
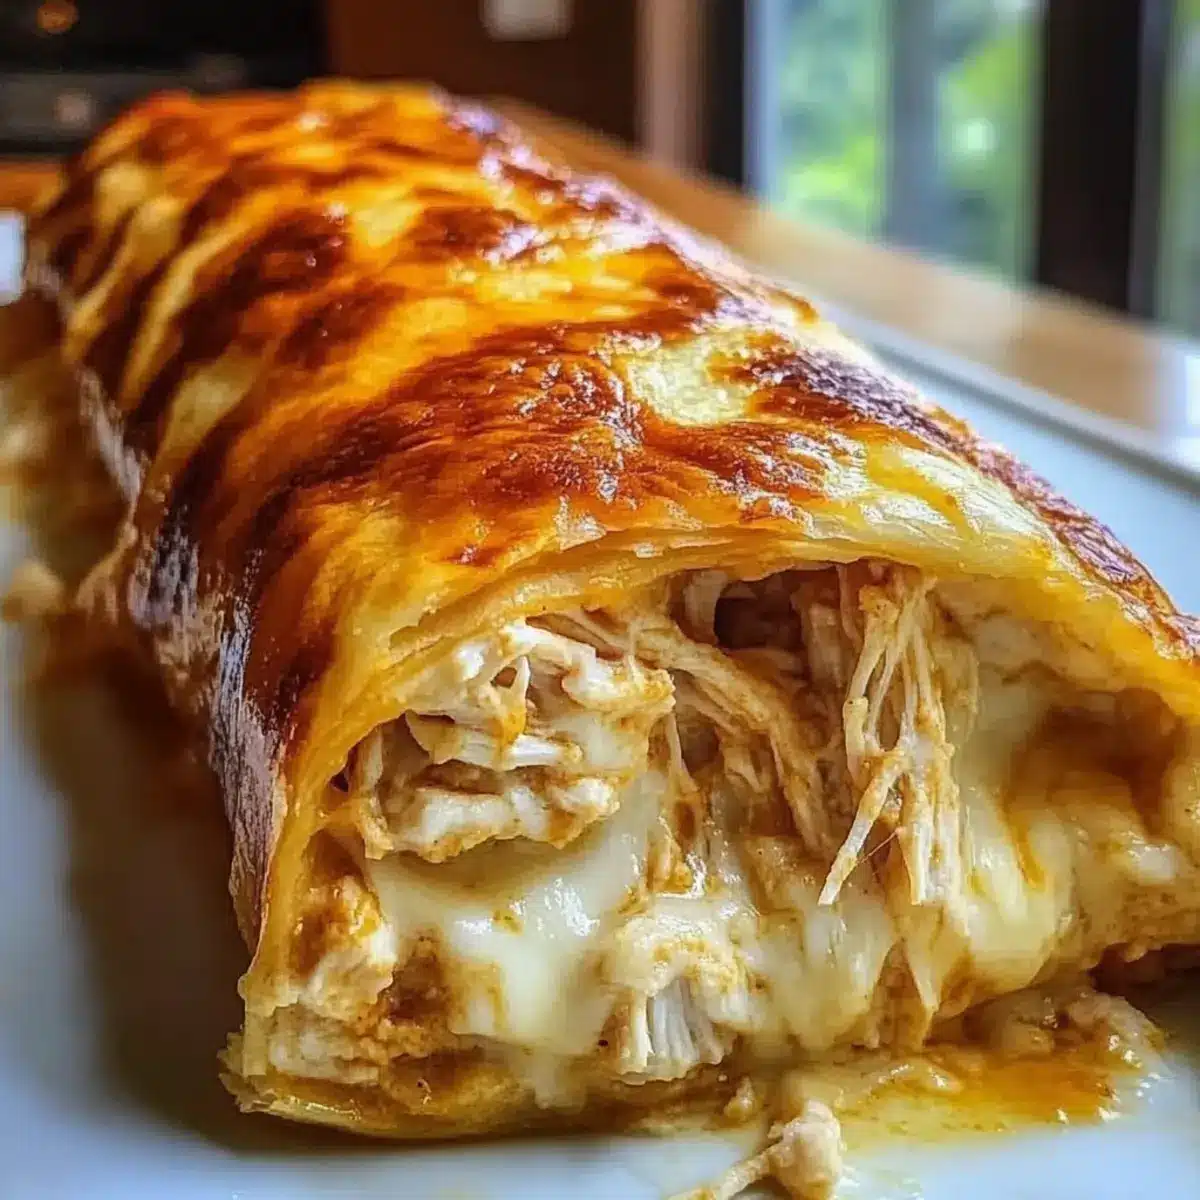
As I pulled my crispy chimichangas from the oven, the golden-brown shells glistening under the kitchen lights, an unexpected wave of nostalgia washed over me. These Ultimate Crispy Baked Chicken and Cheese Chimichangas are more than just a delightful dish; they’re a quick, satisfying solution for busy weeknights when the craving for Tex-Mex hits. With just 35 minutes of prep, you’ll have delectable pockets of flavor that are light on the guilt and heavy on the smiles. Plus, the baking method promises a satisfying crunch without the extra oil of traditional frying. Whether for a cozy dinner or a fun evening gathering, these chimichangas are bound to impress. Are you ready to dive into this mouthwatering twist on classic comfort food?
Why Are These Chimichangas Irresistible?
Flavor Explosion: Each bite delivers a vibrant burst of Tex-Mex goodness, thanks to the savory chicken and rich cheese filling.
Quick and Easy: Ready in just 35 minutes, making them the perfect solution for busy weeknights without sacrificing flavor.
Baked, Not Fried: Enjoy all the crunch of deep-fried chimichangas but with a healthier baked approach—guilt-free indulgence!
Versatile Options: Try a ground beef version or a vegetarian twist with sautéed veggies for a delightful mix that suits every palate.
Crowd-Pleasing Appeal: These chimichangas are ideal for family dinners or entertaining friends, sure to spark joy and compliments at the table.
So, who wouldn’t love to whip up a batch that’s as easy as it is delicious? Pair them with some Oven Baked Sweet potato fries for a complete meal!
Crispy Chimichangas Ingredients
For the Filling
• Olive Oil – Adds moisture and helps sauté vegetables; substitute with any neutral oil for flexibility.
• Yellow Onion – Provides sweetness and flavor; can be replaced with shallots or omitted for a milder taste.
• Garlic – Enhances the overall flavor profile; use garlic powder if fresh isn’t available.
• Cooked, Shredded Chicken Breast – The star protein of the filling; substitute with rotisserie chicken or ground beef for delicious variations.
• Red Enchilada Sauce – Adds richness to the filling; feel free to use homemade or explore other varieties like green sauce.
• Chili Powder – Infuses heat and depth; substitute with taco seasoning for a quicker option.
• Cumin – Provides earthy notes; omit if unavailable but be aware it adds unique flavor.
• Dried Oregano – Offers comforting herby notes; Italian seasoning can work in a pinch.
• Salt and Black Pepper – Essential for seasoning; adjust these to your personal taste.
• Monterey Jack Cheese – Melts perfectly, delivering gooey goodness; cheddar or a blend can be used interchangeably.
For Assembly
• Large Flour Tortillas – The wrapping for your chimichangas; ensure they’re soft and pliable to avoid cracking. Corn tortillas can be a gluten-free option but may alter texture.
• Cooking Spray – For achieving crispiness in the oven; melted butter could be brushed on instead for extra flavor.
Make sure to assemble these crispy chimichangas with care, and prepare to enjoy a delightful Tex-Mex treat that’s perfect for any occasion!
Step‑by‑Step Instructions for Crispy Chimichangas
Step 1: Sauté Aromatics
Heat 2 tablespoons of olive oil in a large skillet over medium heat. Add 1 diced yellow onion, cooking for about 5 minutes until softened and translucent. Stir in 2 minced garlic cloves, sautéing for an additional minute until fragrant. This base will create a delicious flavor for your ultimate crispy chimichangas.
Step 2: Prepare Filling
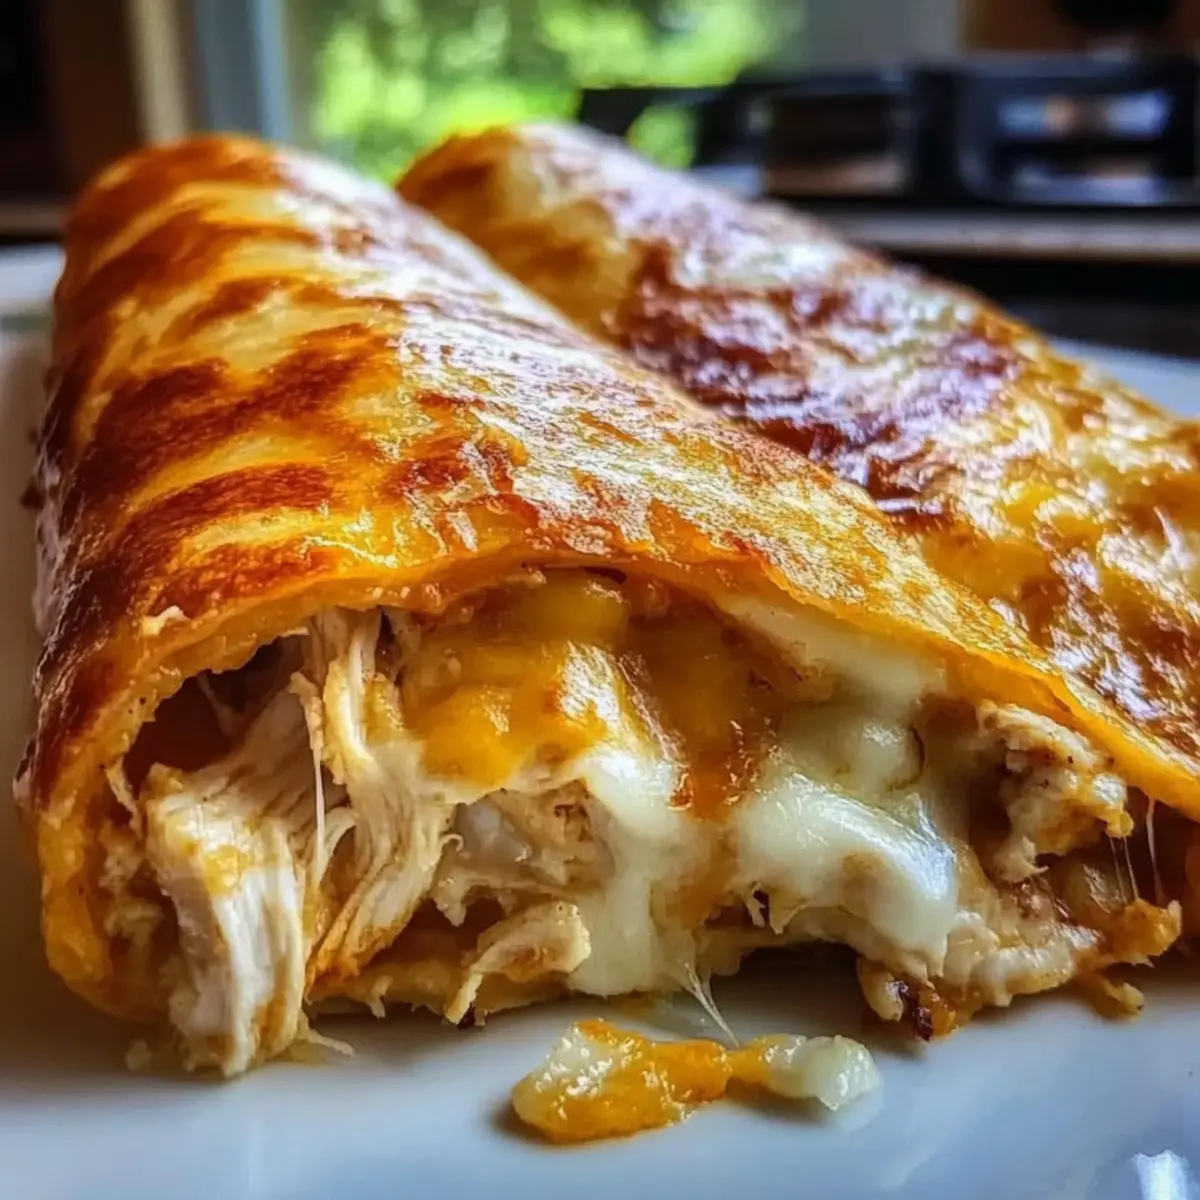
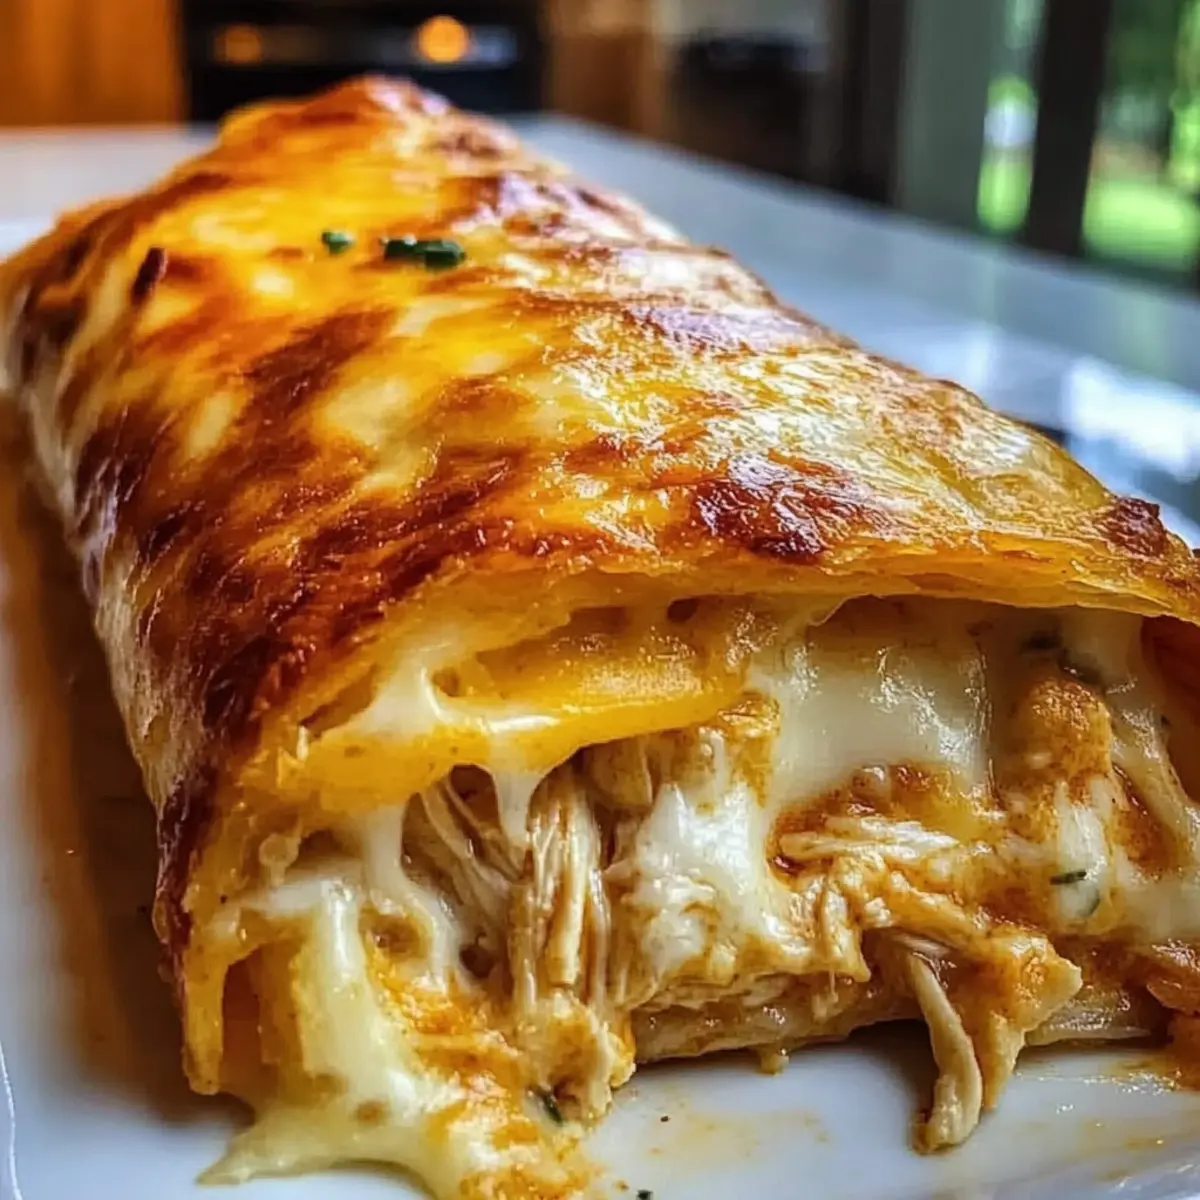
Incorporate 2 cups of cooked, shredded chicken breast into the skillet, followed by 1 cup of red enchilada sauce, 1 tablespoon chili powder, 1 teaspoon cumin, and 1 teaspoon dried oregano. Allow this mixture to simmer for 5-7 minutes, until most of the liquid evaporates. Taste and season with salt and black pepper, then remove from heat and stir in 1 cup of shredded Monterey Jack cheese until melted.
Step 3: Prep Tortillas
To ensure the tortillas are pliable for rolling, wrap them in a damp paper towel and microwave for about 30 seconds. This step is crucial for assembling your crispy chimichangas without tearing the tortillas. Keep them covered while you assemble the filling.
Step 4: Assemble Chimichangas
Lay one tortilla flat on a clean surface, placing roughly ½ cup of the warm chicken filling on the lower third. Fold the sides inward and carefully roll it up tightly to secure the filling. If needed, use a toothpick to keep the chimichanga closed. Repeat this for all tortillas with the remaining filling.
Step 5: Bake
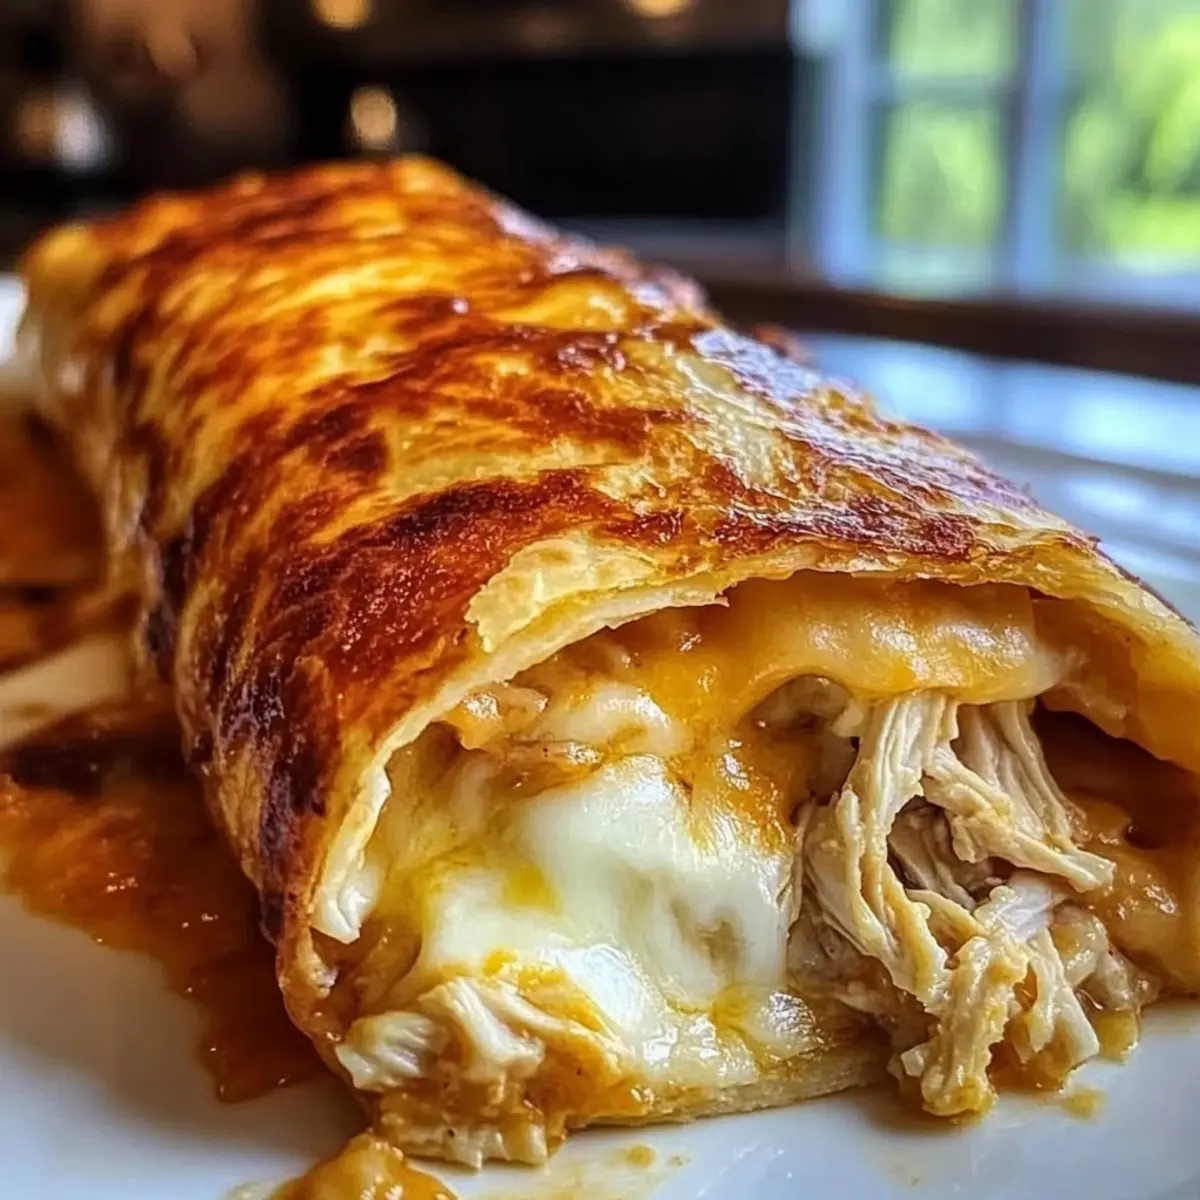
Preheat your oven to 400°F (200°C) while lining a baking sheet with cooking spray. Place the assembled chimichangas seam-side down on the sheet and give the tops a generous spray of cooking spray to promote crispiness. Bake for 15-20 minutes, flipping halfway through, until the chimichangas are golden brown and crispy.
Step 6: Serve
Remove the chimichangas from the oven and take out any toothpicks. Serve them hot with your favorite toppings, such as salsa, sour cream, or guacamole. These ultimate crispy chimichangas are sure to be a hit for any quick weeknight dinner or gathering!
Expert Tips for Crispy Chimichangas
-
Warm Tortillas First: Keep your tortillas warm before assembly to ensure they stay pliable and don’t crack or tear when rolling.
-
Don’t Overfill: Avoid overstuffing your chimichangas; too much filling can make rolling difficult and cause seams to burst during baking.
-
Crispy Finish: For that ultimate golden crunch, generously spray or brush the tops with cooking spray before baking; don’t skimp here!
-
Flip for Even Cooking: Flip the chimichangas halfway through baking; this helps achieve even crispiness on all sides for delightful crispy chimichangas.
-
Best Reheating Method: Skip the microwave for leftovers; instead, reheat in an air fryer or oven to maintain the crisp texture.
-
Flavor Variations: Experiment with spices in the filling! Adding cumin or smoked paprika can elevate the flavor profile beautifully.
Make Ahead Options
These Ultimate Crispy Baked Chicken and Cheese Chimichangas are perfect for busy weeknights and meal prep enthusiasts! You can prepare the filling up to 3 days in advance, just store it in an airtight container in the refrigerator to maintain its freshness. Additionally, you can assemble the chimichangas without baking them and refrigerate them for up to 24 hours; just cover them tightly to prevent drying out. When you’re ready to serve, simply preheat your oven and bake them for 15-20 minutes as directed. By prepping ahead, you’ll save time and still enjoy that satisfying crunch and delicious flavor any night of the week!
How to Store and Freeze Crispy Chimichangas
-
Fridge: Keep leftover crispy chimichangas in an airtight container for up to 4 days. This helps maintain their delightful flavor while preserving freshness.
-
Freezer: Unbaked chimichangas can be frozen for up to 3 months. Arrange them in a single layer to freeze, then transfer to a freezer bag for easy storage.
-
Reheating: For best results, reheat in an air fryer at 350°F for 5-7 minutes or in a preheated oven at 375°F for about 10 minutes to revive their crispy texture.
-
Baked Chimichangas: If you’ve already baked them, enjoy them within 3 days, reheating in the oven for a satisfying crunch on the outside.
Crispy Chimichangas Variations & Substitutions
Feel free to make these chimichangas your own with these delightful twists and swaps that will elevate the flavor!
-
Ground Beef Chimichangas: Swap the chicken for 1 pound of browned ground beef, draining excess fat before mixing in the other ingredients.
-
Vegetarian Option: Replace the chicken with a colorful medley of sautéed vegetables like bell peppers and zucchini. Add black beans for protein and extra heartiness.
-
Spicy Kick: Incorporate jalapeños or diced green chilies into the filling for a flavorful heat that beautifully complements the other ingredients. Your taste buds will thank you!
-
Cheesy Bliss: Experiment with different cheeses such as pepper jack for a zesty twist or try blending in some cream cheese for an extra creamy texture.
-
Herb Infusion: Try adding fresh cilantro or chopped green onions to the filling before rolling for an aromatic burst of flavor.
-
Freezer Meal Prep: Assemble the chimichangas but freeze them unbaked. When ready to enjoy, bake straight from the freezer and add extra time to ensure they’re heated through.
-
Oven Baked Crunch: Brush the tops with melted butter instead of cooking spray for a richer flavor and a stunning golden color.
For side dishes, pair these crispy chimichangas with some seasoned Cottage Cheese Chips for a satisfying crunch or make a zesty dip with your favorite salsa to keep those flavors popping!
What to Serve with Ultimate Crispy Baked Chicken and Cheese Chimichangas
Elevate your meal experience with delightful sides that enhance the rich flavors of these scrumptious chimichangas.
-
Cilantro Lime Rice: This fluffy side dish mirrors the bright notes of the chimichangas while adding a refreshing element to the plate. The zesty lime cuts through the richness, creating a balanced bite.
-
Pico de Gallo: Fresh, chunky, and vibrant, this classic salsa provides a burst of flavor and texture that complements the filling perfectly. The juiciness of the tomatoes and the crispness of onions add a delightful crunch.
-
Creamy Avocado Dip: A soothing avocado dip brings together smoothness and creaminess, pairing well with the crunchy chimichangas. It’s a perfect addition for those seeking a cooling contrast in every bite.
-
Spicy Black Bean Salad: Packed with protein and fiber, this zesty salad introduces a contrasting texture and a kick of spice that elevates the meal experience. With every scoop, you’ll enjoy a layer of vibrant flavors.
-
Corn on the Cob: Grilled or boiled, sweet corn on the cob is a seasonal delight that pairs excellently with Tex-Mex dishes. The kernels add a juicy crunch that complements the chimichangas beautifully.
-
Margaritas or Fresh Limeade: To wash everything down, consider sipping on a refreshing margarita or homemade limeade. The zesty, citrusy flavor pairs fantastically with the chimichangas while enhancing that fiesta atmosphere.
Let these side options bring boldness and vibrancy to your table!
Ultimate Crispy Baked Chicken and Cheese Chimichangas Recipe FAQs
What type of tortillas should I use for the chimichangas?
I recommend using large flour tortillas, as they are soft and pliable, making them perfect for rolling. If you’re looking for a gluten-free option, corn tortillas can work, but be aware that they may alter the texture slightly.
How long can I store leftover chimichangas in the fridge?
Leftover crispy chimichangas can be stored in an airtight container in the fridge for up to 4 days. This will help maintain their delicious flavor and freshness, ensuring you can enjoy them even after the first serving!
Can I freeze unbaked chimichangas?
Absolutely! You can freeze unbaked chimichangas for up to 3 months. Assemble them as directed, then arrange in a single layer on a baking sheet to freeze. Once frozen, transfer to a freezer bag for easy storage. Bake from frozen, adding a few extra minutes to the cooking time.
What’s the best way to reheat leftover baked chimichangas?
To maintain their crispy texture, avoid using the microwave. Instead, reheat in an air fryer at 350°F for about 5-7 minutes, or place them in a preheated oven at 375°F for around 10 minutes. This will ensure your chimichangas come out hot and crispy again!
Can I use a different protein or make this vegetarian?
Yes, you can easily adapt the filling! For a ground beef variation, substitute the chicken with 1 pound of browned ground beef, draining any excess fat. If you’re going for a vegetarian option, try using sautéed vegetables like bell peppers and zucchini, along with black beans for additional protein.
How can I tell if my tortillas are the right texture?
To ensure your tortillas are pliable and won’t crack during assembly, warm them in the microwave wrapped in a damp paper towel for about 30 seconds. They should be soft and easy to roll without tearing, which is key to achieving those perfect crispy chimichangas!
Crispy Chimichangas Packed with Flavor for Quick Dinners
Ingredients
Equipment
Method
- Heat 2 tablespoons of olive oil in a large skillet over medium heat. Add 1 diced yellow onion, cooking for about 5 minutes until softened and translucent. Stir in 2 minced garlic cloves, sautéing for an additional minute until fragrant.
- Incorporate 2 cups of cooked, shredded chicken breast into the skillet, followed by 1 cup of red enchilada sauce, 1 tablespoon chili powder, 1 teaspoon cumin, and 1 teaspoon dried oregano. Allow this mixture to simmer for 5-7 minutes, until most of the liquid evaporates. Taste and season with salt and black pepper, then remove from heat and stir in 1 cup of shredded Monterey Jack cheese until melted.
- To ensure the tortillas are pliable for rolling, wrap them in a damp paper towel and microwave for about 30 seconds.
- Lay one tortilla flat on a clean surface, placing roughly ½ cup of the warm chicken filling on the lower third. Fold the sides inward and carefully roll it up tightly to secure the filling.
- Preheat your oven to 400°F (200°C) while lining a baking sheet with cooking spray. Place the assembled chimichangas seam-side down on the sheet and spray the tops with cooking spray. Bake for 15-20 minutes, flipping halfway through, until golden brown and crispy.
- Remove the chimichangas from the oven and take out any toothpicks. Serve hot with toppings like salsa, sour cream, or guacamole.
Leave a Reply