
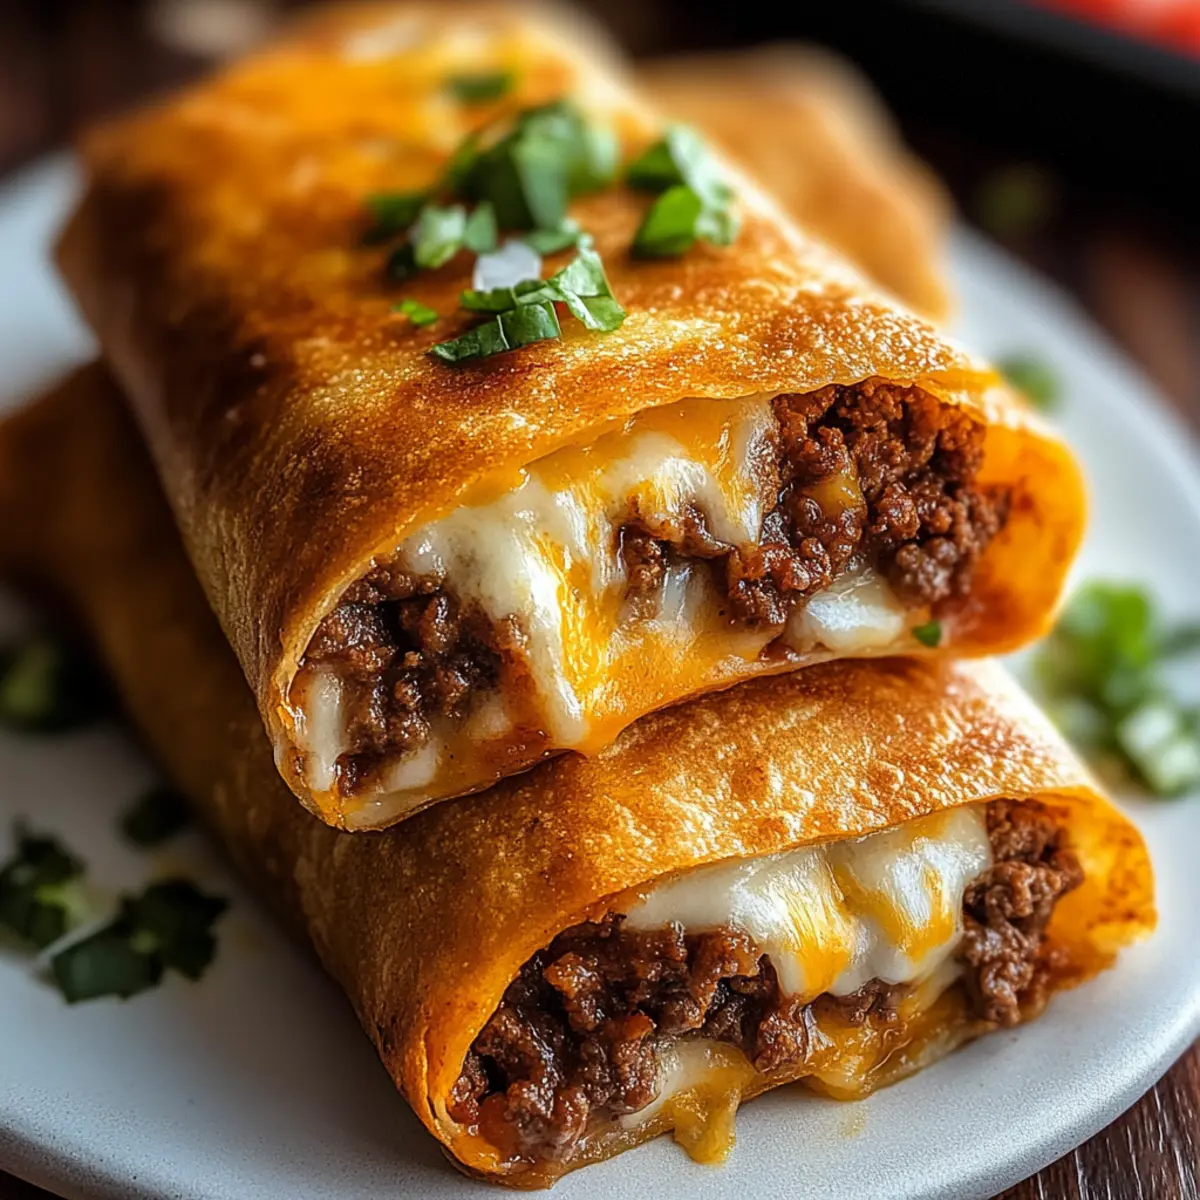
As I sat down for dinner the other night, a culinary spark ignited when I unveiled a plate of crispy Beef and Cheese Chimichangas. This dish is like a warm hug from the inside out—perfectly golden tortillas wrapped around seasoned ground beef and gooey cheese, just waiting to tantalize my taste buds. Not only are these chimichangas quick to whip up, making them ideal for those busy weeknight meals, but they’re also fully customizable, so the whole family can enjoy their own unique spin! Whether you’re a fan of beans, a spice enthusiast, or just love good old-fashioned comfort food, I can’t wait to share how to create your own delicious batch. Are you ready to dive into some Tex-Mex magic?
Why Are These Chimichangas Unforgettable?
Quick to Prepare: These Beef and Cheese Chimichangas come together in no time—perfect for busy weeknights.
Customizable Delight: Adjust the filling based on personal taste; add beans for creaminess or swap proteins for variety.
Crowd-Pleaser: Family-friendly and delightful, this dish appeals to all ages—great for gatherings or cozy family dinners!
Crispy Texture: Whether baked or fried, each chimichanga boasts a wonderfully crunchy exterior that contrasts beautifully with the melty interior.
Freezer-Friendly: Make a batch ahead of time and freeze for easy meals—just pop them in the oven or fryer, and you’re set!
Elevate your meal experience by serving them with a side of guacamole or sour cream, or perhaps try pairing them with a scrumptious Garlic Butter Beef for a satisfying dinner!
Beef and Cheese Chimichangas Ingredients
For the Filling
• Ground Beef – The main protein; use lean ground beef to keep it healthier.
• Onion – Finely diced to meld with the beef, it adds a savory depth of flavor.
• Garlic – Minced for a rich aroma that enhances the overall taste.
• Taco Seasoning – Essential for that Tex-Mex kick; homemade or store-bought works perfectly!
• Salsa – Keeps the filling moist and packed with flavor; substitute with tomato sauce if in a pinch.
• Refried Beans – Optional, but they add creaminess and extra texture; feel free to skip for a meatier bite.
• Shredded Cheese – Perfect for melty goodness; choose from cheddar, Monterey Jack, or a Mexican blend.
For Assembling
• Flour Tortillas – Large (10-inch) tortillas help prevent tearing; warm them slightly for easier rolling.
• Vegetable Oil – For frying to a golden crisp or brushing on for baking; neutral flavor enhances the deliciousness.
Get ready to enjoy this flavorful Beef and Cheese Chimichangas recipe that will bring smiles to your dining table!
Step‑by‑Step Instructions for Beef and Cheese Chimichangas Recipe
Step 1: Prepare the Filling
In a large skillet, heat over medium heat and add the ground beef and finely diced onion. Cook for about 5-7 minutes or until the beef is browned and the onion is translucent. Drain any excess grease, then stir in the minced garlic, taco seasoning, and salsa. Let it simmer for 2-3 minutes until the mixture thickens and is fragrant.
Step 2: Assemble the Chimichangas
Take a warm, 10-inch flour tortilla and lay it flat on a clean surface. Spoon a layer of refried beans onto the center, followed by a generous portion of the beef mixture and a sprinkle of shredded cheese. Fold the sides of the tortilla in and then roll it up tightly from the bottom, ensuring the filling is secure. Repeat this with the remaining tortillas.
Step 3: Cook the Chimichangas (Fried)
In another skillet, heat vegetable oil to 350°F (175°C) over medium-high heat. Carefully place the chimichangas seam-side down in the hot oil, frying in batches to avoid overcrowding. Fry for 2-3 minutes or until they are golden brown and crispy, then flip them and fry for another 2-3 minutes on the other side, making sure they are evenly cooked.
Step 4: Cook the Chimichangas (Baked)
For a healthier option, preheat your oven to 400°F (200°C). Place the assembled chimichangas seam-side down on a greased baking tray, spacing them apart to prevent sticking. Brush the tops lightly with vegetable oil for a crispy finish. Bake for 20-25 minutes or until golden brown and crispy, flipping them halfway through for even cooking.
Step 5: Serve the Chimichangas
Once cooked, remove the chimichangas from the skillet or oven and let them cool for a minute. Serve them hot, accompanied by your favorite toppings such as sour cream, guacamole, pico de gallo, or fresh lettuce. This Beef and Cheese Chimichangas recipe is not only a delightful treat but also a customizable crowd-pleaser!
Make Ahead Options
These Beef and Cheese Chimichangas are a fantastic option for meal prep, making them perfect for busy weeknights! You can assemble the chimichangas up to 24 hours in advance; simply wrap them tightly in plastic wrap and store them in the refrigerator to keep them fresh. If you want to go the extra mile, they can be frozen for up to 2 months — just be sure to place them in a freezer-safe container. When you’re ready to enjoy, bake from frozen at 400°F (200°C) for 25-30 minutes, or fry until golden and crispy, ensuring they’re just as delicious as the day they were made. By prepping ahead, you save precious time without sacrificing flavor!
What to Serve with Beef and Cheese Chimichangas
Enhance your dining experience with delightful sides and treats that beautifully complement these crispy, savory bites.
-
Savory Mexican Rice: A warm bed of flavorsome Mexican rice balances the richness of chimichangas, adding a comfortable, fulfilling base to your meal.
-
Fresh Guacamole: Smooth, buttery guacamole provides a refreshing touch. Its creamy texture perfectly contrasts the crispy chimichangas, making each bite more irresistible.
-
Zesty Corn Salsa: This bright, tangy salsa elevates the meal, adding a wonderful burst of flavor and a hint of sweetness that pairs beautifully with the richness of beef.
-
Crisp Green Salad: A light salad with mixed greens and a citrus vinaigrette offers a crunchy, refreshing side, cutting through the richness of the chimichangas for a balanced plate.
-
Sour Cream or Greek Yogurt: Cooling and creamy, a dollop of sour cream or Greek yogurt enhances every bite, adding a tangy richness that works wonderfully with the Tex-Mex flavors.
-
Chilled Margarita: Enjoy a refreshing margarita with lime notes that complement the dish’s spices nicely, enhancing the entire dining experience with a festive touch.
-
Churros for Dessert: End your meal on a sweet note with churros. Their crispy exterior and soft center, dusted with cinnamon-sugar, provide a delightful finish to your Tex-Mex feast.
Beef and Cheese Chimichangas Variations
Feel free to personalize this recipe to fit your taste buds and dietary preferences!
- Bean & Beef Chimichangas: Add refried beans to the filling for a creamy texture that complements the beef. They’ll be especially satisfying!
- Spicy Variants: For a kick, mix in diced jalapeños or opt for pepper jack cheese. The heat will elevate your chimichangas!
- Breakfast Option: Swap out the ground beef for scrambled eggs and crispy bacon. Enjoy a delicious breakfast twist that’s fulfilling and flavorful.
- Vegetarian Version: Replace meat with sautéed vegetables and black beans for a hearty and healthy alternative that doesn’t skimp on taste.
- Sauced Version: Drizzle chimichangas with queso dip or enchilada sauce for a comforting “smothered” dish that adds an extra layer of richness.
- Chicken Chimichangas: Use shredded chicken instead of beef to change up the protein while still keeping that classic chimichanga vibe. This option is delicious in flavor and texture!
- Pork Variation: Swap ground beef for ground pork seasoned with chipotle for a smoky and delightful taste that adds a new twist to each bite.
- Herb-Infused: Add fresh cilantro or chopped green onions to the filling for an additional splash of flavor that brightens up the dish!
For a complete meal, consider serving your chimichangas alongside some fresh guacamole or a delicious Cream Cheese Hashbrown for a satisfying experience!
Expert Tips for Beef and Cheese Chimichangas
• Warm Tortillas: Ensure tortillas are warm before assembly; cold tortillas can crack, making rolling difficult.
• Don’t Overfill: Avoid overfilling your chimichangas to prevent bursting during cooking. Stick to a couple of tablespoons of filling.
• Crispy Finish: For the best crunch, fry in batches without overcrowding the skillet; otherwise, they will steam instead of crisp.
• Secure Seams: If you’re worried about them unrolling, use toothpicks to secure the seams after wrapping before cooking.
• Freezer-Friendly: Assemble and freeze uncooked chimichangas; when ready to eat, cook from frozen, adding a few extra minutes.
These expert tips will ensure your Beef and Cheese Chimichangas come out perfectly every time!
How to Store and Freeze Beef and Cheese Chimichangas
Fridge: Store leftover chimichangas in an airtight container for up to 3 days. Reheat in the oven at 350°F (175°C) until warmed through for the best texture.
Freezer: For longer storage, freeze assembled but uncooked chimichangas in a single layer on a baking sheet. Once frozen, transfer them to an airtight freezer bag for up to 2 months.
Reheating: Cook frozen chimichangas straight from the freezer, adding an extra 5-10 minutes to frying or baking times to ensure they are heated through.
Make Ahead: You can also prepare the filling in advance and store it in the fridge for up to 2 days, making assembly quick and easy for busy weeknight dinners with this Beef and Cheese Chimichangas recipe.
Beef and Cheese Chimichangas Recipe FAQs
What kind of ground beef should I use?
Absolutely! For the best flavor and texture, I recommend using lean ground beef, as it reduces excess grease and keeps your chimichangas light and satisfying. Just make sure to drain off any excess grease after cooking.
How do I store leftover chimichangas?
Very simply! Place any leftover chimichangas in an airtight container and store them in the refrigerator for up to 3 days. When you’re ready to enjoy them, reheat in the oven at 350°F (175°C) for the best, crispy texture.
Can I freeze chimichangas?
Definitely! To freeze, assemble the uncooked chimichangas and place them on a baking sheet in a single layer until solid. Then, transfer them into an airtight freezer bag. They can be frozen for up to 2 months. When ready to cook, just fry or bake them straight from frozen, adding about 5-10 extra minutes to the cooking time.
What should I do if my chimichangas are bursting during cooking?
If you encounter this, don’t worry! It can happen if they’re overfilled or if the tortillas are too cold. Be sure not to exceed a couple of tablespoons of filling, and warm your tortillas slightly before rolling them up to keep them pliable.
Are chimichangas safe for my kids?
Absolutely! These Beef and Cheese Chimichangas are kid-friendly and customizable. Just adjust the spice level in your seasonings, and offer toppings like sour cream or guacamole that they can add to their liking.
Can I use different proteins or dietary substitutes?
The more the merrier! Feel free to substitute ground beef for chicken, pork, or even a vegetarian option like black beans or sautéed vegetables. Just make sure to adjust cooking times accordingly to ensure everything is cooked through.
Beef and Cheese Chimichangas Recipe for Ultimate Comfort Food
Ingredients
Equipment
Method
- In a large skillet, heat over medium heat and add the ground beef and finely diced onion. Cook for about 5-7 minutes or until the beef is browned and the onion is translucent. Drain any excess grease, then stir in the minced garlic, taco seasoning, and salsa. Let it simmer for 2-3 minutes until the mixture thickens and is fragrant.
- Take a warm, 10-inch flour tortilla and lay it flat on a clean surface. Spoon a layer of refried beans onto the center, followed by a generous portion of the beef mixture and a sprinkle of shredded cheese. Fold the sides of the tortilla in and then roll it up tightly from the bottom, ensuring the filling is secure. Repeat this with the remaining tortillas.
- In another skillet, heat vegetable oil to 350°F (175°C) over medium-high heat. Carefully place the chimichangas seam-side down in the hot oil, frying in batches to avoid overcrowding. Fry for 2-3 minutes or until they are golden brown and crispy, then flip them and fry for another 2-3 minutes on the other side.
- For a healthier option, preheat your oven to 400°F (200°C). Place the assembled chimichangas seam-side down on a greased baking tray. Brush the tops lightly with vegetable oil for a crispy finish. Bake for 20-25 minutes or until golden brown and crispy, flipping them halfway through.
- Once cooked, let the chimichangas cool for a minute. Serve hot with toppings like sour cream, guacamole, pico de gallo, or fresh lettuce.
Leave a Reply