
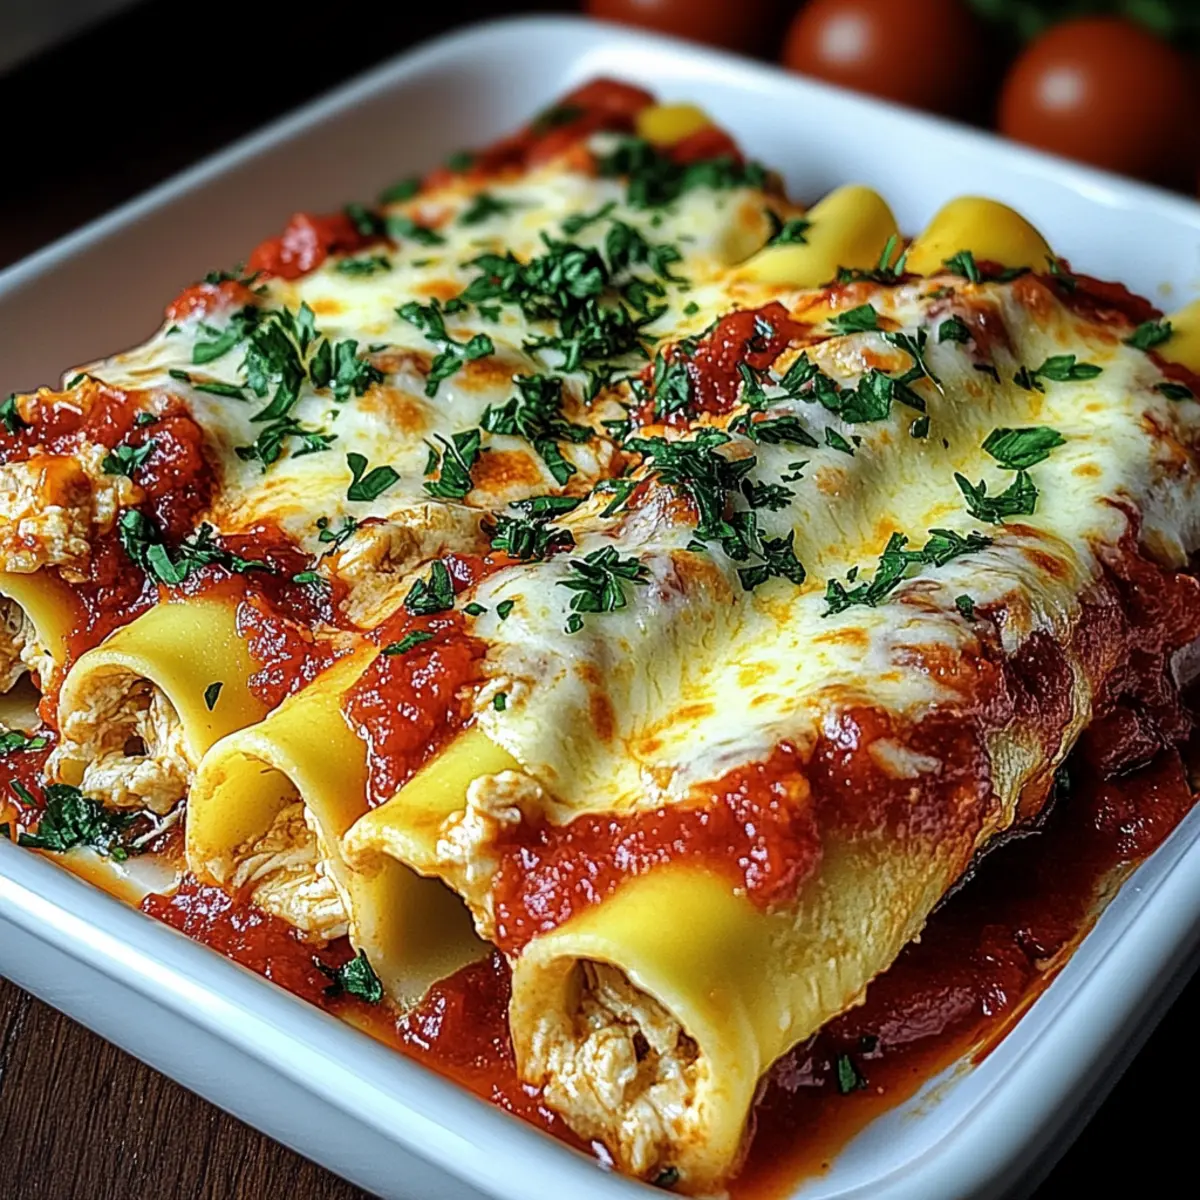
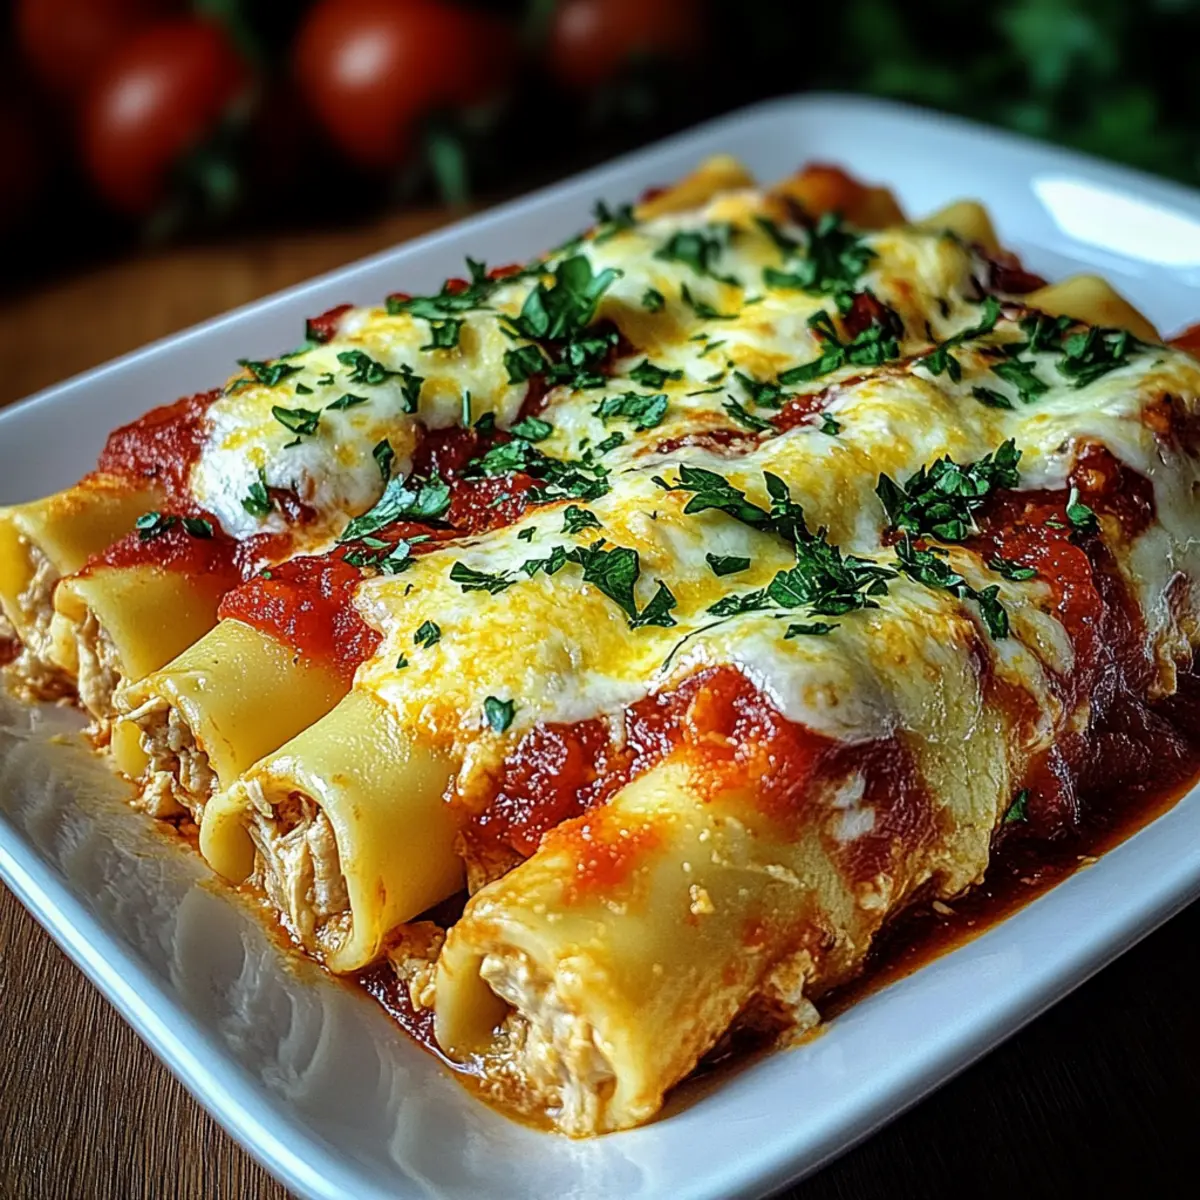
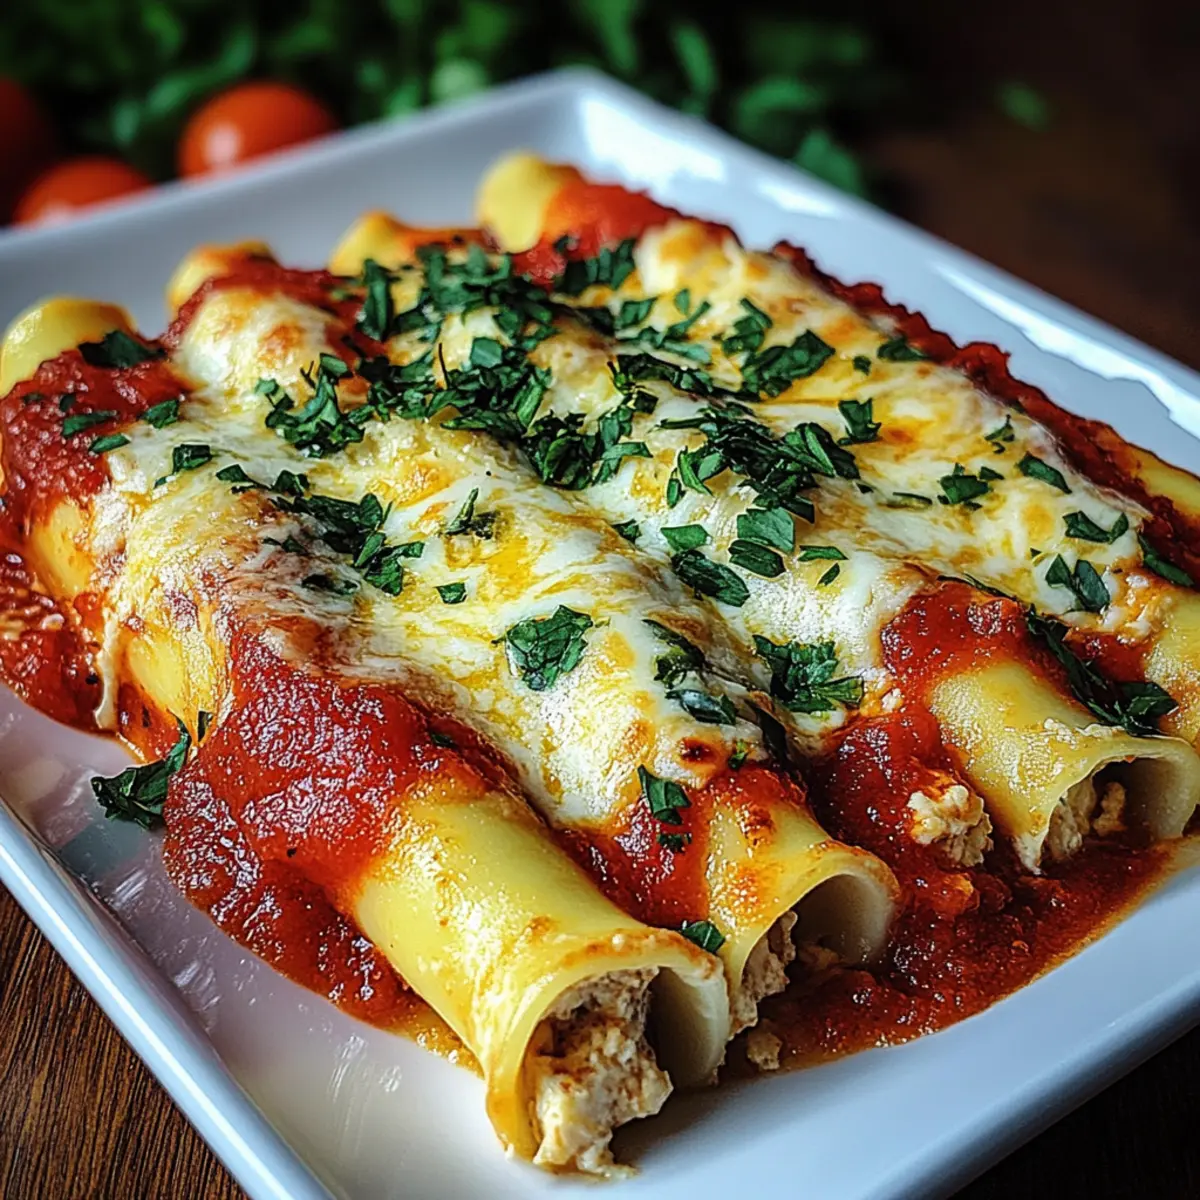
“Did you hear that? It’s the sound of comfort food calling your name!” Nothing embodies the warmth of a home-cooked meal quite like Cheesy Chicken Manicotti. This creamy, cheesy dish wraps tender pasta tubes around a delightful filling of shredded chicken and ricotta, making it irresistible for your next family dinner. With simple ingredients and straightforward preparation, you can whip this up on busy weeknights or save it for a cozy weekend gathering. Plus, it’s freezer-friendly, which means you can save some for later (if there’s any left!). Whether you’re cooking for yourself or the whole family, this Cheesy Chicken Manicotti promises a satisfying experience that will leave you craving more. Ready to make a meal that feels like a warm hug? Let’s dive in!
Why is Cheesy Chicken Manicotti a must-try?
Delectable Layers: This dish showcases layers of flavor with creamy ricotta and savory chicken wrapped in tender pasta. Each bite is a delightful explosion, sure to impress everyone at the table.
Simple Preparation: With a few easy steps, dinner is ready in no time! Perfect for busy weeknights or unexpected guests, the recipe is incredibly forgiving and adaptable.
Crowd Favorite: Kids and adults alike will adore this creamy classic. It’s a meal that brings the family together, evoking smiles and satisfaction.
Versatile Options: Want to switch it up? This Cheesy Chicken Manicotti can easily transform into a vegetarian delight by swapping in your favorite veggies, like spinach and mushrooms!
Make-Ahead Magic: Prepare this dish ahead of time and freeze it! When you’re ready to indulge, pop it in the oven and enjoy a comforting meal that warms both body and soul.
Whether you’re a novice cook or a seasoned chef, this Cheesy Chicken Manicotti will become a cherished staple in your kitchen. For other comforting recipes, check out Cheesy Chicken Broccoli or Garlic Chicken Fried Rice.
Cheesy Chicken Manicotti Ingredients
For the Manicotti
- Manicotti Pasta Shells – Ensure to boil until al dente to maintain structure and prevent mushiness.
For the Filling
- Shredded Cooked Chicken – Provides the main protein; leftover turkey or cooked beef can be great substitutes.
- Ricotta Cheese – Adds creaminess and binds the filling; cottage cheese works for a different texture.
- Mozzarella Cheese – For that gooey, melty topping; fresh mozzarella is ideal for stretchiness.
- Parmesan Cheese – Lends flavor depth; you can use grated or shredded varieties.
For Flavoring
- Marinara Sauce – Rich tomato flavor envelops the manicotti; opt for homemade or your favorite store-bought.
- Olive Oil – Adds flavor and helps in cooking; vegetable oil can be used if needed.
- Garlic (minced) – Enhances the dish’s flavor profile; fresh garlic is best, but garlic powder is a fine substitute.
- Dried Italian Seasoning – Brings a blend of herbs to the filling; if you don’t have it, oregano and basil can work in a pinch.
- Black Pepper (freshly ground) – Provides warmth; white pepper is a lighter option.
- Salt – Essential for enhancing flavors; make sure to use it liberally in pasta water.
For Garnish
- Fresh Parsley (chopped) – A lovely touch for color and freshness; completely optional but highly recommended.
With these simple yet essential ingredients, you’ll be on your way to crafting the most delightful Cheesy Chicken Manicotti that your family will adore!
Step‑by‑Step Instructions for Cheesy Chicken Manicotti
Step 1: Preheat Your Oven
Begin by preheating your oven to 350°F (175°C). This ensures that your Cheesy Chicken Manicotti bakes evenly and thoroughly, enhancing the irresistible gooey texture of the cheese. While the oven warms up, prepare your baking dish by greasing it lightly with olive oil or cooking spray to prevent sticking.
Step 2: Boil the Manicotti Shells
In a large pot, bring salted water to a rolling boil. Carefully add the manicotti pasta shells and cook for 7-8 minutes until they are al dente—firm but tender. Drain the shells in a colander and let them cool slightly, ensuring they don’t stick together. This critical step helps maintain their shape when stuffed.
Step 3: Prepare the Filling
In a spacious mixing bowl, combine shredded cooked chicken, ricotta cheese, ½ cup of mozzarella, grated Parmesan, minced garlic, Italian seasoning, salt, and freshly ground black pepper. Stir until all ingredients are well-blended and creamy. This flavorful filling is what will make your Cheesy Chicken Manicotti shine, so be sure to mix thoroughly!
Step 4: Stuff the Manicotti
Using a spoon or a piping bag, carefully fill each manicotti shell with the chicken mixture, being cautious not to overstuff. As you pack the filling inside, ensure it’s snug but not bursting. This step requires a bit of patience, but the end result will be worth every moment of effort!
Step 5: Assemble in the Baking Dish
Spread a layer of marinara sauce on the bottom of your greased 9×13-inch baking dish to prevent sticking and add flavor. Place the stuffed manicotti shells side by side in the dish, making sure they fit snugly together. This base layer of sauce will keep your dish moist during baking.
Step 6: Add More Sauce and Cheese
Once your manicotti are arranged, pour the remaining marinara sauce generously over the top. Sprinkle the reserved mozzarella cheese across the sauce, ensuring even coverage. This extra layer of cheese will melt beautifully as the dish bakes, creating that signature cheesy topping you’re looking for in your Cheesy Chicken Manicotti.
Step 7: Bake to Perfection
Cover the baking dish tightly with aluminum foil and place it in the preheated oven. Bake for 30 minutes to allow the flavors to meld and the cheeses to start melting. After this, remove the foil and continue baking for an additional 10 minutes, or until the top is bubbly and golden brown.
Step 8: Let It Rest and Serve
Once baked, remove the Cheesy Chicken Manicotti from the oven and let it rest for about 5-10 minutes. This resting time allows the dish to settle, making it easier to serve. Garnish with freshly chopped parsley for a pop of color, and enjoy the comforting warmth of this delicious meal!
Make Ahead Options
These Cheesy Chicken Manicotti are perfect for busy home cooks looking to save time! You can prepare the entire dish up to 24 hours in advance by assembling the stuffed manicotti and covering it with marinara sauce and cheese, then refrigerating it until you’re ready to bake. If you’d like to keep it longer, you can freeze the unbaked manicotti for up to 3 months—just be sure to wrap it tightly to prevent freezer burn. When you’re ready to serve, simply bake straight from the fridge at 350°F (175°C) for 30 minutes, then uncover and bake for an additional 10 minutes until bubbly. This way, you’ll have a cozy and comforting meal that tastes just as delicious as when made fresh!
What to Serve with Cheesy Chicken Manicotti
Indulging in creamy, comforting Cheesy Chicken Manicotti invites a delightful meal experience that begs for perfect pairings.
- Garlic Bread: This classic side is perfect for soaking up extra marinara sauce, enhancing that cozy Italian feel.
- Caesar Salad: Crisp romaine with creamy dressing adds freshness and crunch, balancing the richness of the manicotti.
- Roasted Vegetables: Roasting veggies brings out their natural sweetness and offers a textured counterpart to the cheesy pasta.
- Steamed Broccoli: Lightly seasoned, this nutritious side adds color and nutrition while complementing the dish’s creamy elements.
- Italian Wine: A glass of Chianti or a Pinot Grigio elevates the experience, enhancing the tomato and cheese flavors beautifully.
- Tiramisu: Finish your meal with this classic Italian dessert; its light and coffee-infused flavor contrasts perfectly with the decadent main.
Each pairing brings a unique element to your table, creating a well-rounded meal that’ll leave your guests reaching for seconds.
Variations & Substitutions for Cheesy Chicken Manicotti
Feel free to get creative with your Cheesy Chicken Manicotti to suit your taste and dietary preferences—there’s so much you can do!
-
Vegetarian Delight: Replace the chicken with sautéed spinach and mushrooms for a hearty veggie option. The earthy flavors bring a unique twist to this classic dish.
-
Cheese Variations: Try using a blend of cheeses like gouda or provolone along with mozzarella for an elevated flavor profile. The combination can create a luxurious and creamy filling.
-
Alternative Pasta: Use shells or cannelloni if manicotti shells aren’t available. These pasta shapes also hold fillings beautifully and offer a fun texture.
-
Add Heat: Spice things up by adding red pepper flakes to the chicken filling or drizzling hot sauce on top before serving. It’s an exciting way to kick up the flavor!
-
Gluten-Free Option: Substitute the manicotti shells with gluten-free pasta to make this dish suitable for gluten-sensitive eaters. It’s just as satisfying!
-
Creamy Spin: Swap ricotta for a blend of cream cheese and Greek yogurt for a rich, tangy filling. This adds a delightful twist to the classic cheese mixture.
-
Summary Variation: Enjoy a mix of chicken and vegetables by adding diced bell peppers, zucchini, or carrots to the filling. This not only boosts nutrition but also adds color and texture to each bite.
Feel free to experiment with these variations—making your Cheesy Chicken Manicotti truly your own. And if you’re looking for more comforting recipes, try Crockpot Buffalo Chicken or indulge in Grilled Chicken Broccoli. Let your culinary creativity shine!
Expert Tips for Cheesy Chicken Manicotti
-
Perfect Pasta: Boil manicotti shells only until al dente; overcooking can lead to a mushy texture that may crack during stuffing.
-
Flavorful Filling: Don’t skimp on seasoning! Generously season the chicken mixture and taste it before stuffing to ensure delicious flavor in your Cheesy Chicken Manicotti.
-
Mess-Free Stuffing: Use a piping bag to fill the manicotti shells. This makes the process cleaner and quicker, saving you from a messy kitchen!
-
Covering Up: Bake covered for the first 30 minutes to keep the cheese moist, then uncover to achieve that golden, bubbly top you crave.
-
Freezer Friendly: Prepare a double batch and freeze one for later! Just assemble, cover tightly, and pop it in the freezer before baking for quick dinners.
How to Store and Freeze Cheesy Chicken Manicotti
Fridge: Store leftovers in an airtight container for up to 3 days. Reheat in the microwave or oven until heated through, adding a splash of marinara sauce to keep it moist.
Freezer: For longer storage, freeze unbaked Cheesy Chicken Manicotti. Assemble the dish, tightly cover with foil, and freeze for up to 3 months.
Reheating: If frozen, thaw in the fridge overnight before baking. Bake straight from the freezer for an additional 10-15 minutes, ensuring the center is hot.
Make-Ahead Tip: You can prepare Cheesy Chicken Manicotti a day in advance and store it in the fridge. Just pop it in the oven when you’re ready to serve!
Cheesy Chicken Manicotti Recipe FAQs
How do I select the best manicotti pasta shells?
Absolutely! When choosing manicotti shells, look for those that are sturdy and free from cracks or defects. You want them to hold up during cooking and stuffing. If fresh pasta is available, that can add a delightful texture, but dried pasta works just fine.
How long can I store leftovers in the fridge?
Very! Leftovers can be stored in an airtight container in the fridge for up to 3 days. When you’re ready to enjoy some comfort food again, just reheat in the microwave or oven. Adding a splash of extra marinara sauce during reheating can help keep it moist and flavorful.
Can I freeze Cheesy Chicken Manicotti?
Absolutely! To freeze, prepare the manicotti without baking it. Once assembled, tightly cover the dish with aluminum foil or plastic wrap, and place it in the freezer for up to 3 months. When you’re ready to bake, let it thaw in the fridge overnight. If baking straight from frozen, check that it’s heated through with an extra 10-15 minutes.
What if my filling is too thick or hard to stuff?
No worries! If your filling seems too thick, you can add a little milk or extra marinara sauce to loosen it up. Mix in small amounts until it reaches the desired creamy consistency. Using a piping bag to fill the manicotti can also make this process simpler and less messy.
Is this recipe suitable for people with dietary restrictions?
Very! If you have dietary restrictions, consider substituting the shredded chicken with sautéed spinach, mushrooms, or a mix of your favorite vegetables for a vegetarian option. Always check your cheese varieties if you’re concerned about lactose intolerance or allergies, and feel free to adjust seasonings to suit your taste!
How can I make the dish more flavorful?
To enhance the flavor of your Cheesy Chicken Manicotti, be generous with seasoning. Before stuffing, taste the filling and adjust with more salt, pepper, or even crushed red pepper flakes for heat. Additionally, adding fresh herbs like basil or oregano can elevate the flavor profile significantly. Don’t shy away from experimenting with different cheeses, either!

Cheesy Chicken Manicotti: A Comforting Family Favorite
Ingredients
Equipment
Method
- Preheat your oven to 350°F (175°C) and grease your baking dish with olive oil.
- In a large pot, bring salted water to a rolling boil. Cook the manicotti shells for 7-8 minutes until al dente.
- In a mixing bowl, combine shredded chicken, ricotta, ½ cup mozzarella, Parmesan, garlic, Italian seasoning, salt, and pepper. Mix well.
- Using a spoon or piping bag, fill each manicotti shell with the chicken mixture.
- Spread marinara sauce on the bottom of the greased baking dish and place the stuffed manicotti in it.
- Pour the remaining marinara sauce over the manicotti and sprinkle with reserved mozzarella.
- Cover with aluminum foil and bake for 30 minutes. Remove the foil and bake an additional 10 minutes until bubbly.
- Let it rest for 5-10 minutes, garnish with parsley, and serve.
Leave a Reply