
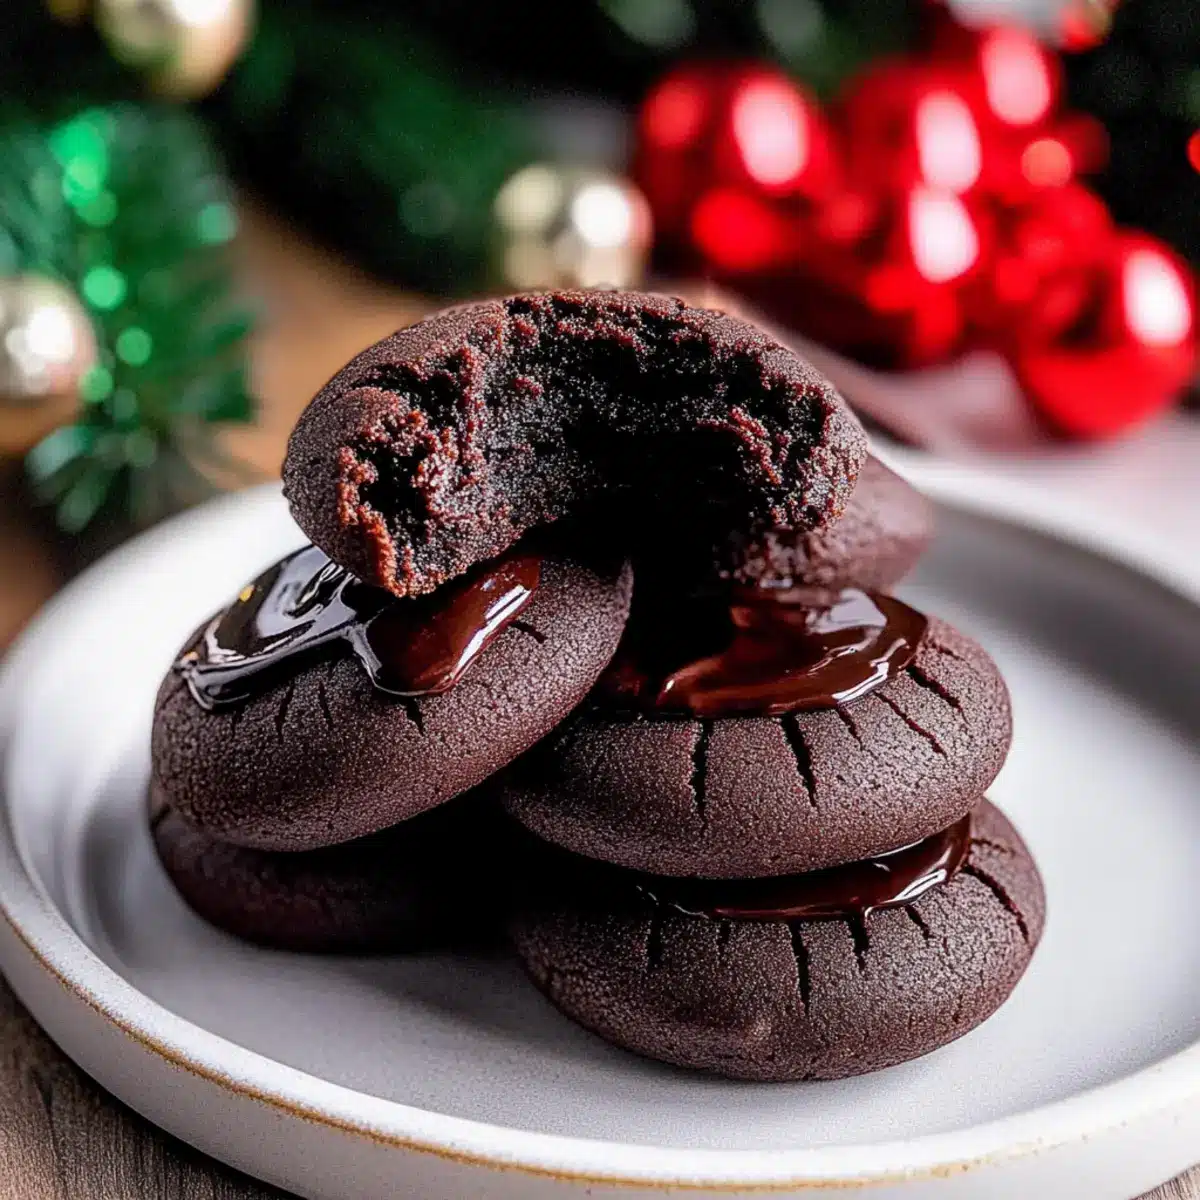
There’s a magical moment when chocolate meets your taste buds, and it all starts with these chewy Chocolate Thumbprint Cookies filled with luscious ganache. As the holiday season approaches, I find myself dreaming of cozy nights spent baking, and this easy recipe has become my go-to. Not only are these cookies delightfully rich and satisfying, but their comforting, soft texture makes them a hit among family and friends alike. In just a few simple steps, you’ll have a delightful dessert that’s perfect for cookie platters and festive gatherings. So, are you ready to elevate your baking game and impress your loved ones with these delectable treats? Let’s dive into the world of sweet indulgence!
Why are Chocolate Thumbprint Cookies a must?
Irresistible Flavor: The rich chocolate flavor paired with a silky ganache creates a divine treat that’s impossible to resist.
Effortless Baking: With simple ingredients and straightforward instructions, you’ll be whipping up these cookies in no time!
Family-Friendly Fun: Kids and adults alike will love helping shape the cookies and filling them with ganache—perfect for holiday bonding.
Versatile Delight: Mix it up by swapping chocolate with fruit preserves or adding festive toppings like crushed candy canes for extra flair.
Crowd-Pleasing Treat: These cookies are perfect for gatherings, whether it’s a holiday party or a casual tea time—everyone will be reaching for seconds!
Chocolate Thumbprint Cookies Ingredients
For the Cookie Dough
• All-Purpose Flour – Provides structure to the cookies; measure accurately to avoid excess.
• Dutch Process Cocoa Powder – Gives the cookies a deep chocolate flavor; swap with regular cocoa for a milder taste.
• Salt – Enhances the flavors and balances sweetness; do not omit.
• Baking Powder – Acts as a leavening agent for a chewy texture.
• Unsalted Butter – Adds richness and moisture; ensure it’s softened for easier mixing.
• Light Brown Sugar – Contributes sweetness and chewiness; brown sugar can be used as an alternative.
• Granulated Sugar – Provides sweetness to the cookies; you can adjust the amount to your liking.
• Egg Yolks – Binds ingredients and enhances flavor; use at room temperature for optimal blending.
• Vanilla Bean Paste/Extract – Infuses a delightful aroma and taste; vanilla extract can be a good substitute.
For the Ganache Filling
• Semi-Sweet Chocolate Chips – The star ingredient for the velvety ganache; consider using milk chocolate for a sweeter filling.
• Heavy Whipping Cream – Creates a smooth texture for the ganache; a non-dairy alternative can be used for a lighter option.
For Optional Toppings
• Nonpareils – Fun and decorative sprinkle for an extra touch of elegance; entirely optional but adds visual appeal.
These Chocolate Thumbprint Cookies are delightful treats that promise to captivate your taste buds with their rich flavors and pleasing textures. Enjoy your baking experience!
Step‑by‑Step Instructions for Chewy Chocolate Thumbprint Cookies with Ganache
Step 1: Preheat the Oven
Begin your baking adventure by preheating your oven to 350°F (175°C). This ensures that your Chocolate Thumbprint Cookies will bake evenly and have the perfect chewy texture. While the oven heats up, gather your baking sheets and line them with parchment paper, making ready for your delicious cookie dough.
Step 2: Combine Dry Ingredients
In a medium bowl, whisk together 1 ½ cups of all-purpose flour, ½ cup of Dutch process cocoa powder, ½ teaspoon of salt, and 1 teaspoon of baking powder. This mixture will add structure and flavor to your cookies. Once combined, set aside the dry ingredients to integrate seamlessly into your dough.
Step 3: Cream the Butters and Sugars
In a large mixing bowl, cream together ½ cup of unsalted butter, ½ cup of light brown sugar, and ¼ cup of granulated sugar. Use an electric mixer on medium speed for about 2 minutes, until the mixture is fluffy and pale. This step is crucial for achieving the soft and chewy texture characteristic of your Chocolate Thumbprint Cookies.
Step 4: Incorporate Egg Yolks and Vanilla
Add in 2 large egg yolks and 1 teaspoon of vanilla bean paste (or extract) to the creamed mixture. Mix on low speed just until incorporated, ensuring the flavors meld beautifully. The egg yolks not only bind the ingredients but also enrich the overall flavor of your cookies, making them irresistibly delicious.
Step 5: Mix in Dry Ingredients
Gradually add the prepared dry ingredients to the wet mixture, mixing just until combined. Avoid overmixing to maintain the soft texture of your cookie dough. The dough should come together nicely and look rich and chocolatey—perfectly primed for the next exciting step in creating your Chocolate Thumbprint Cookies.
Step 6: Shape the Dough
Using a cookie scoop or your hands, divide the dough into about 34 equal portions. Roll each portion into a ball and place them on the lined baking sheets, leaving adequate space between each for spreading. With a 1/4 teaspoon measuring spoon, gently create an indent in the center of each ball—a hallmark of the classic thumbprint.
Step 7: Chill the Dough
Place the baking sheets with the indented dough balls in the refrigerator to chill for at least 1 hour. This resting period is essential as it helps maintain the shape during baking, resulting in beautifully intact Chocolate Thumbprint Cookies. While you wait, you can even prepare the ganache for a smooth finish!
Step 8: Bake the Cookies
After chilling, bake the cookies in your preheated oven for 9-11 minutes. Keep an eye on them—baking until the edges appear set but the centers remain soft. If any indents have flattened, quickly press again with the measuring spoon upon removal. Once done, they should look slightly puffed and chewy.
Step 9: Cool the Cookies
Allow the cookies to cool on the baking sheets for about 5 minutes before transferring them to a wire rack. This step is crucial—the cookies will firm up as they cool while maintaining their soft chew. Give them a few more minutes to cool completely before filling with ganache.
Step 10: Prepare the Ganache
To make the silky ganache, heat ½ cup of heavy whipping cream in a small saucepan until it’s just boiling. Pour the hot cream over 1 ½ cups of semi-sweet chocolate chips in a separate bowl. Stir continuously until smooth and glossy, creating the perfect filling for your Chocolate Thumbprint Cookies.
Step 11: Fill the Indentations
Carefully spoon the ganache into the indents of each cookie, allowing them to fill up generously. The warm ganache will create a beautiful shine as it settles into the cookies. Optional: Top with nonpareils for a festive touch. Let them sit for about 10-15 minutes to allow the ganache to set before indulging.
Step 12: Serve and Share
Your delectable Chewy Chocolate Thumbprint Cookies with Ganache are now ready to be enjoyed! Arrange them on a platter for sharing, or package them as sweet gifts. With their heavenly taste and delightful texture, these cookies are sure to leave everyone wanting more!

What to Serve with Chewy Chocolate Thumbprint Cookies with Ganache
Imagine the joy of pairing these decadent cookies with delightful sides for an unforgettable dessert spread.
-
Fresh Berries: The tartness of strawberries or raspberries cuts through the rich chocolate, offering a refreshing contrast. They add a burst of color to your dessert table as well!
-
Vanilla Ice Cream: A scoop of smooth vanilla ice cream perfectly complements the cookies’ chewy texture, creating a classic pairing that never fails to please.
-
Espresso or Coffee: Enjoying these cookies with a cup of bold espresso enhances the chocolate flavor and provides a warm, comforting finish to the meal. The rich flavors embrace your senses in perfect harmony.
-
Mint Chocolate Milkshake: Creamy and cool, a mint chocolate milkshake is both whimsical and indulgent, making it a family-friendly choice that feels like a special treat.
-
Homemade Whipped Cream: Lightly sweetened whipped cream adds a soft touch to the rich ganache, providing just the right amount of creaminess. This simple addition elevates your cookies to another level of indulgence!
-
Slivered Almonds: Toasted slivered almonds sprinkled on top introduce a delightful crunch to the soft cookies. The nutty flavor enhances the chocolate and makes for an elegant presentation.
-
Chocolate Sauce Drizzle: An extra drizzle of chocolate sauce over the top can take your cookies over the edge! It creates a beautiful visual while amplifying the chocolate experience for true chocoholics.
Make Ahead Options
These chewy Chocolate Thumbprint Cookies are perfect for busy home cooks looking to save time without sacrificing flavor! You can prepare the cookie dough up to 24 hours in advance; simply roll the dough into balls and refrigerate them on the baking sheets. This chilling not only helps the cookies maintain their shape while baking but also enhances their rich chocolate flavor. If you’re planning a gathering, consider making the ganache filling ahead too, storing it in the fridge for up to 3 days. When you’re ready to bake, simply preheat the oven and follow the finishing instructions—bake, cool, and fill! This way, you’ll enjoy freshly baked cookies with minimum effort, transforming your holiday baking into a stress-free celebration.
Chocolate Thumbprint Cookies Variations
Feel free to get creative with these chocolate thumbprint cookies, turning them into a delightful reflection of your taste and preferences!
-
Fruit Preserves: Swap the chocolate ganache with your favorite fruit preserves like raspberry or apricot for a tart twist.
Imagine biting into a soft cookie that surprises you with a burst of fruity goodness—perfect for a fresh take! -
Nutty Addition: Stir in finely chopped nuts like hazelnuts or almonds into the dough for a satisfying crunch.
The contrast of soft cookie and crunchy nuts elevates every bite, making these cookies even more delightful. -
Minty Freshness: Add a few drops of peppermint extract to the ganache for a holiday-inspired flavor.
The cool mint paired with rich chocolate creates a refreshing experience that’s simply irresistible during festive gatherings. -
Dairy-Free Option: Use coconut cream instead of heavy whipping cream for your ganache to create a dairy-free version.
The tropical undertones complement the rich chocolate so beautifully that you won’t even miss the dairy! -
Spicy Kick: Incorporate a pinch of cayenne or chili powder into the cookie dough for an unexpected heat.
This warm spice adds an exciting twist and a delightful surprise that’ll keep your friends guessing! -
Double Chocolate: For extra indulgence, mix in chocolate chips to the dough along with the ganache.
Who wouldn’t want a cookie bursting with chocolatey goodness? It’s a chocolate lover’s dream come true! -
Gluten-Free Twist: Use a 1:1 gluten-free flour blend instead of all-purpose flour for a gluten-free option.
These cookies can be enjoyed by everyone, ensuring no one feels left out of the deliciousness! -
Decadent Toppings: After filling with ganache, sprinkle sea salt or shavings of dark chocolate on top for a gourmet touch.
The slight contrast between sweet and salty adds an exciting dimension to this already delicious cookie!
Explore these variations to discover your favorite flavors, and when you’re ready to satisfy your sweet tooth even further, why not try these gluten-free chocolate cookies or indulge in a cozy mug of white hot chocolate? Your baking adventure has just begun!
Storage Tips for Chocolate Thumbprint Cookies
Airtight Container: Store your Chocolate Thumbprint Cookies in an airtight container at room temperature for up to 3 days to maintain their delicious chewy texture.
Refrigeration: If you prefer, you can refrigerate the cookies for extended freshness; just ensure they’re well-wrapped to avoid absorbing odors, and enjoy within a week.
Freezer: For longer storage, freeze the cookies in a single layer on a baking sheet, then transfer them to a freezer-safe bag or container. These can last up to 2 weeks.
Reheating: To enjoy your cookies warm, thaw at room temperature before reheating in the oven at 300°F (150°C) for about 5 minutes, adding freshness back to your delightful treats.
Expert Tips for Chocolate Thumbprint Cookies
- Accurate Measurements: Always measure flour by spooning and leveling to avoid dense cookies. Too much flour can ruin the chewyness of your Chocolate Thumbprint Cookies.
- Chilling is Key: Don’t skip chilling the dough; it helps maintain shape and structure during baking. A firm dough leads to perfectly formed cookies.
- Indent Carefully: If your indents flatten during baking, re-indent immediately after removing the cookies from the oven for a deep well to hold the ganache.
- Flavor Boost: For a holiday twist, consider adding a drop of peppermint extract to the ganache, enhancing the richness of your Chocolate Thumbprint Cookies.
- Storing Tips: Keep your cookies in an airtight container to retain their freshness, and enjoy them within three days for the best flavor and texture.

Chocolate Thumbprint Cookies Recipe FAQs
What type of cocoa powder should I use for the best flavor?
I recommend using Dutch process cocoa powder for its rich chocolate flavor, which elevates these cookies to decadence! If you want a milder taste, you can substitute it with regular cocoa powder, but the cookies won’t be as intense in flavor.
How should I store the cookies after baking?
Store your Chocolate Thumbprint Cookies in an airtight container at room temperature for up to 3 days. Keeping them sealed prevents them from drying out, ensuring they maintain their delightful chewiness. If you want to extend their freshness, you can refrigerate them, wrapped properly, for up to a week.
Can I freeze the chocolate thumbprint cookies?
Absolutely! To freeze your cookies, place them in a single layer on a baking sheet and pop them in the freezer until firm. Once set, transfer them to a freezer-safe bag or container, where they can last up to 2 weeks. When you’re ready to enjoy them, simply thaw at room temperature and reheat in the oven at 300°F (150°C) for about 5 minutes for that freshly baked taste.
What should I do if my cookies flatten during baking?
If your cookies flatten, don’t worry! You can re-indent them while they’re still warm using a teaspoon. Gently press the center again for a deeper well to hold more ganache. This little trick ensures your cookies not only look good but also have space for that luscious filling.
Are these cookies suitable for those with dietary restrictions?
While these Chocolate Thumbprint Cookies are a delightful indulgence, they contain gluten and dairy ingredients. If you’re baking for someone with allergies, consider using gluten-free flour and non-dairy alternatives for the butter and heavy cream. Always check packaging for potential allergens, especially for chocolate chips, to keep everyone safe while still enjoying this sweet treat!
How long do the cookies take to chill before baking?
Chilling the dough is crucial! Make sure to chill the indented dough for at least 1 hour before baking. This helps the cookies maintain their shape and prevents them from spreading too much during baking, resulting in that lovely, chewy texture we all love.

Decadent Chocolate Thumbprint Cookies with Silky Ganache
Ingredients
Equipment
Method
- Preheat your oven to 350°F (175°C) and line baking sheets with parchment paper.
- In a medium bowl, whisk together the dry ingredients: all-purpose flour, cocoa powder, salt, and baking powder.
- In a large mixing bowl, cream together unsalted butter, light brown sugar, and granulated sugar until fluffy.
- Incorporate egg yolks and vanilla bean paste into the creamed mixture.
- Gradually add the dry ingredients to the wet mixture, mixing just until combined.
- Divide the dough into about 34 portions, roll into balls, and create indentations in the center of each.
- Chill the dough balls in the refrigerator for at least 1 hour.
- Bake the cookies for 9-11 minutes until edges are set but centers remain soft.
- Cool on baking sheets for 5 minutes before transferring to a wire rack.
- For the ganache, heat heavy whipping cream until boiling and pour over chocolate chips, stirring until smooth.
- Fill the indents of each cookie with ganache and let set for 10-15 minutes.
- Serve and share your delicious Chocolate Thumbprint Cookies!
Leave a Reply