
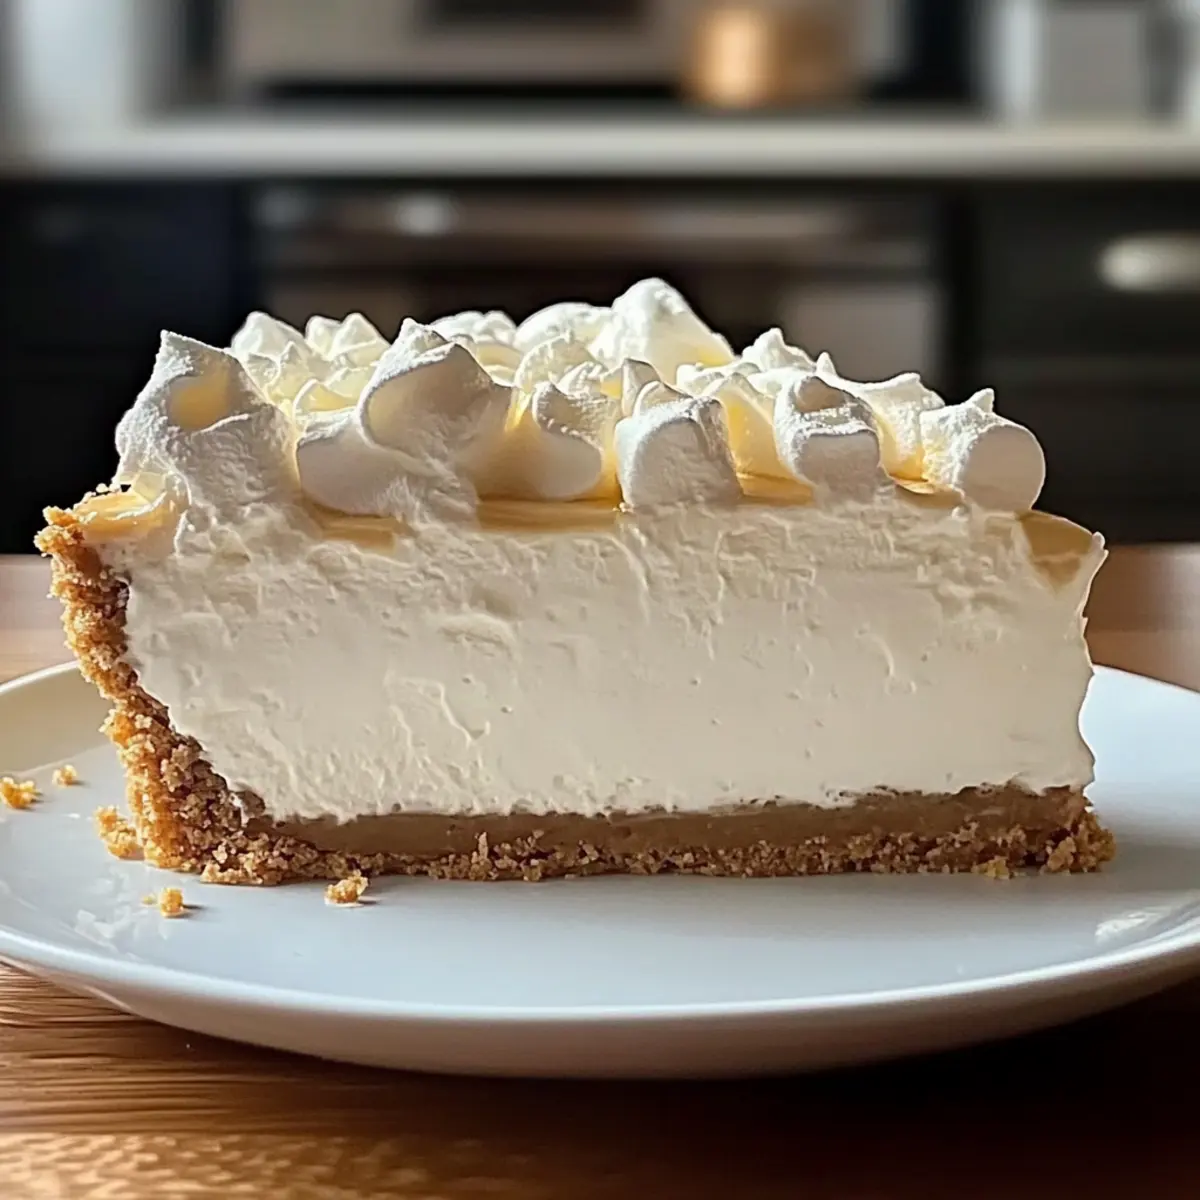
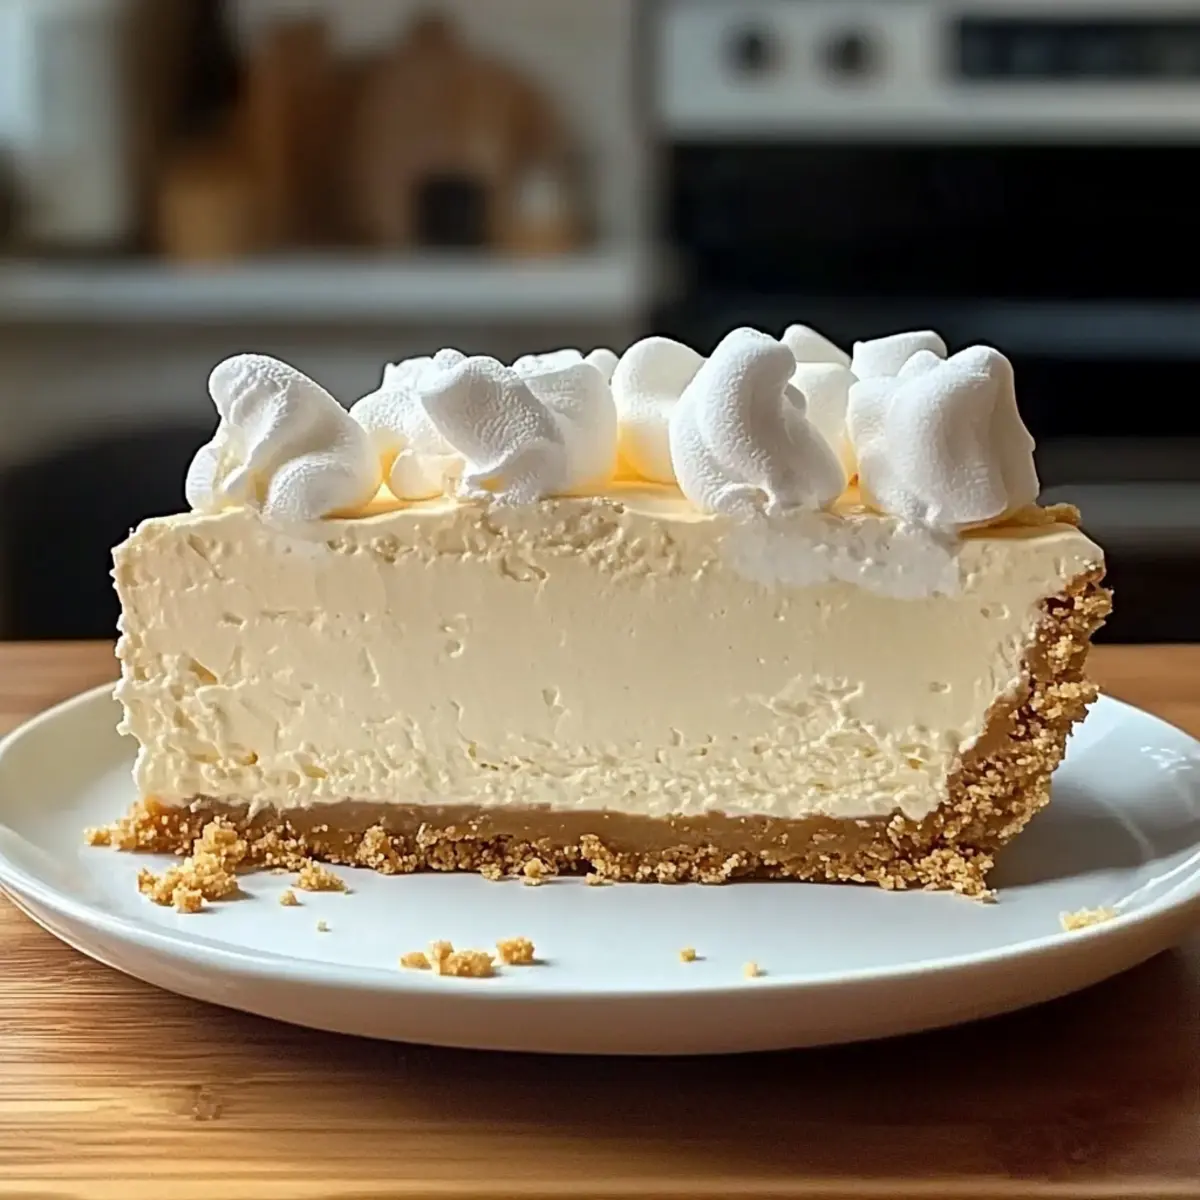
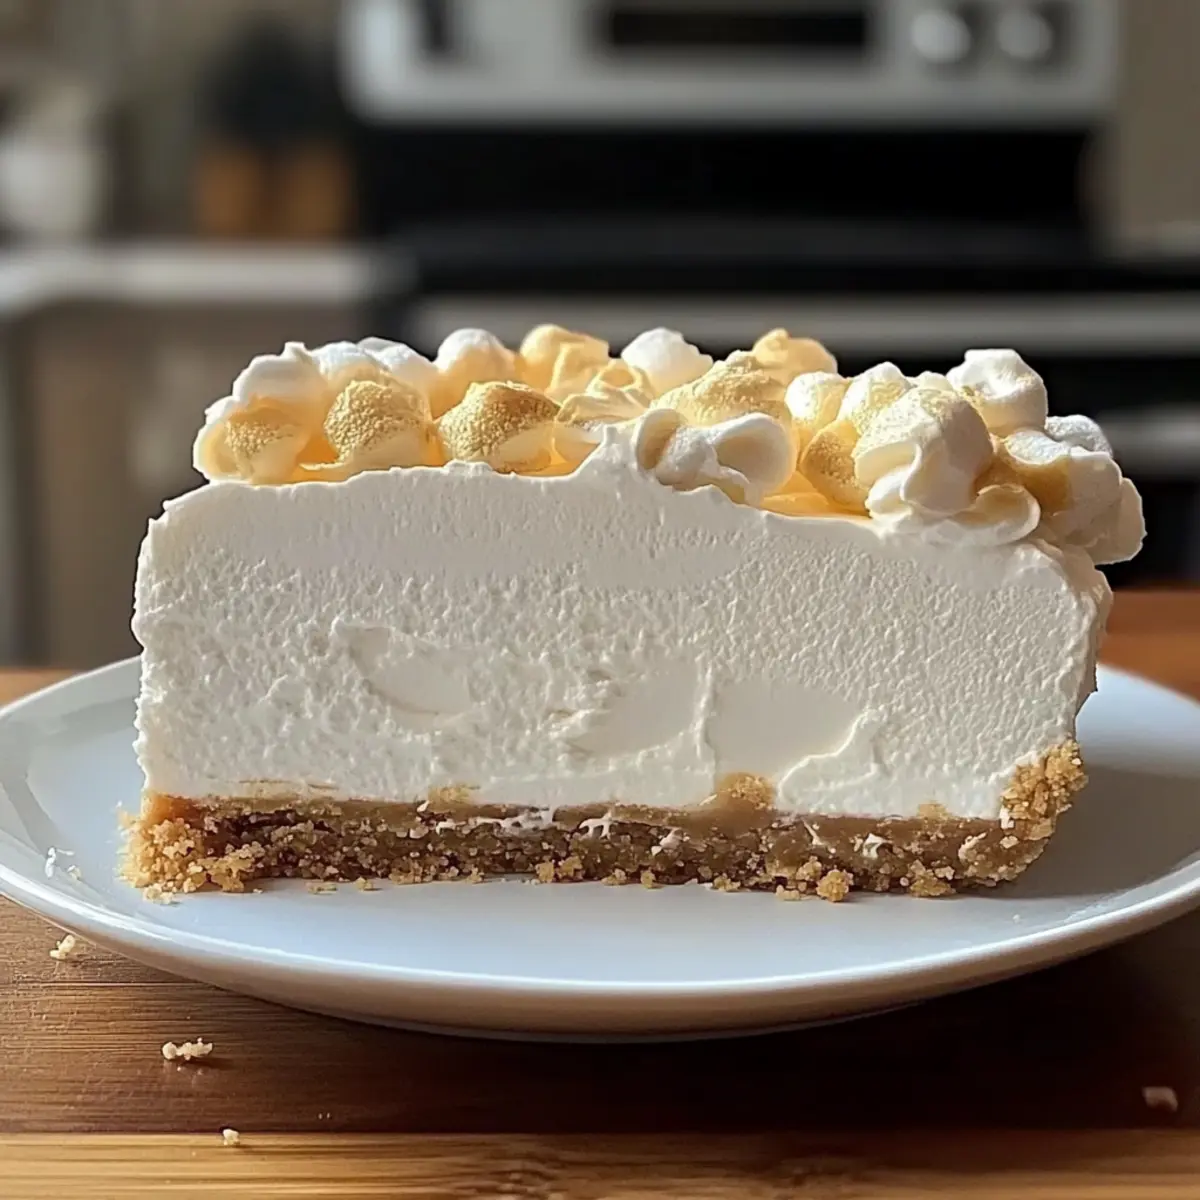
As I stood in the kitchen, the warm sunlight danced across the counters, and I felt the excitement of creating something magical. When I decided to whip up a No-Bake Marshmallow Whip Cheesecake, I knew I was in for a treat. This recipe is not only a crowd-pleaser but also requires just minutes of preparation, letting you spend more time enjoying delicious moments with loved ones. The airy fluffiness of the marshmallow paired with the creamy cheesecake filling, all resting on a buttery graham cracker crust, makes it an ideal dessert for those warm summer evenings or spontaneous gatherings. Plus, its adaptability means you can personalize this dreamy dish with your favorite toppings or crust variations. So, what are you waiting for? Let’s dive into creating this delightful cheesecake that’s sure to make any occasion sweeter!
Why is Marshmallow Whip Cheesecake Perfect?
Effortless Preparation: You’ll love how quick and easy this no-bake dessert is to make—perfect for unexpected guests!
Heavenly Fluffiness: The airy marshmallow texture creates a cloud-like experience that melts in your mouth.
Endless Customization: Feel free to play with flavors or crusts, turning this cheesecake into your personalized masterpiece.
Crowd Favorite: Impress friends and family with a dessert that is sure to disappear faster than you can say “cheesecake”!
Make-Ahead Magic: Prep this delightful treat ahead of time; it’s even better when chilled overnight! Enjoy simple snacks? Check out our no-bake treats for more inspiration.
Marshmallow Whip Cheesecake Ingredients
For the Crust
• Graham Cracker Crumbs – Provides the foundation and delightful crunch for the cheesecake; swap with crushed chocolate wafer cookies for a delicious twist.
• Sugar – Enhances the sweetness of the crust; consider coconut sugar for a healthier option.
• Unsalted Butter – Binds the crust ingredients together; substitute with coconut oil for a dairy-free version.
For the Filling
• Cream Cheese – Forms the creamy base of the cheesecake; opt for full-fat for richness, but low-fat can work in a pinch.
• Marshmallow Fluff – Adds an irresistible sweetness and airy texture; can be replaced with homemade whipped cream for a fresher taste.
• Vanilla Extract – Enhances the overall flavor; pure vanilla is best, but imitation works too.
• Whipped Topping – Contributes to the lightness of the cheesecake filling; you can use homemade whipped cream for an extra touch.
Optional Toppings
• Fresh Fruit – Strawberries or raspberries add a burst of flavor and color; add right before serving to maintain freshness.
• Mini Marshmallows – Perfect for a fun, nostalgic touch on top of your cheesecake.
• Chocolate Drizzle – A luscious addition that complements the sweetness of the marshmallow whip; drizzle right before serving for the best effect.
Now that you have all the ingredients prepared, you’re well on your way to creating a delightful Marshmallow Whip Cheesecake that will wow your guests!
Step‑by‑Step Instructions for Marshmallow Whip Cheesecake
Step 1: Prepare the Crust
In a mixing bowl, combine graham cracker crumbs and sugar, then pour in melted unsalted butter. Stir until the mixture resembles wet sand. Press this mixture firmly into the bottom of a 9-inch springform pan to create a solid crust. Ensure it’s evenly distributed, then chill it in the refrigerator for about 30 minutes until firm.
Step 2: Mix the Cream Cheese Filling
In a large mixing bowl, beat the room-temperature cream cheese using an electric mixer on medium speed until smooth and creamy, about 2 minutes. Add in the marshmallow fluff and pure vanilla extract, mixing until well combined and free of lumps. You want a luscious mixture that will form the decadent filling for your Marshmallow Whip Cheesecake.
Step 3: Fold in Whipped Topping
Gently fold the whipped topping into the cream cheese mixture using a spatula. Take care to maintain the airy texture; the goal is a light, fluffy filling. Mix until just combined and no streaks remain, ensuring that the filling is rich yet not overly dense. This step is crucial for achieving that dreamy consistency in your cheesecake.
Step 4: Assemble the Cheesecake
After the crust has set, spread the fluffy filling over the chilled graham cracker base. Use a spatula to smooth the top, creating an even surface. Cover the cheesecake with plastic wrap and refrigerate for at least 4 hours, or preferably overnight, allowing the flavors to meld beautifully and the texture to set firmly.
Step 5: Add Toppings and Serve
Before serving your Marshmallow Whip Cheesecake, add your choice of toppings such as fresh strawberries, mini marshmallows, or a drizzle of chocolate. Carefully release the springform ring and slice into wedges. Serve chilled for the best flavor and texture experience. Enjoy each creamy, dreamy bite!
Marshmallow Whip Cheesecake Variations
Invite your taste buds on a delightful journey by personalizing this creamy dream dessert with exciting twists!
- Chocolate Crust: Substitute graham cracker crumbs with crushed chocolate wafer cookies for a rich, chocolaty base. It adds an extra depth of flavor that chocolate lovers will adore!
- Coconut Sugar: Replace regular sugar in the crust with coconut sugar for a natural sweetness that pairs beautifully with the rich filling. It gives a subtle caramel note to your cheesecake.
- Dairy-Free Delight: Use coconut oil in place of unsalted butter and dairy-free cream cheese for a complete dairy-free option. Enjoy the same creamy texture and flavor while accommodating dietary needs.
- Fresh Fruit Swirl: For a fruity twist, fold in some pureed strawberries or raspberries into the cream cheese filling. This luscious addition not only enhances flavor but also creates stunning visual appeal.
- Zesty Lemon: Add lemon zest into the filling for a refreshing citrus kick. It brightens the cheesecake, making it perfect for warm summer days.
- Mini Cheesecakes: Create individual portions by using cupcake liners in a muffin tin. This makes serving easier and adds a fun touch to parties or potlucks.
- Spicy Kick: Mix in a pinch of cinnamon or nutmeg into the filling for a warm, spicy note that complements the sweetness beautifully. It’s a subtle yet delightful enhancement!
- Crunchy Toppings: For added texture, toss a handful of crushed nuts or toffee bits on top before serving. The contrast of crunch against the creaminess takes your cheesecake to the next level.
Feel free to explore and experiment with different flavors or ingredients! And if you’re looking for more inspiration, our delightful no-bake treats provide a bounty of ideas and customization possibilities.
Expert Tips for Marshmallow Whip Cheesecake
• Room Temperature Cream Cheese: Start with cream cheese at room temperature for smooth mixing. Cold cream cheese can result in lumps in your filling.
• Chill Overnight: For the best flavor and texture, let your cheesecake chill overnight. This allows it to firm up and enhances the creaminess of the Marshmallow Whip Cheesecake.
• Fresh Toppings Last Minute: Add toppings like fruit or chocolate drizzle just before serving to keep them fresh and prevent sogginess.
• Mixing Carefully: When folding in whipped topping, do it gently! This helps maintain the light, airy texture essential for a dreamy cheesecake.
• Crust Options: Don’t hesitate to switch up the crust! Using crushed Oreos or chocolate wafer cookies can add a rich twist to your cheesecake experience.
How to Store and Freeze Marshmallow Whip Cheesecake
Fridge: Store your cheesecake covered in plastic wrap or in an airtight container for up to 3 days. This keeps it fresh and ready for that perfect sweet moment.
Freezer: To preserve your Marshmallow Whip Cheesecake longer, wrap it tightly in plastic wrap and aluminum foil, then freeze for up to one month.
Thawing: When you’re ready to enjoy, move it to the fridge overnight to thaw gently. This helps maintain the cheesecake’s creamy texture.
Reheating: Since this cheesecake is served cold, there’s no need to reheat. Just slice and indulge in the delightful flavors!
Make Ahead Options
This Marshmallow Whip Cheesecake is a fantastic choice for meal prep, saving you time on busy days! You can prepare the graham cracker crust up to 3 days in advance—just store it tightly wrapped in plastic wrap to keep it fresh. The cheesecake filling can also be made the day before (or even up to 24 hours ahead) and then spread over the crust. Just be sure to cover the cheesecake with plastic wrap so it stays airy and delicious. When you’re ready to serve, add your favorite toppings, slice, and enjoy a decadent dessert that’s just as delightful as if made fresh that day!
What to Serve with Marshmallow Whip Cheesecake?
As you prepare to treat your loved ones with this delightful cheesecake, consider the perfect accompaniments that will elevate your dessert experience!
- Fresh Berries: Juicy strawberries or raspberries enhance the cheesecake’s creaminess and add a refreshing burst of flavor.
- Chocolate Ice Cream: Indulge in rich chocolate ice cream as a contrast to the light cheesecake and enhance the sweetness.
- Mint Tea: Fresh mint tea provides a soothing end to your meal, balancing the sweetness of the cheesecake beautifully.
- Chocolate Sauce: A drizzle of warm chocolate sauce adds a decadent touch, making each slice feel extra indulgent.
- Coconut Macaroons: Soft coconut macaroons bring a delightful chewiness that contrasts with the smooth cheesecake texture—perfect for coconut lovers!
- Whipped Cream: A dollop of freshly whipped cream complements the cheesecake’s airy texture, giving each bite an extra layer of delight.
- Lemon Sorbet: Light and zesty lemon sorbet adds a refreshing tartness that cuts through the richness of the dessert, leaving you feeling refreshed.
- Coffee: A hot cup of coffee creates a comforting pairing, rounding out the meal and providing a rich flavor alongside the cheesecake.
- Mini Marshmallows: For a playful touch, serve sugary mini marshmallows on the side for guests to enjoy with their slice!
- Fruit Salad: A vibrant fruit salad filled with seasonal fruits gives a fresh, colorful touch to the dessert table.
Marshmallow Whip Cheesecake Recipe FAQs
What kind of graham cracker crumbs should I use?
I recommend using plain graham cracker crumbs for a traditional crust, but if you want a chocolatey twist, crushed chocolate wafer cookies work beautifully! Just make sure whichever you choose is finely crushed for a better texture.
How should I store my cheesecake?
Store your Marshmallow Whip Cheesecake in the refrigerator wrapped tightly in plastic wrap or in an airtight container for up to 3 days. This will keep it fresh and delicious for those sweet moments you crave!
Can I freeze the cheesecake?
Absolutely! To freeze your cheesecake, wrap it tightly in plastic wrap followed by aluminum foil to prevent freezer burn. It will stay fresh in the freezer for up to one month. When you’re ready to enjoy it, just move it to the fridge overnight to thaw gently.
What if my cream cheese is too cold?
Very important! If your cream cheese is cold right out of the fridge, it can cause lumps in your filling. Always let it sit at room temperature for about 30 minutes before you start mixing. This ensures a smooth, creamy filling for your cheesecake.
Can I use low-fat cream cheese for this recipe?
Yes, you can use low-fat cream cheese as a substitute, although the texture might be slightly different. Keep in mind that full-fat cream cheese provides a richer, creamier consistency that’s more typical for cheesecakes. If using low-fat, give it a good mix for a smooth blend.
Is this cheesecake suitable for people with allergies?
While this Marshmallow Whip Cheesecake contains dairy, it can be adapted for different dietary needs. For a dairy-free option, you can substitute cream cheese with a vegan alternative and use coconut whipped cream instead of whipped topping. Always check the labels for allergens if serving to guests.

Marshmallow Whip Cheesecake: Your Dreamy No-Bake Delight
Ingredients
Equipment
Method
- In a mixing bowl, combine graham cracker crumbs and sugar, then pour in melted unsalted butter. Stir until the mixture resembles wet sand. Press this mixture into a 9-inch springform pan and chill for 30 minutes.
- In a large mixing bowl, beat the room-temperature cream cheese until smooth. Add marshmallow fluff and vanilla extract, mixing until well combined.
- Gently fold in whipped topping using a spatula until just combined.
- Spread the fluffy filling over the chilled crust. Smooth the top and cover with plastic wrap. Refrigerate for at least 4 hours or overnight.
- Add toppings of your choice before serving and slice into wedges. Serve chilled.
Leave a Reply