
There’s something magical about the aroma wafting through my kitchen when I prepare Sweet and Sticky Honey Garlic Chicken Thighs. Just a handful of ingredients transforms into a glossy, golden glaze that clings to tender, juicy chicken. Not only is this recipe a breeze to whip up on busy weeknights, but it’s also wallet-friendly and adaptable, perfect for families or anyone craving a satisfying meal without the hassle. With options to cook it in a skillet, oven, or air fryer, you can easily tailor it to your kitchen setup. Whether you’re making it gluten-free or adding a dash of heat with red pepper flakes, each variation opens the door to creativity. How do you like your chicken served—over rice, in a wrap, or perhaps with a side of veggies? Let’s dive into crafting this delightful dish together!

Why Choose Honey Garlic Chicken Thighs?
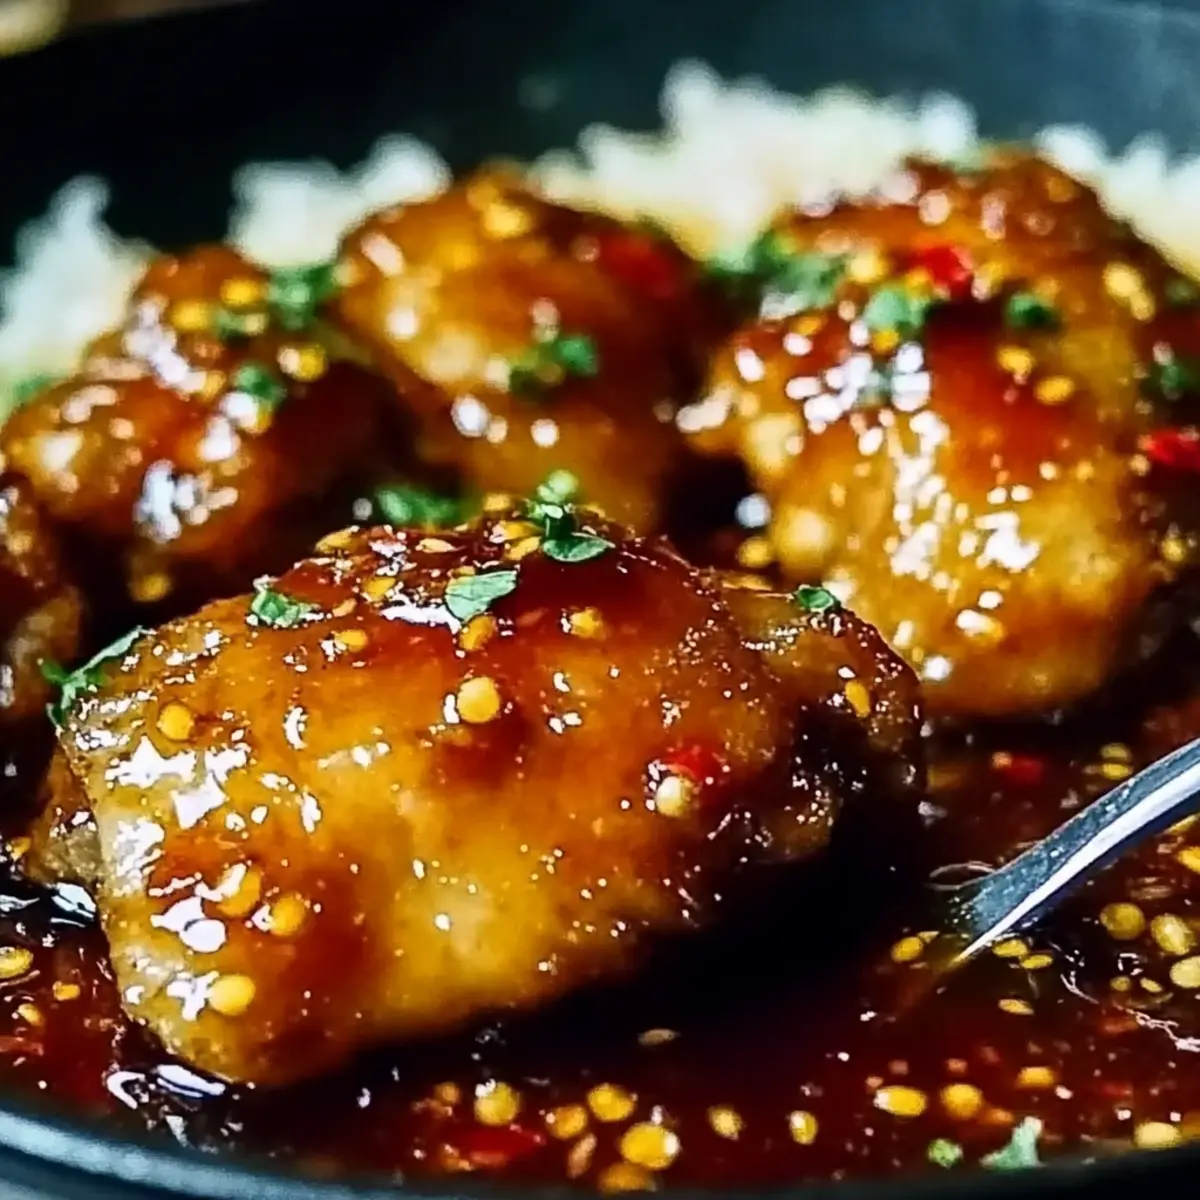
Flavor Explosion: This recipe brings sweet, sticky goodness to your table, showcasing a delightful balance of honey and garlic that will have everyone asking for seconds.
Versatile Cooking Methods: Whether using a skillet, oven, or air fryer, you can adapt this dish to your kitchen style and preferences, making it totally convenient.
Budget-Friendly: With simple ingredients and quick prep, it’s a wallet-friendly option for families looking to enjoy homemade meals without breaking the bank.
Crowd-Pleaser: The rich, savory flavors make this dish irresistible, perfect for gatherings or a cozy family dinner. Pair it with your favorite sides, like rice or steamed vegetables, to complete the meal!
For a little extra flavor, try incorporating some Garlic Chicken Fried Rice on the side. You’ll have a meal that feels gourmet but is super easy to make!
Sweet and Sticky Honey Garlic Chicken Thighs Ingredients
For the Chicken
• Chicken Thighs – Choose boneless or bone-in for juiciness; skin-on adds extra flavor.
For the Sauce
• Honey – Provides the signature sweetness; substitute with maple syrup for a lighter glaze.
• Garlic – Fresh minced garlic delivers the best aromatic flavor.
• Soy Sauce – Adds umami; opt for tamari or coconut aminos for gluten-free options.
• Vinegar (e.g., apple cider vinegar) – Balances sweetness; apple cider or rice vinegar can work, too.
Optional Enhancements
• Sesame Oil – Adds a lovely nutty fragrance for an extra layer of flavor.
• Sriracha/Red Pepper Flakes – Spice it up if you want a little heat!
• Grated Ginger – Adds warmth and a zesty twist to the sauce.
Enjoy this delightful recipe – Sweet and Sticky Honey Garlic Chicken Thighs are sure to be a new family favorite!
Step‑by‑Step Instructions for Sweet and Sticky Honey Garlic Chicken Thighs
Step 1: Prepare the Chicken
Begin by patting the chicken thighs dry with paper towels to promote a beautiful sear. Season generously with salt and pepper on both sides. This step is crucial for enhancing the flavor of your Sweet and Sticky Honey Garlic Chicken Thighs and achieving that gorgeous golden color when seared.
Step 2: Sear the Thighs
Heat a large skillet over medium-high heat and add a splash of oil. Once the oil shimmers, carefully place the chicken thighs in the skillet, skin-side down if using skin-on. Sear for about 4-5 minutes until they are nicely browned, then flip and cook for another 4-5 minutes. The thighs should be golden and cooked halfway through before removing them from the pan.
Step 3: Sauté the Garlic
Remove the cooked chicken from the skillet and set aside. In the same skillet, lower the heat to medium and add the minced garlic. Sauté for about 30 seconds until fragrant, stirring continuously to prevent burning. The wonderful aroma of the garlic will complement the honey glaze to come, setting the stage for your Sweet and Sticky Honey Garlic Chicken Thighs.
Step 4: Make the Sticky Sauce
In a small bowl, mix together honey, soy sauce, and vinegar until well combined. Pour this sticky mixture into the skillet while scraping the browned bits off the bottom. This adds depth of flavor to the sauce. Allow it to bubble gently, which helps to thicken it slightly, enriching the glaze for the chicken.
Step 5: Combine Chicken and Sauce
Return the seared chicken thighs to the skillet, ensuring they’re nestled in the sauce. Spoon the glaze over the thighs generously. Reduce the heat to low and let everything simmer together for about 8-10 minutes. The sauce will thicken, coating the chicken beautifully and ensuring each bite of your Sweet and Sticky Honey Garlic Chicken Thighs is deliciously glazed.
Step 6: Rest and Serve
Once the chicken is cooked through and the sauce has become thick and sticky, remove the skillet from heat. Let the chicken rest for a couple of minutes to retain its juices. Serve your Sweet and Sticky Honey Garlic Chicken Thighs drizzled with any remaining sauce over a bed of rice or alongside steamed vegetables for a complete meal.

Sweet and Sticky Honey Garlic Chicken Thighs Variations
Feel free to express your culinary creativity with these delightful twists that enhance your Sweet and Sticky Honey Garlic Chicken Thighs!
-
Gluten-Free:
Substitute soy sauce with tamari or coconut aminos for a gluten-free option that keeps the flavor intact. -
Citrus Zing:
Finish with a splash of freshly squeezed lemon or lime juice for a refreshing twist that brightens the dish. -
Veggie Boost:
Add in some broccoli or bell peppers during the last few minutes of cooking for a pop of color and nutrition! -
Oil-Free Cooking:
For a lighter option, bake the chicken thighs on a parchment-lined sheet pan with no added oil—perfect for those looking to cut back on calories. -
Air Fryer Magic:
Cook your chicken thighs in an air fryer at 380°F for about 20-25 minutes for crispy edges and a tender center, all while saving on clean-up. -
Sweet Heat:
Spice things up by adding sriracha or red pepper flakes into the glaze for a zesty kick that contrasts beautifully with the sweetness. -
Herb Infusion:
Stir in some fresh herbs like cilantro or parsley at the end for an aromatic finish that elevates the dish’s flavor profile. -
Crockpot Convenience:
For an easy, hands-free meal, place the chicken thighs and sauce ingredients in a slow cooker. Cook on low for 6-7 hours for succulent, fall-off-the-bone chicken. Pair it with Crockpot Chicken Thighs with Creamy Gravy for a comforting choice!
Each option allows you to make this recipe uniquely yours while enjoying the same delicious flavors that bring comfort to the table.
How to Store and Freeze Sweet and Sticky Honey Garlic Chicken Thighs
Fridge: Store cooked chicken in an airtight container for up to 4 days, ensuring the glaze remains intact and flavorful.
Freezer: For longer storage, freeze leftovers in a sealed freezer bag for up to 3 months. Portion it out for easy reheating later!
Reheating: To enjoy your Sweet and Sticky Honey Garlic Chicken Thighs again, reheat gently in a skillet with a splash of water or broth to restore the glaze.
Make-Ahead Tips: Prepare the chicken and glaze ahead and store separately. Cook when ready for a quick, fresh meal!
Make Ahead Options
These Sweet and Sticky Honey Garlic Chicken Thighs are perfect for meal prep enthusiasts! You can marinate the chicken in the honey garlic sauce up to 24 hours in advance, allowing the flavors to deepen and ensuring every bite is just as delicious. Simply combine your sauce ingredients, coat the chicken, and refrigerate overnight. Additionally, you can chop any accompanying vegetables up to 3 days ahead, storing them in an airtight container for maximum freshness. When you’re ready to cook, simply sear the chicken and follow the recipe instructions from there. This approach saves you precious time on busy weeknights and makes dinner a breeze!
What to Serve with Sweet and Sticky Honey Garlic Chicken Thighs
Elevate your family meal with delightful sides that harmonize with this sweet and savory dish, creating a feast for the senses.
- Fluffy Rice: The subtle flavors of jasmine or basmati rice soak up the sticky sauce, creating a satisfying base for each bite.
- Steamed Broccoli: Crisp, bright green broccoli adds a fresh crunch and a pop of color, balancing the richness of the chicken.
- Garlic Mashed Potatoes: Creamy mashed potatoes with a hint of garlic offer a comforting, velvety complement to the savory glaze.
- Crispy Green Salad: A light salad with mixed greens and a tangy vinaigrette refreshes the palate between bites of sticky chicken.
- Roasted Carrots: Sweet, caramelized carrots bring a touch of natural sweetness and earthiness, pairing beautifully with the dish’s flavors.
- Sesame Noodles: Tossed in a soy sauce-based dressing, these noodles echo the dish’s Asian-inspired roots and add a delightful texture.
- Mango Salsa: A fruity, zesty mango salsa introduces a bright contrast, refreshing the meal with each flavorful bite.
- Sparkling Water: Serve with a slice of lemon or lime for a refreshing drink that cuts through the richness and cleanses the palate.
- Chocolate Mousse: End on a sweet note with a light chocolate mousse, offering a perfect pairing that rounds out the meal beautifully.
Expert Tips for Sweet and Sticky Honey Garlic Chicken Thighs
• Pat Dry First: Ensure the chicken is patted dry before cooking for perfect browning; moisture prevents that beautiful, crispy sear.
• Avoid Overcrowding: Cook in batches if necessary, as overcrowding can steam the chicken instead of searing, leading to less flavorful Sweet and Sticky Honey Garlic Chicken Thighs.
• Adjust Sauce Consistency: If the sauce turns out too thin, simmer for a bit longer. For a thicker glaze, add a splash of water to loosen it, if necessary.
• Let Rest: Allow the chicken to rest after cooking for a few minutes; this helps keep the juices locked in and enhances the tenderness.
• Personalize It: Feel free to adjust the sweetness or add heat by tweaking the honey or including sriracha for a spicy kick in your Sweet and Sticky Honey Garlic Chicken Thighs.

Sweet and Sticky Honey Garlic Chicken Thighs Recipe FAQs
What type of chicken thighs should I use?
Absolutely! For this recipe, I recommend using bone-in, skin-on chicken thighs for maximum flavor and juiciness. However, boneless thighs work well too. Just keep an eye on the cooking time, as they may cook faster.
How should I store the leftovers?
Very good question! Store your cooked Sweet and Sticky Honey Garlic Chicken Thighs in an airtight container in the refrigerator for up to 4 days. Be sure to keep the glaze intact to maintain its delicious flavor.
Can I freeze the chicken thighs?
Yes, you can! To freeze your Sweet and Sticky Honey Garlic Chicken Thighs, place them in a sealed freezer bag or an airtight container. They will stay fresh in the freezer for up to 3 months. Just remember to label the bag with the date!
What if my sauce turns out too thick or too thin?
No worries! If your sauce ends up too thick, simply add a splash of water or broth while stirring over low heat to loosen it up. For a thin sauce, let it simmer for a few more minutes until it thickens. It’s all about reaching that glorious, sticky consistency!
Are there any dietary considerations for this recipe?
Absolutely, you can adapt this recipe to suit various dietary needs. To make it gluten-free, swap regular soy sauce for tamari or coconut aminos. For a lower-sodium version, choose low-sodium soy sauce. Always check that your honey is pure and consider any additional ingredients for allergens!
Sweet and Sticky Honey Garlic Chicken Thighs for Easy Family Dinners
Ingredients
Equipment
Method
- Pat the chicken thighs dry with paper towels. Season generously with salt and pepper on both sides.
- Heat a large skillet over medium-high heat and add a splash of oil. Place chicken thighs in the skillet, skin-side down if skin-on. Sear for 4-5 minutes until browned.
- Flip the thighs and cook for another 4-5 minutes until golden and cooked halfway through. Remove from pan.
- Lower the heat and add minced garlic to the skillet. Sauté for about 30 seconds until fragrant.
- Mix honey, soy sauce, and vinegar in a small bowl. Pour this into the skillet, scraping the browned bits off the bottom.
- Return the chicken thighs to the skillet and spoon the glaze generously over them. Simmer for about 8-10 minutes.
- Remove from heat and let the chicken rest for a couple of minutes before serving.
Leave a Reply