
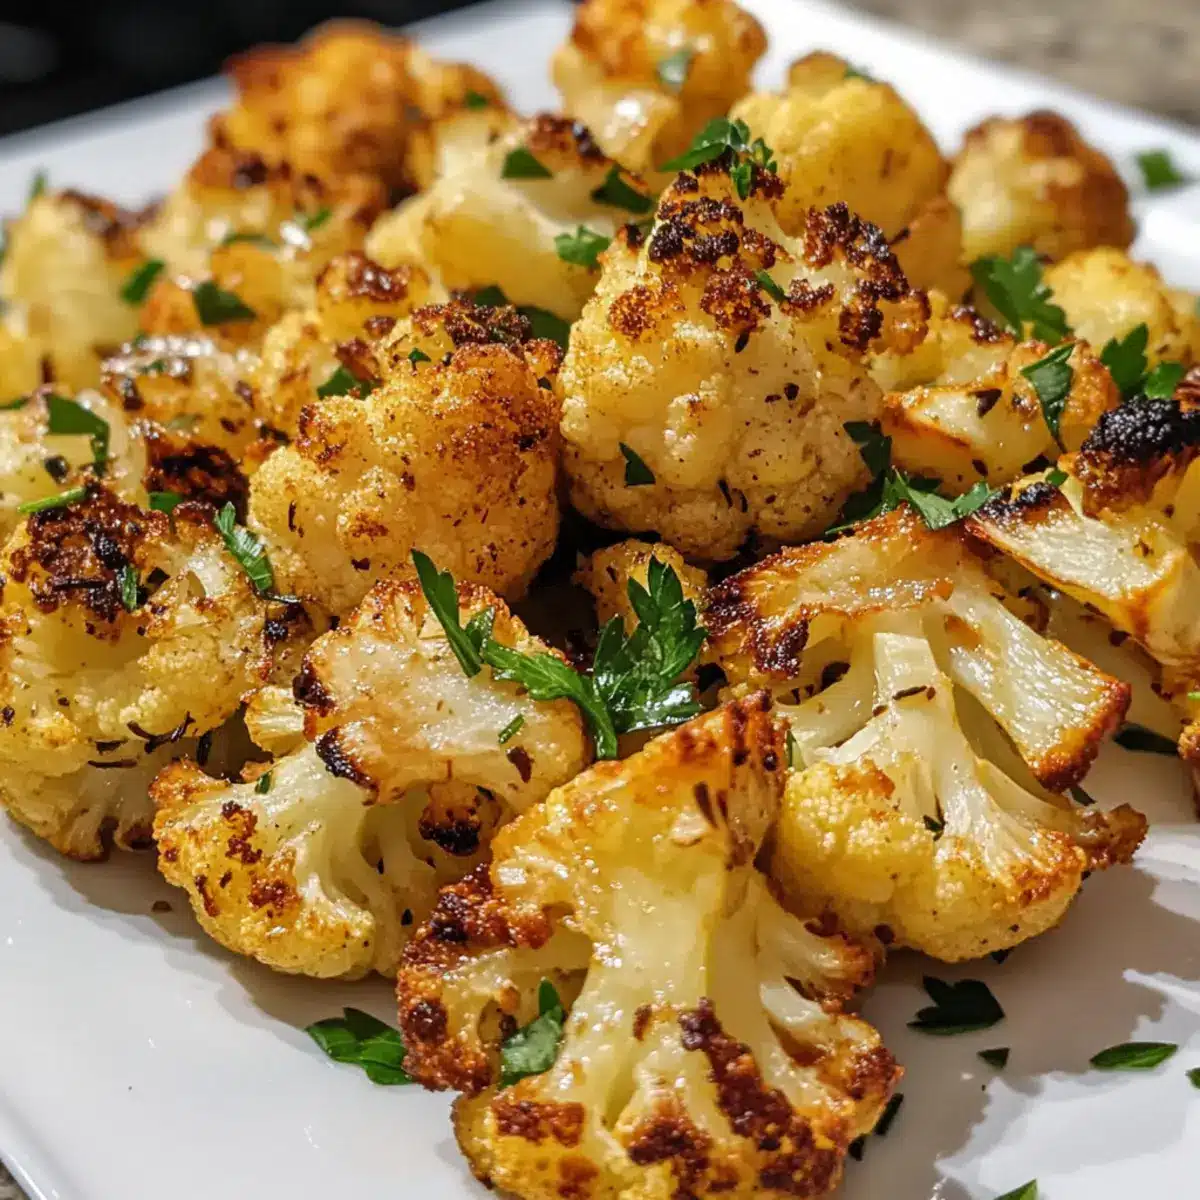
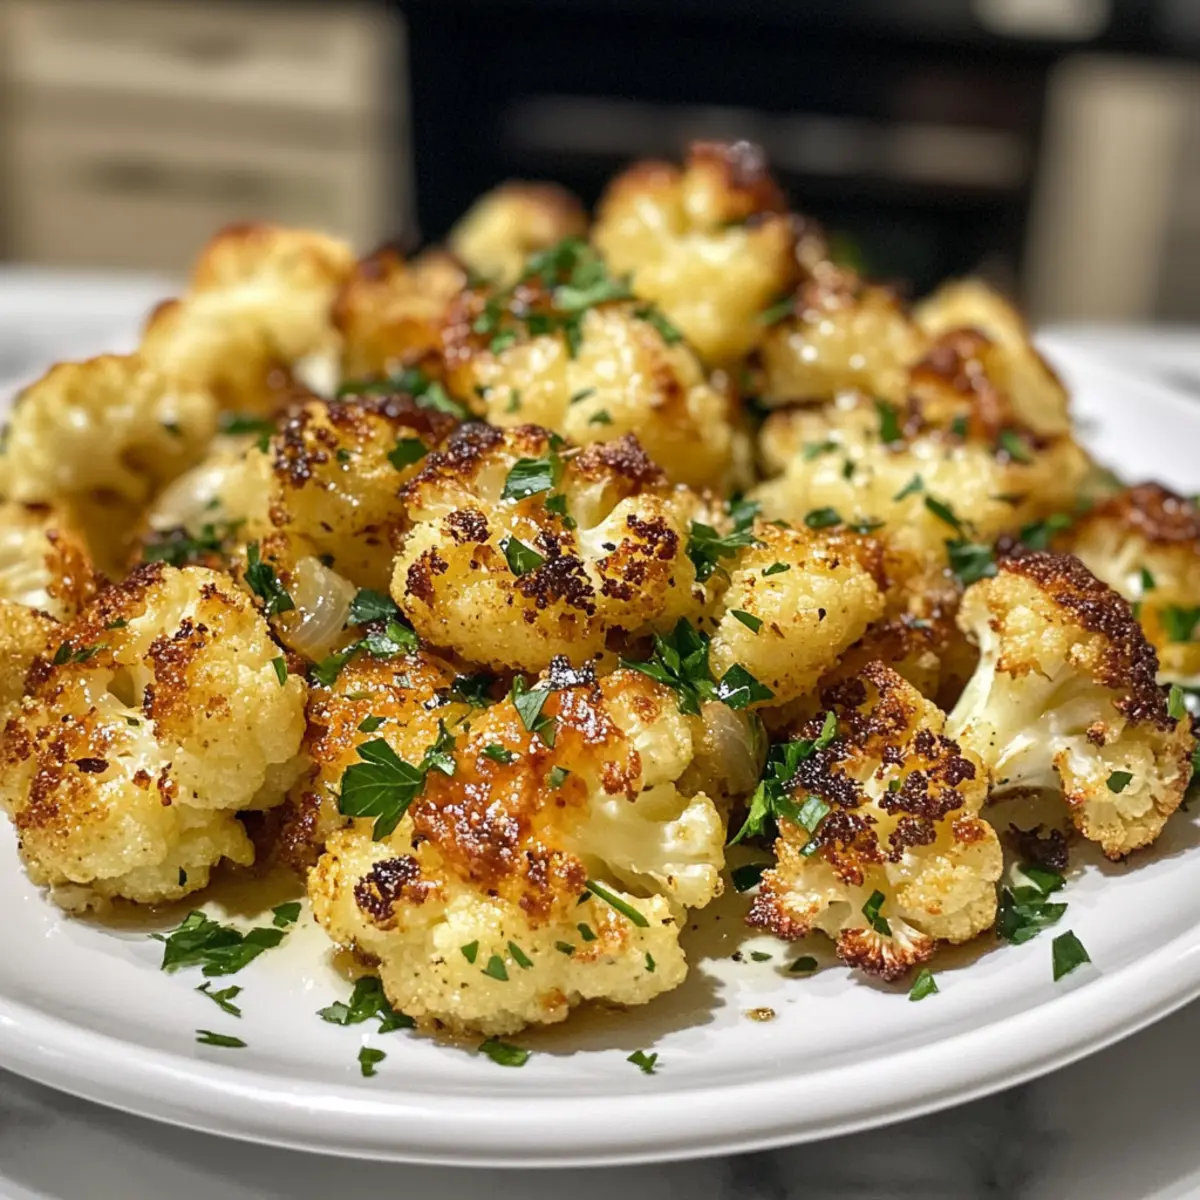
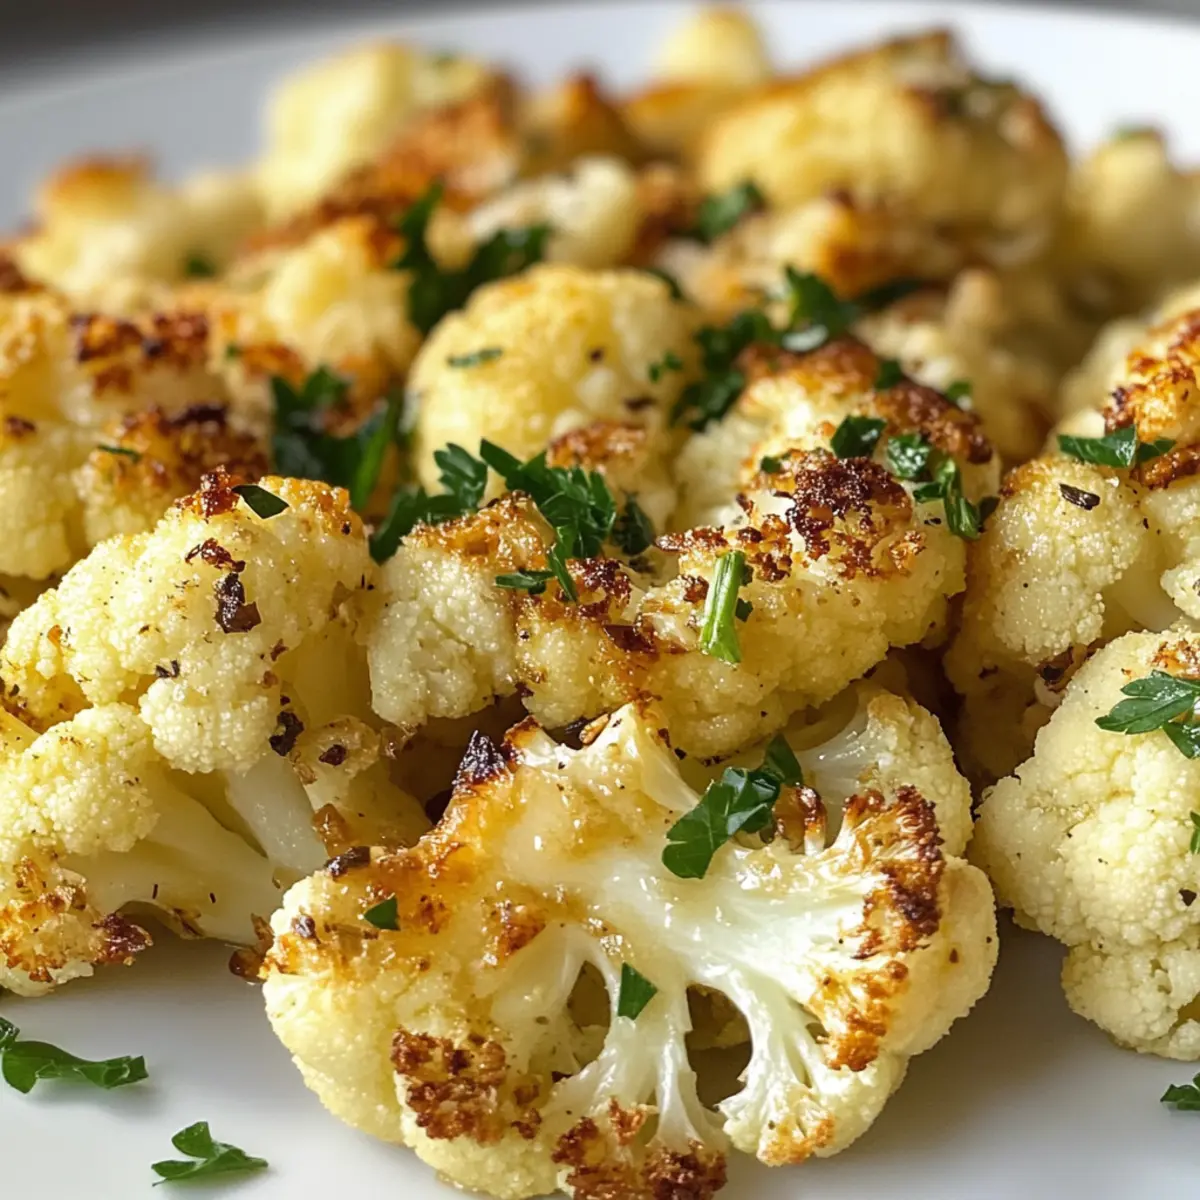
As the aroma of garlic wafts through the kitchen, it instantly transports me to cozy family dinners where every bite is a cherished moment. Today, I’m excited to share my recipe for Garlic Butter Roasted Cauliflower—a quick and healthy side dish that brings warmth to any meal. With just 10 minutes of prep, this recipe lets the oven handle the heavy lifting while you focus on other delights. The combination of rich, buttery garlic paired with the natural sweetness of roasted cauliflower creates a dish that even the pickiest eaters will adore. Plus, it’s effortlessly adaptable for anyone leaning towards a vegan lifestyle with just a simple swap. Are you ready to elevate your next dinner with this deliciously satisfying side?
Why is Garlic Butter Roasted Cauliflower a Must-Try?
Bold flavors: The blend of rich garlic and buttery goodness elevates plain cauliflower into a flavorful masterpiece that everyone will rave about.
Quick prep time: With just 10 minutes of hands-on work, you can whip this up even on your busiest days, making it the perfect side dish for those hectic weeknights.
Versatility: Whether you’re pairing it with grilled meats or serving it as the star of a vegetarian meal, this dish adapts beautifully to fit any table setting.
Healthy indulgence: Garlic Butter Roasted Cauliflower is not only delicious but also packed with nutrients, aligning with health-conscious eating habits. A great addition to your regular rotations, alongside my other favorite healthy side dishes, like Roasted Brussels Sprouts with Balsamic Glaze.
Crowd-pleaser: Even the pickiest eaters in your family will be begging for seconds, as this dish makes cauliflower exciting and enjoyable!
Simple substitutions: Want to keep it vegan? Just swap the butter with olive oil or plant-based butter without sacrificing taste. Get ready to impress your guests with this adaptable recipe!
Garlic Butter Roasted Cauliflower Ingredients
For the Cauliflower
• Cauliflower – This hearty vegetable forms the base of our dish; cut it into even-sized florets to ensure even cooking.
• Unsalted Butter – Adding richness and helping with browning, you can substitute this with plant-based butter for a vegan option.
For the Garlic Mixture
• Garlic (minced) – Infusing the dish with aromatic flavor, freshly minced garlic is the key to unlocking that comforting taste.
• Salt – Enhances the natural flavors of the cauliflower; adjust according to your taste preferences.
• Black Pepper – A sprinkle provides mild heat, perfectly complementing the buttery richness; opt for freshly ground for the best flavor.
For Garnish
• Fresh Parsley (for garnish) – This bright herb adds a pop of color and freshness to your dish, elevating both presentation and taste.
This Garlic Butter Roasted Cauliflower recipe is not just a side, it’s an experience that will make your dining table shine!
Step‑by‑Step Instructions for https://lekkerdish.com/wp-content/uploads/2026/01/Garlic-Butter-Roasted-Cauliflower.webp
Step 1: Preheat the Oven
Start by preheating your oven to 425°F (220°C). This high temperature is essential for achieving that perfect roasted flavor and golden-brown crispiness on your Garlic Butter Roasted Cauliflower. Ensure your oven rack is in the center position for even heat distribution. As it preheats, gather your ingredients to streamline the process ahead.
Step 2: Prepare the Garlic Butter Mixture
In a large mixing bowl, combine melted unsalted butter with minced garlic, salt, and freshly ground black pepper. Whisk this delightful mixture until well blended, allowing the rich aroma of garlic to fill the air. This step not only enhances flavor but also creates a beautiful base for our roasted cauliflower.
Step 3: Coat the Cauliflower Florets
Add the cauliflower florets to the garlic butter mixture in the bowl. Toss them gently but thoroughly to ensure each floret is generously coated with the flavorful blend. Aim for even coverage, as this will result in a more harmonious taste in your finished Garlic Butter Roasted Cauliflower.
Step 4: Spread on a Baking Sheet
Take a large baking sheet and line it with parchment paper for easy cleanup. Pour the coated cauliflower florets onto the sheet, spreading them out in a single layer. Avoid overcrowding to ensure they roast evenly and develop that signature crispy texture.
Step 5: Roast in the Oven
Place the baking sheet in the preheated oven and roast the cauliflower for 25–30 minutes. Halfway through, give the florets a gentle stir to promote even roasting. Keep a close eye on them; you’ll want to see a beautiful golden-brown color with a fork-tender texture indicating they are perfectly done.
Step 6: Garnish and Serve
Once roasted to perfection, remove the baking sheet from the oven. Allow the Garlic Butter Roasted Cauliflower to cool slightly before serving. For an added touch, sprinkle freshly chopped parsley over the dish to enhance its visual appeal and introduce a touch of freshness. Enjoy this delightful side dish warm!
Expert Tips for Garlic Butter Roasted Cauliflower
Cut Evenly: Ensure cauliflower florets are cut into uniform sizes to guarantee even roasting, preventing some pieces from burning while others are undercooked.
Avoid Overcrowding: Place cauliflower in a single layer on the baking sheet; overcrowding can result in steaming rather than roasting, ruining that desired crispy texture.
Opt for Fresh Garlic: Using fresh minced garlic enhances the flavor significantly; avoid pre-minced varieties for the best results in your Garlic Butter Roasted Cauliflower.
Monitor Cooking Time: Keep an eye on your vegetables as they roast to achieve a perfect golden-brown color; every oven is different, and timing may vary slightly.
Try Vegan Alternatives: For a tasty vegan version, substitute unsalted butter with olive oil or your favorite plant-based butter; both options maintain flavor without sacrificing texture.
What to Serve with Garlic Butter Roasted Cauliflower
This delightful side dish creates a warm, inviting atmosphere at any meal with its rich flavors and comforting textures.
- Grilled Chicken Skewers: Juicy, marinated chicken adds a savory complement to the buttery notes of the cauliflower, creating a satisfying balance.
- Quinoa Salad: A refreshing quinoa salad with cucumbers and ripe tomatoes provides a burst of freshness and a healthy crunch alongside the roasted richness.
- Crusty Garlic Bread: The buttery garlic bread echoes the flavors of the roasted cauliflower, perfect for scooping up every savory morsel on your plate.
- Roasted Brussels Sprouts: These charred bites of Brussels sprouts add a wonderful texture contrast and a hint of earthiness that pairs beautifully with the cauliflower.
- Creamy Coleslaw: A tangy, crunchy coleslaw brings a refreshing bite that lightens the meal while complementing the roasted flavors, making it a fantastic contrast.
- Lemon Herb Dressing: A light drizzle of lemon herb dressing over the cauliflower enhances its flavor while introducing a zesty brightness that elevates the whole experience.
- Chardonnay or Sauvignon Blanc: A crisp glass of white wine can elevate your meal, enhancing the rich garlic and butter notes while cleansing the palate.
- Dark Chocolate Mousse: For dessert, a rich dark chocolate mousse delivers a satisfying end to your meal, providing a sweet note that contrasts with the savory flavors.
- Crispy Tofu Steaks: For a heartier vegetarian option, crispy tofu steaks seasoned with soy sauce create a delicious protein to enjoy with the cauliflower.
- Fruit Salad: A simple fruit salad filled with seasonal berries offers a refreshing and vibrant finish to your meal, balancing the richness of the cauliflower delightfully.
Make Ahead Options
These Garlic Butter Roasted Cauliflower florets are ideal for meal prep, allowing you to enjoy a delicious side dish with minimal effort on busy weeknights! You can cut and coat the cauliflower in the garlic butter mixture up to 24 hours in advance; simply place it in an airtight container and refrigerate. To maintain their quality, make sure the florets are well-coated to avoid browning. When you’re ready to serve, spread the marinated cauliflower on a baking sheet and roast in a preheated oven at 425°F (220°C) for 25–30 minutes. Enjoy the convenience and flavor of freshly roasted garlic butter cauliflower without the last-minute rush!
Garlic Butter Roasted Cauliflower Variations
Feel free to get creative with this Garlic Butter Roasted Cauliflower; the possibilities are endless and delicious!
-
Vegan Swap: Use olive oil or plant-based butter instead of traditional unsalted butter for a flavorful vegan alternative. You’ll still enjoy all the comforting richness without any dairy.
-
Cheesy Delight: Sprinkle grated Parmesan over the cauliflower florets before roasting to add a delightful savoriness. For a really cheesy twist, combine with a mix of mozzarella and cheddar for maximum meltiness.
-
Spice It Up: Mix in red pepper flakes or cayenne pepper into the garlic butter for a fiery kick that elevates flavor. Adjust the amount to suit your heat preference, and watch how it transforms your dish!
-
Mixed Roasted Vegetables: Combine cauliflower with other veggies like broccoli, carrots, or Brussels sprouts for a vibrant medley. Adjust roasting times based on the ingredients for even cooking and maximum flavor.
-
Herb Infusion: Experiment with fresh or dried herbs such as thyme, rosemary, or oregano mixed into your garlic butter. This can provide your dish with an aromatic boost and added depth.
-
Crispy Topping: Add a topping of panko breadcrumbs mixed with herbs and olive oil before roasting for a crunchy texture that offers an exciting contrast to the tender cauliflower.
-
Zesty Citrus: Drizzle lemon or lime juice over the roasted cauliflower right before serving. This brightens the flavors and adds a refreshing finish that tantalizes the taste buds.
-
Nutty Crunch: Finish with toasted almonds or pine nuts sprinkled on top just before serving. The additional crunch and nutty flavor will elevate your Garlic Butter Roasted Cauliflower to new heights, making it an unforgettable side dish.
Remember, you can tailor this delightful recipe to suit any palate while turning a humble vegetable into a culinary masterpiece. Happy cooking!
How to Store and Freeze Garlic Butter Roasted Cauliflower
Fridge: Store leftover Garlic Butter Roasted Cauliflower in an airtight container for up to 3 days to maintain its flavor and texture.
Freezer: Allow the roasted cauliflower to cool completely before transferring it to a freezer-safe bag. Freeze for up to 2 months for later enjoyment.
Reheating: To reheat, place the cauliflower in a preheated oven at 375°F (190°C) for about 15-20 minutes to restore its crispiness. Avoid microwave reheating to keep it from becoming soggy.
Thawing: When ready to enjoy frozen cauliflower, thaw it in the fridge overnight before reheating for the best flavor and texture.
Garlic Butter Roasted Cauliflower Recipe FAQs
How do I choose ripe cauliflower?
Absolutely! When selecting cauliflower, look for heads that are firm, compact, and have tightly packed florets. The color should be bright white or creamy, without dark spots or blemishes. Avoid any florets that appear yellow or have black spots.
What’s the best way to store leftover Garlic Butter Roasted Cauliflower?
To maintain freshness, store your leftover Garlic Butter Roasted Cauliflower in an airtight container in the refrigerator for up to 3 days. This will help keep the flavors vibrant and the texture enjoyable. When you’re ready to enjoy leftovers, I recommend reheating them in the oven to retain their crispness!
Can I freeze Garlic Butter Roasted Cauliflower? If so, how?
Yes, you can freeze Garlic Butter Roasted Cauliflower! First, allow it to cool completely after roasting. Next, place the cooled cauliflower in a freezer-safe bag, removing as much air as possible to prevent freezer burn. Label the bag with the date, and you can freeze it for up to 2 months. When you’re ready to enjoy it, thaw it overnight in the fridge, then reheat in a preheated oven at 375°F (190°C) for about 15-20 minutes to bring back that delightful crispy texture.
What should I do if my cauliflower isn’t browning in the oven?
Very! If your cauliflower isn’t browning properly, consider a couple of things: first, ensure that you’re not overcrowding the baking sheet, as this can lead to steaming rather than roasting. Second, make sure your oven is preheated adequately before putting the cauliflower in. Finally, a light drizzle of olive oil or another round of seasoning can help promote browning if needed!
Can I make this recipe dairy-free?
Certainly! To adapt the Garlic Butter Roasted Cauliflower for a vegan lifestyle, simply replace the unsalted butter with olive oil or your favorite plant-based butter. This alternative maintains the rich flavor while keeping it completely dairy-free, making it a hit with everyone!
Is Garlic Butter Roasted Cauliflower safe for pets?
While it’s delicious for humans, you should avoid feeding your pets roasted garlic, as it can be harmful to them. The good news is that plain cauliflower is safe for most dogs and cats, so if you want to share a piece of this dish, simply set some aside before adding the garlic and butter!

Savory Garlic Butter Roasted Cauliflower in Minutes
Ingredients
Equipment
Method
- Preheat the oven to 425°F (220°C).
- In a large mixing bowl, combine melted unsalted butter with minced garlic, salt, and pepper.
- Add the cauliflower florets to the garlic butter mixture and toss gently.
- Spread the coated cauliflower on a lined baking sheet in a single layer.
- Roast in the oven for 25–30 minutes, stirring halfway through.
- Remove from oven, garnish with parsley, and serve warm.
Leave a Reply