
As I rummaged through my pantry on a sunny afternoon, I stumbled upon a forgotten package of Oreo cookies—a delightful treasure waiting to be transformed. That’s when the idea struck: Bunny Oreo Balls! These easy no-bake chocolate treats are not only a fun, festive project for the whole family, but they also deliver a combination of rich creaminess and satisfying crunch that’s bound to win everyone over. With their adorable bunny design, they’re the perfect addition to your Easter celebrations. Plus, since they require minimal prep time, you’ll have more moments to create lasting memories with loved ones. Are you ready to make these charming little desserts that are sure to hop right off your dessert table?
Why Are Bunny Oreo Balls a Must-Make?
Fun and Festive: Bunny Oreo Balls are the ultimate way to bring joy to your Easter celebrations! Their adorable bunny design is sure to delight both kids and adults alike.
No-Bake Simplicity: With just a few ingredients and zero baking required, you’ll save time while delivering a show-stopping dessert.
Family-Friendly Activity: Get the little ones involved! Rolling these treats into bunny shapes can create unforgettable family memories.
Customizable Creations: Want to mix it up? You can easily swap Oreo flavors or decorations to fit other holidays, making this a year-round favorite.
Irresistible Taste: Each bite offers a luscious blend of creamy Oreo and rich chocolate that will leave your guests coming back for more! Check out these Pineapple Christmas Balls for another fun treat idea.
Bunny Oreo Balls Ingredients
• Here’s everything you need for Bunny Oreo Balls!
For the Oreo Mixture
- Oreo Cookies – The base of this treat; choose regular or gluten-free for a delightful crunch.
- Cream Cheese – Creates a creamy filling; be sure to soften it for easier mixing.
For the Coating
- White Chocolate/Candy Melts – Adds a sweet, smooth finish to these Bunny Oreo Balls; dark chocolate makes a yummy substitute.
For Decorations
- Mini Marshmallows – Perfect for adorable bunny ears; fresh ones work best to stick on easily.
- Pink Sugar Sprinkles – Use these to add a pop of color to the ears; swap with edible glitter for a sparkling twist.
- Black Candy Melts/Edible Marker – Great for facial details; melted chocolate can also create charming features if needed.
Step‑by‑Step Instructions for Bunny Oreo Balls
Step 1: Prepare Oreo Mixture
Begin by crushing the Oreo cookies into fine crumbs. You can do this by placing them in a food processor or putting them in a sealed bag and using a rolling pin. In a mixing bowl, combine the crumbs with softened cream cheese, mixing until you achieve a smooth, dough-like consistency. This should take about 3-5 minutes of blending, making sure everything is well incorporated.
Step 2: Shape the Balls
Once your mixture is ready, take small portions and roll them into 1-inch balls using your hands. Place each ball on a parchment-lined baking sheet. Make sure they are evenly spaced to allow room for decoration later. Refrigerate the shaped balls for 30 minutes to firm up, which will make the next steps easier and prevent melting during coating.
Step 3: Coat with Chocolate
After refrigeration, melt the white chocolate or candy melts in a microwave-safe bowl. Heat in 15-30 second intervals, stirring after each, until completely smooth and melted. Using a fork or dipping tool, dip each ball into the chocolate, allowing any excess to drip off before returning them to the parchment. Ensure they are fully coated to give your Bunny Oreo Balls a glossy finish.
Step 4: Decorate as Bunnies
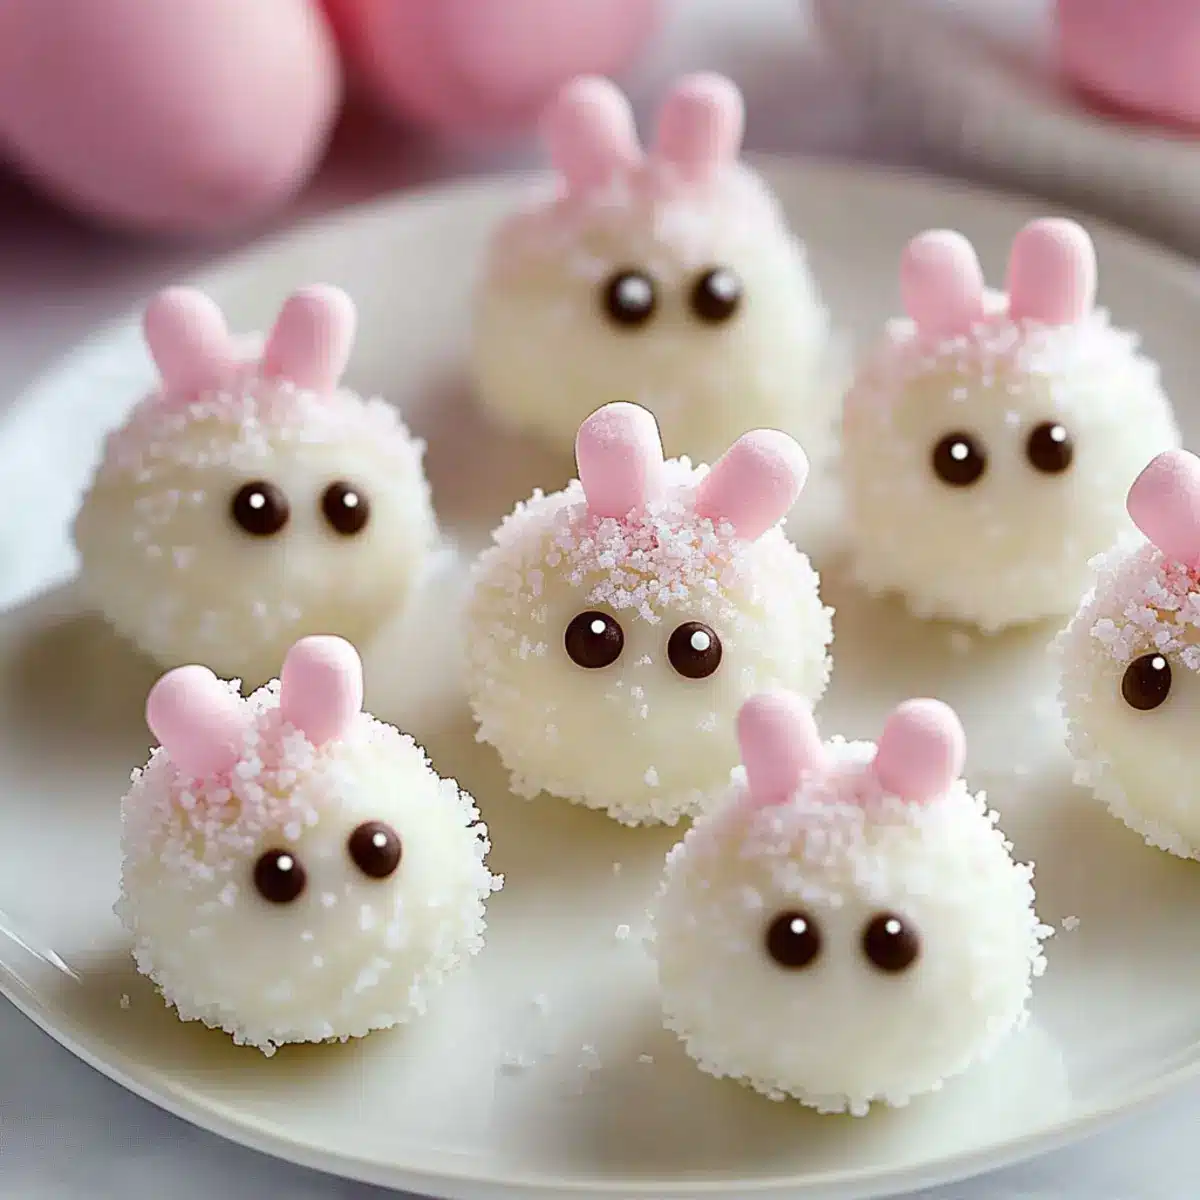
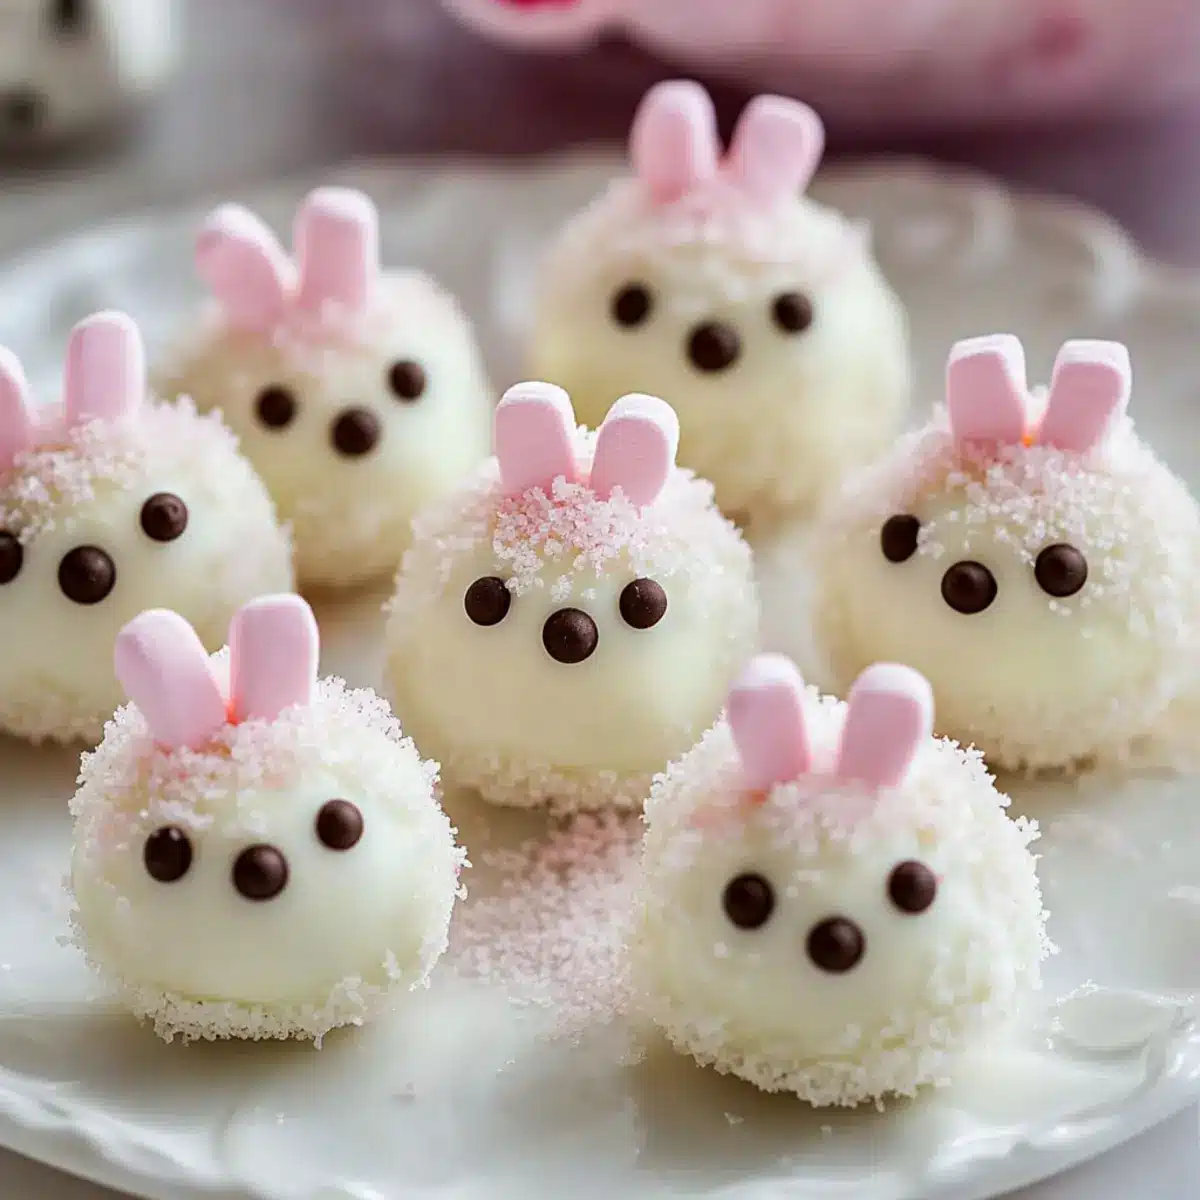
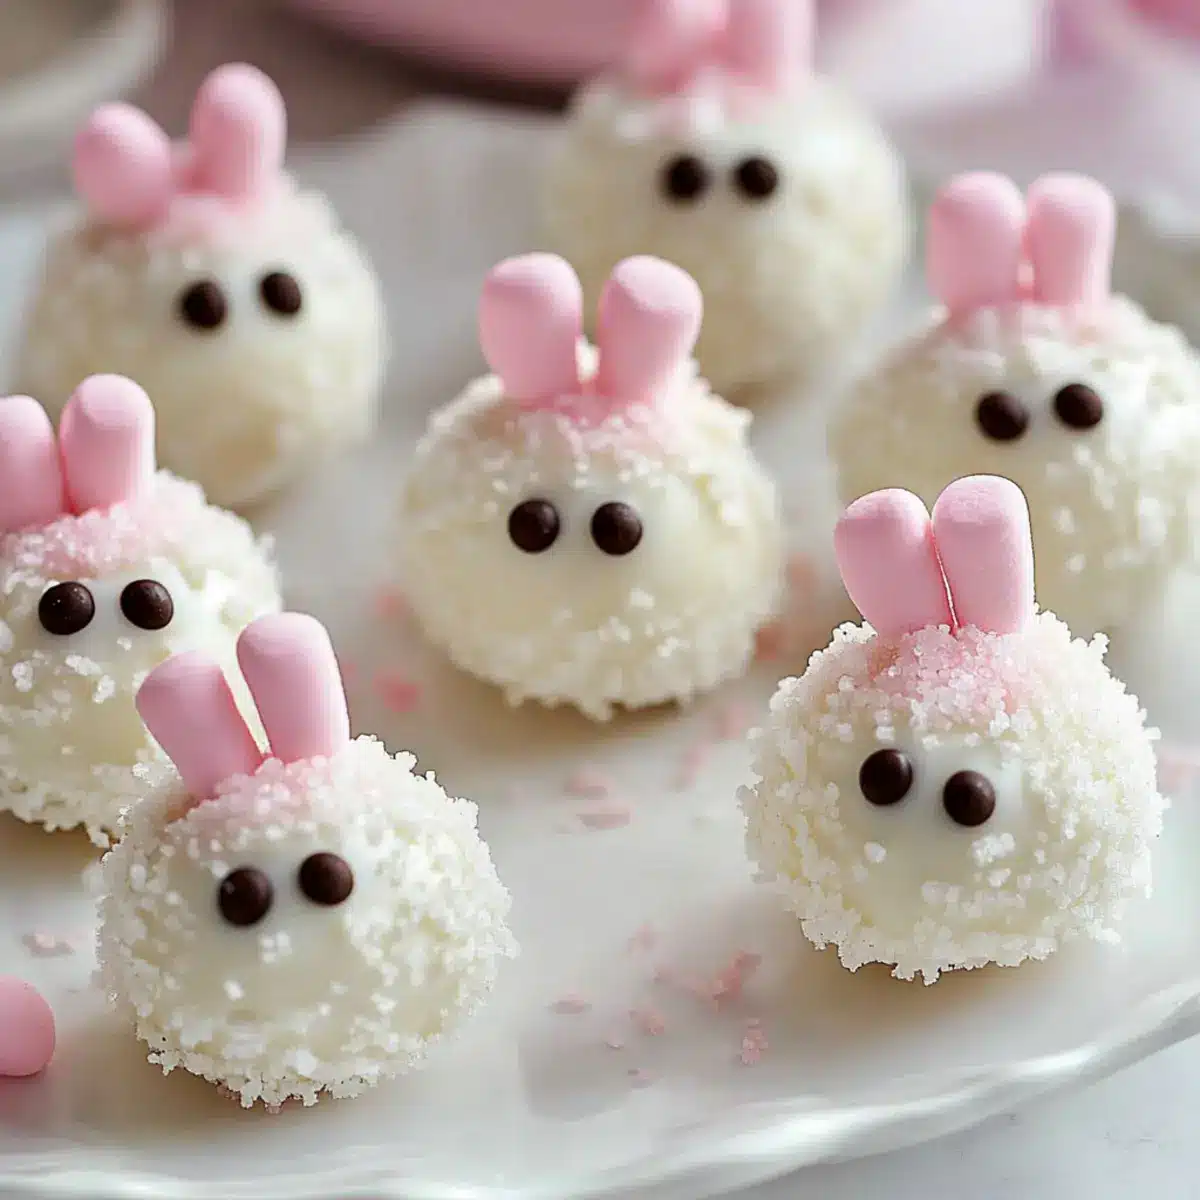
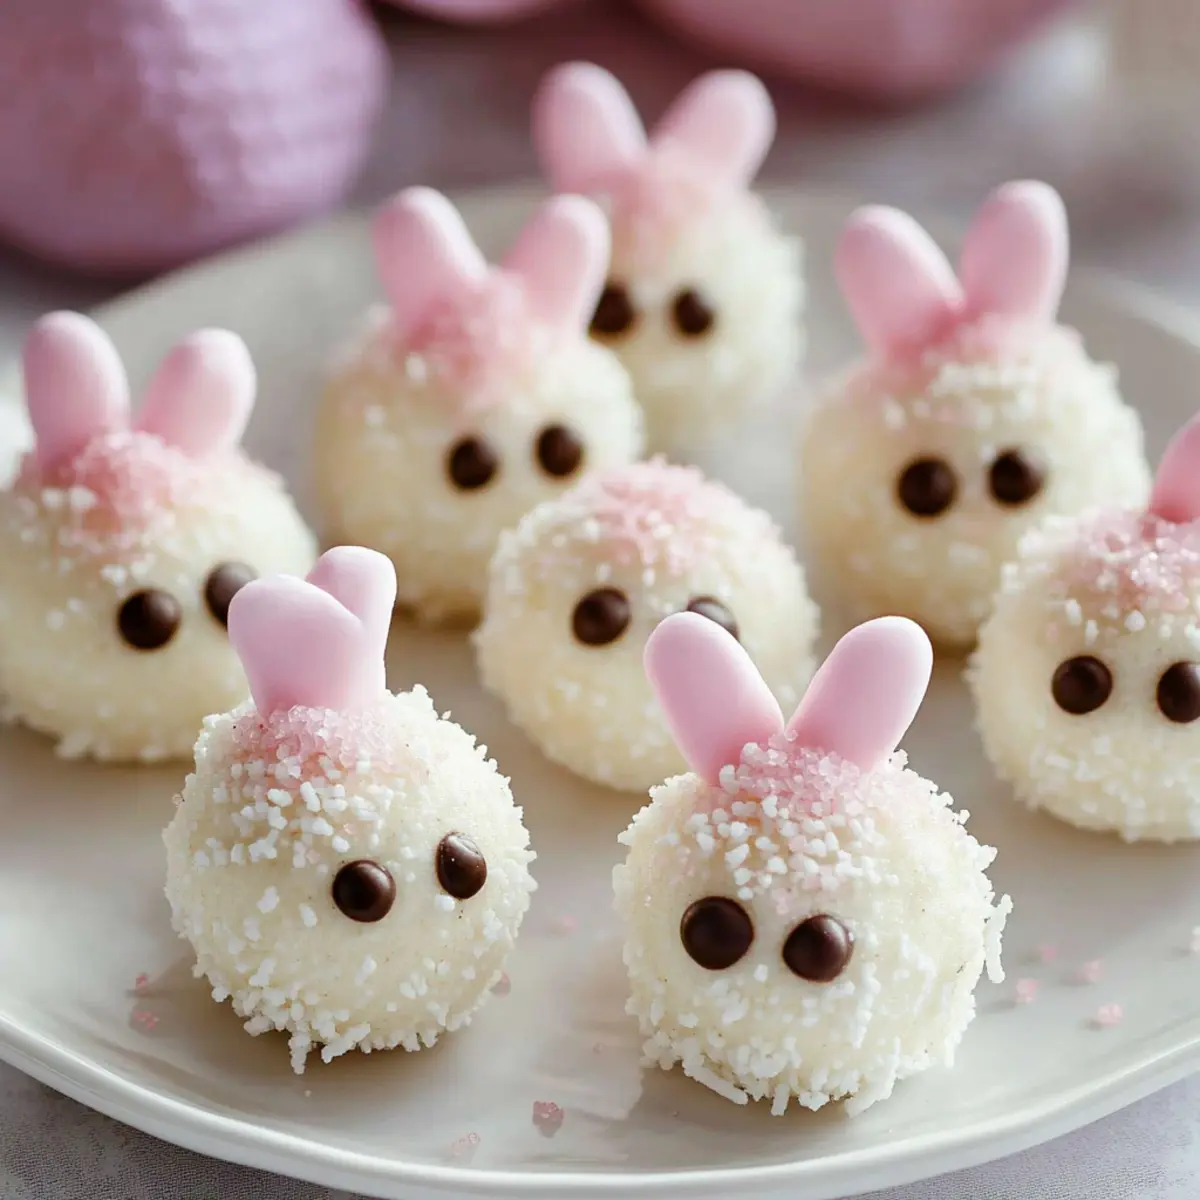
While the chocolate coating is still wet, it’s time to add the decorations. For bunny ears, cut mini marshmallows in half and dip the sticky side into pink sugar. Press these marshmallow halves gently onto the top of each coated ball. For the facial features, melt some black candy melts or use an edible marker to draw on cute eyes and a nose. Get creative to give each bunny its own personality!
Step 5: Let Set
Allow the decorated Bunny Oreo Balls to sit at room temperature or refrigerate for about 20-30 minutes until the chocolate is fully set. This will ensure that all decorations adhere properly and the chocolate coating hardens nicely, giving you a delightful and festive dessert ready for serving. After setting, they’re perfect for sharing at Easter celebrations or any festive gathering.
What to Serve with Bunny Oreo Balls?
Indulge in the perfect pairing to elevate your festive dessert table and create a memorable celebration.
-
Fresh Fruit Medley: A vibrant assortment of seasonal fruits adds a refreshing burst of flavor and balances the sweetness of the Bunny Oreo Balls.
-
Chocolate-Covered Strawberries: These luscious treats echo the chocolate notes in the Bunny Oreo Balls, making for a delightful chocolate duo.
-
Vanilla Ice Cream: Creamy vanilla ice cream serves as a lovely contrast, offering both a cool and comforting complement to these festive sweets.
-
Coffee or Espresso: Serve with a cup of bold coffee to enhance the chocolatey richness, making each nibble even more satisfying.
-
Milkshakes: A dreamy, thick milkshake brings a nostalgic touch that kids and adults alike will find irresistible alongside these charming bunnies.
-
Decorative Easter Cookies: Delightful cookies shaped like eggs or other bunnies add flair to your spread, enhancing the festive theme while providing contrasting textures.
These pairings will not only accentuate your Bunny Oreo Balls but also bring joy to your table, uplifting the overall experience of your Easter celebrations!
How to Store and Freeze Bunny Oreo Balls
Fridge: Store Bunny Oreo Balls in an airtight container in the refrigerator for up to 5 days to maintain freshness and prevent drying out.
Freezer: For longer storage, freeze Bunny Oreo Balls in a single layer on a baking sheet, then transfer to a freezer-safe container for up to 3 months.
Thawing: When ready to enjoy, thaw the frozen Bunny Oreo Balls in the refrigerator for a few hours or at room temperature for about 30 minutes before serving.
Reheating: These treats are best served chilled, so no reheating is necessary; just enjoy them straight from the fridge!
Bunny Oreo Balls Variations & Substitutions
Feel free to take these Bunny Oreo Balls and make them your own with these fun and delicious twists!
-
Gluten-Free: Use gluten-free Oreos to create a treat everyone can enjoy, ensuring no one misses out on the fun.
-
Dairy-Free: Substitute cream cheese with a dairy-free alternative like cashew cream for a lighter version that still tastes great.
-
Flavor Swap: Experiment with different Oreo flavors, like mint or peanut butter, to elevate the classic recipe into something uniquely yours. A minty twist adds a refreshing kick that complements the sweet chocolate beautifully!
-
Colorful Ears: Instead of pink sugar, try using colored edible glitter or sprinkles to make your bunny ears pop with personality. This is a simple swap that brings a festive flavor all on its own.
-
Cocoa Coating: For a richer taste, dip the Bunny Oreo Balls in dark chocolate instead of white chocolate. The combination of dark chocolate with the sweet Oreo mixture creates a delightful contrast.
-
Mini Egg Surprise: For an added treat, insert a mini chocolate egg inside each ball before coating to surprise your guests! The creamy center will melt in your mouth, making each bite even more enjoyable.
-
Seasonal Decor: Customize for different holidays by decorating with seasonal candy. For Halloween, consider using candy corn, or swap to chocolate-covered pretzels for a quirky look during Christmas. Check out these Spinach Garlic Meatballs for festive ideas!
-
Spicy Kick: Add a pinch of cayenne pepper to the Oreo mixture for those who love a bit of heat mixed with their sweetness. It adds a surprising zing that will intrigue your taste buds.
Feel free to mix and match these suggestions to create Bunny Oreo Balls that reflect your taste and creativity!
Expert Tips for Bunny Oreo Balls
-
Soft Cream Cheese: Ensure cream cheese is softened to room temperature for easy blending into the Oreo mixture, avoiding clumps.
-
Chill for Shape: Refrigerate the shaped balls for at least 30 minutes to firm up; this prevents them from melting during the chocolate coating process.
-
Use a Fork: For an even chocolate coating, use a fork or dipping tool. This method also helps minimize excess chocolate, creating a smoother finish.
-
Simple Decorations: Start with basic bunny decorations for kids. Encourage family creativity but keep it simple; they’ll appreciate the fun more than complicated details!
-
Let It Set: Allow Bunny Oreo Balls to set completely after decoration to ensure they hold their shape and the chocolate coating hardens properly before serving.
Make Ahead Options
Bunny Oreo Balls are an ideal choice for busy home cooks looking to simplify their holiday preparations! You can prepare the Oreo mixture up to 24 hours in advance; just crush the Oreos and blend them with cream cheese, then store the mixture in an airtight container in the refrigerator. Additionally, you can shape the balls a day ahead, refrigerate them, and then dip them in chocolate or candy melts on the day you plan to serve them, ensuring they remain just as delicious. For best results, coat them close to serving time to maintain that luscious chocolate finish. When ready to serve, complete the fun by decorating them with bunny ears and facial features, and you’ll have delightful treats that are ready to impress!
Bunny Oreo Balls Recipe FAQs
What type of Oreo cookies should I use?
Absolutely! You can use either regular Oreo cookies or gluten-free versions. The classic Oreos provide the perfect balance of sweetness and texture, but gluten-free Oreos will work just as well without compromising flavor.
How should I store Bunny Oreo Balls?
Store Bunny Oreo Balls in an airtight container in the refrigerator for up to 5 days. This keeps them fresh and maintains their delightful gooey texture. Make sure they are completely cooled and set before storing to avoid sticking together.
Can I freeze Bunny Oreo Balls, and if so, how?
Yes! To freeze Bunny Oreo Balls, place them in a single layer on a baking sheet and freeze until solid. Then transfer them to a freezer-safe container, where they can be stored for up to 3 months. For serving, thaw them in the refrigerator for a few hours or at room temperature for about 30 minutes before enjoying.
What should I do if my chocolate coating is too thick?
Very good question! If your chocolate coating seems thick or clumpy, it’s likely that it wasn’t melted properly. Try reheating it in 15-second intervals in the microwave and stir well after each interval until it becomes smooth. You can also add a little bit of vegetable oil to the melted chocolate to thin it out, making it easier to coat the Bunny Oreo Balls evenly.
Are Bunny Oreo Balls suitable for those with allergies?
It’s essential to note that Bunny Oreo Balls contain dairy from cream cheese and chocolate. If you have dairy allergies, consider using a dairy-free cream cheese alternative and vegan chocolate. Always check the labels to ensure they’re safe for your dietary needs.
Can kids help make Bunny Oreo Balls?
The more the merrier! Involving kids in the process is a fantastic idea. They can help roll the balls, dip them in chocolate, and add fun decorations. Just be sure to supervise them around melting chocolate or sharp utensils. It’s a great family bonding activity that creates lasting memories!
Bunny Oreo Balls: Fun No-Bake Treats for a Festive Easter
Ingredients
Equipment
Method
- Crush the Oreo cookies into fine crumbs and mix with softened cream cheese until smooth.
- Roll the mixture into 1-inch balls and place on a parchment-lined baking sheet.
- Refrigerate for 30 minutes to firm up.
- Melt white chocolate or candy melts in a microwave-safe bowl until smooth.
- Dip each ball in the melted chocolate and return to parchment.
- Decorate with mini marshmallow halves for ears and add facial features using black candy melts or edible marker.
- Let sit at room temperature or refrigerate for 20-30 minutes until the chocolate is set.
Leave a Reply