
Whether it’s the cheerful pastel colors or the delicious crunch of Oreo cookies, springtime desserts have a unique ability to evoke joy. This Easter, I’m excited to share my delightful Easter Oreo Cookie Casserole—a no-bake wonder that’s not only simple to whip up but also a guaranteed crowd-pleaser. With just about 15 minutes of prep time, you can create a decadent layered dessert that will impress both kids and adults alike. This recipe brings the celebration of Easter right to your table with layers of creamy filling and crunchy cookies, making it the perfect addition to your holiday festivities. Are you ready to bring a playful twist to your dessert table? Let’s dive into the exciting layers of this fabulous casserole!
Why is this casserole a must-try?
No-Bake Ease: This Easter Oreo Cookie Casserole comes together in just 15 minutes, making it perfect for busy hosts who want to delight without the oven hustle.
Kid-Friendly Fun: Bursting with vibrant colors and crunchy textures, this dessert is sure to be a hit with your little ones and adults alike, making it a fun addition to any gathering.
Layered Indulgence: The luscious cream cheese filling perfectly complements the Oreo layers for a divine treat everyone will rave about, reminiscent of childhood delights.
Versatile Twist: Feel free to customize with your favorite candies or use gluten-free cookies for a variation that caters to dietary needs. Don’t forget to check out my Cheesy Hamburger Casserole or Croissant Breakfast Casserole for more delicious ideas!
Memorable Presentation: Serving this dessert in a clear trifle bowl allows you to showcase its beautiful layers, making it an eye-catching centerpiece for your Easter table.
Easter Oreo Cookie Casserole Ingredients
For the Casserole Layers
• Oreo cookies – Essential for a crunchy base that adds delightful flavor.
• Mini Oreos – Perfect for garnishing on top, enhancing the look and texture.
For the Cream Filling
• Cream cheese – Provides a rich, creamy filling; be sure to let it soften for easy mixing.
• Unsalted butter – Adds richness and helps bind the filling; margarine works as a substitute if needed.
• Powdered sugar – Sweetens the cream without grittiness; granular sugar can alter the texture, so stick with powdered for best results.
• Whipped topping – Gives that airy texture; homemade whipped cream can be used but ensure you stabilize it well.
For the Colorful Touch
• Pastel candy-coated chocolates – Brighten up the dish with fun colors and a hint of crunch; mini chocolate chips or dried fruits can also be great alternatives.
This collection of Easter Oreo Cookie Casserole ingredients ensures you have everything you need for a stunning, festive dessert that will bring joy and sweetness to your spring celebrations!
Step‑by‑Step Instructions for Easter Oreo Cookie Casserole
Step 1: Prepare Ingredients
Begin by crushing 20 Oreo cookies into chunky pieces using a food processor or by placing them in a zip-top bag and hitting them with a rolling pin. Reserve about 5 whole Oreos and a handful of pastel candy-coated chocolates for topping later. This preparation sets the foundation for your delightful Easter Oreo Cookie Casserole.
Step 2: Make Filling
In a large mixing bowl, combine 8 ounces of softened cream cheese and ¼ cup of unsalted butter. Using a hand mixer, beat the mixture until it’s smooth and creamy, approximately 2 minutes. Gradually add 1 cup of powdered sugar, mixing until well combined. Carefully fold in 8 ounces of whipped topping to create a fluffy filling that will layer beautifully with your crushed cookies.
Step 3: Assemble Layers
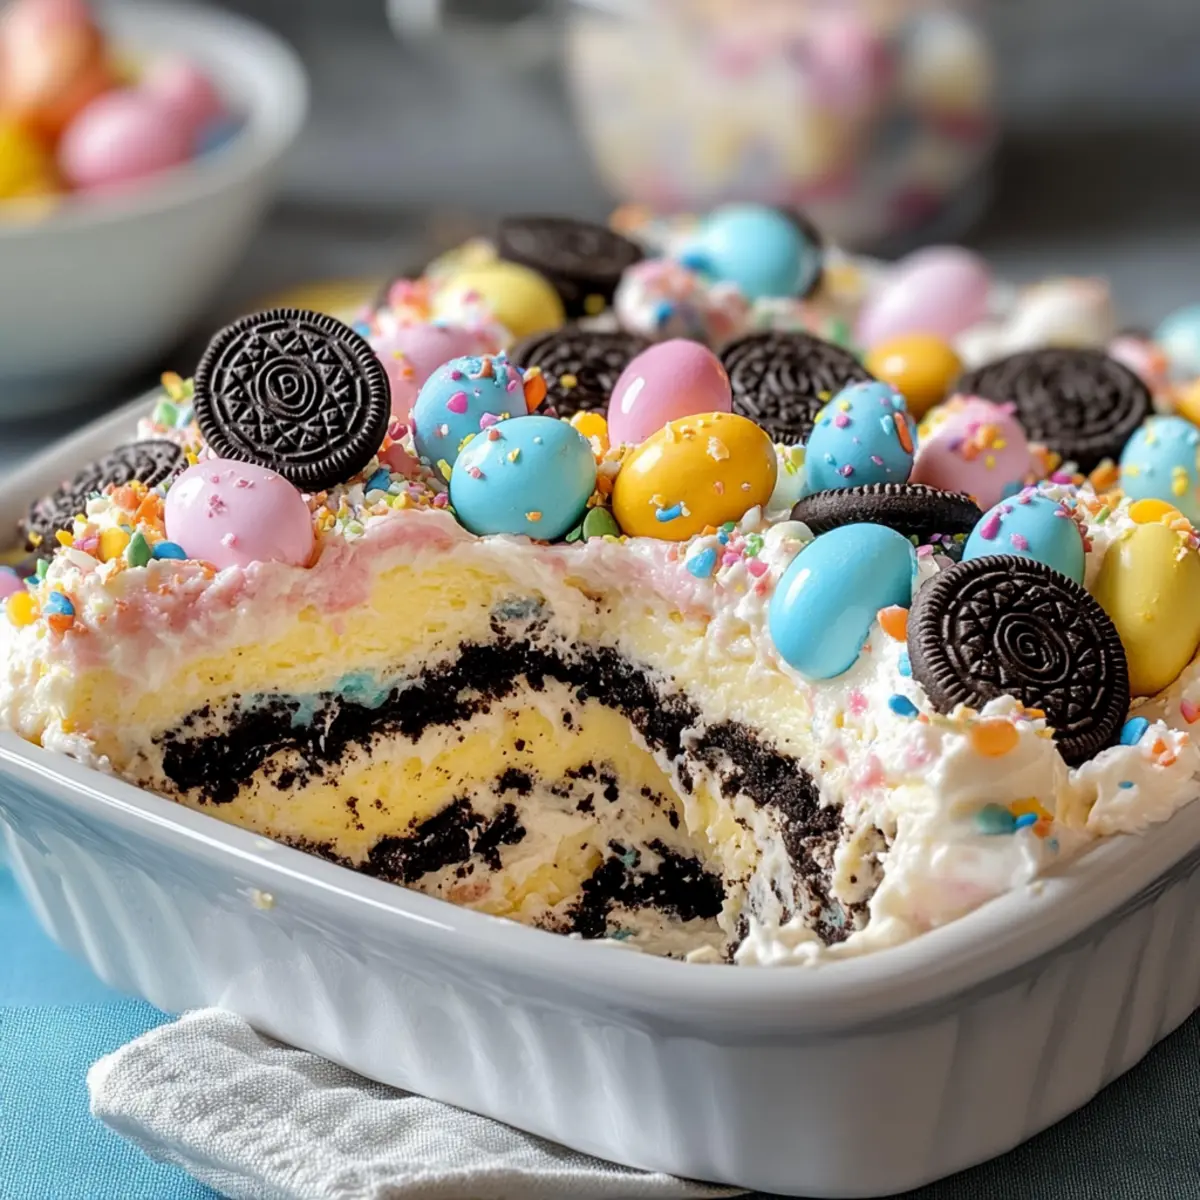
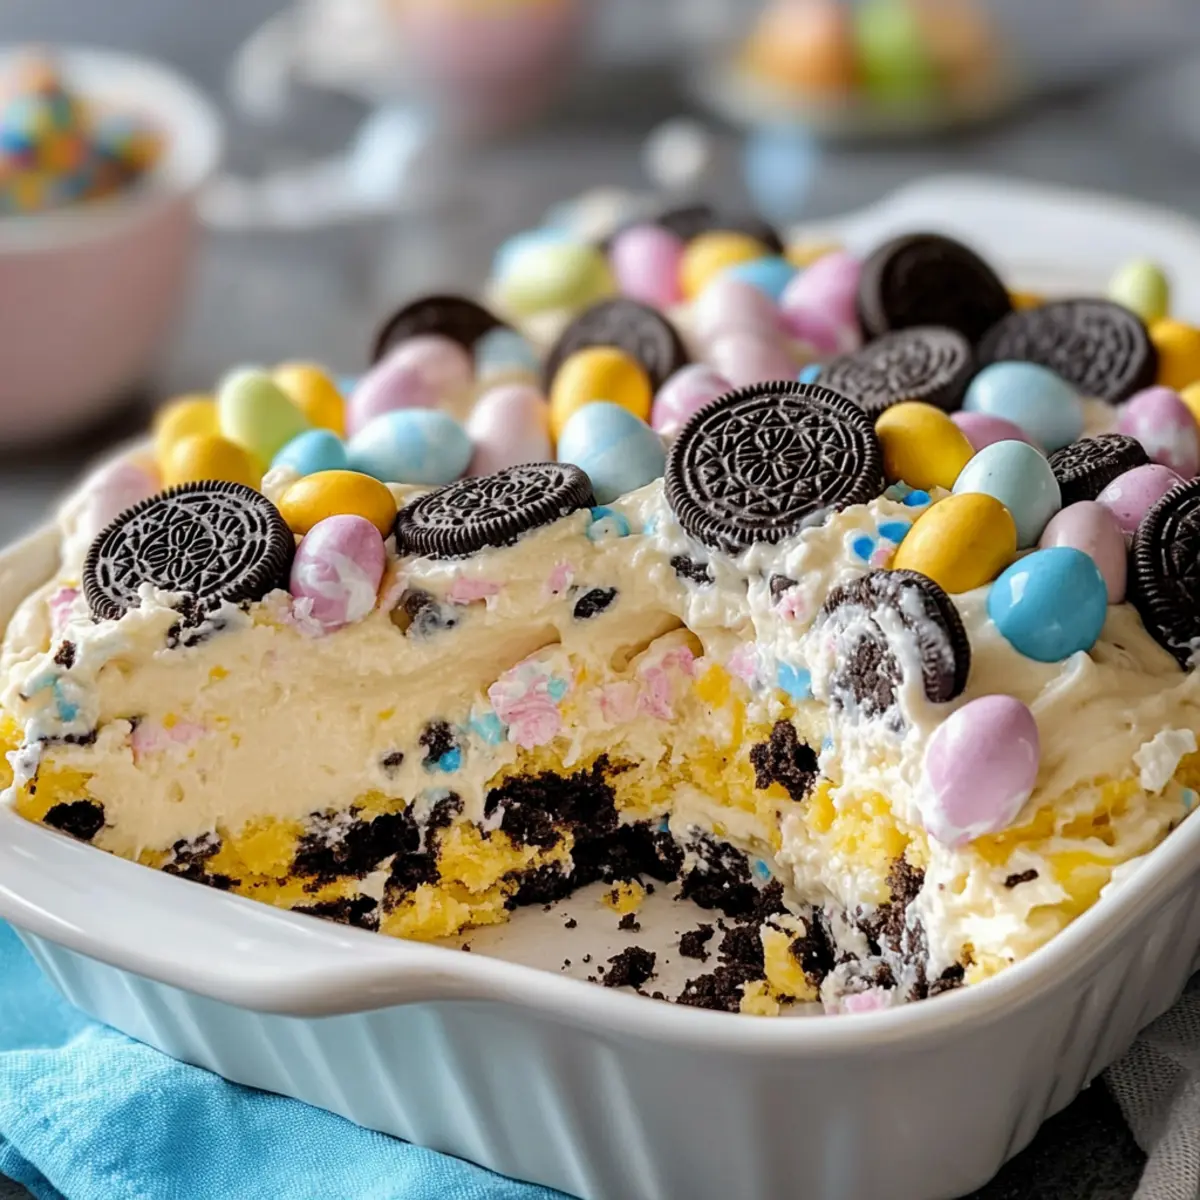
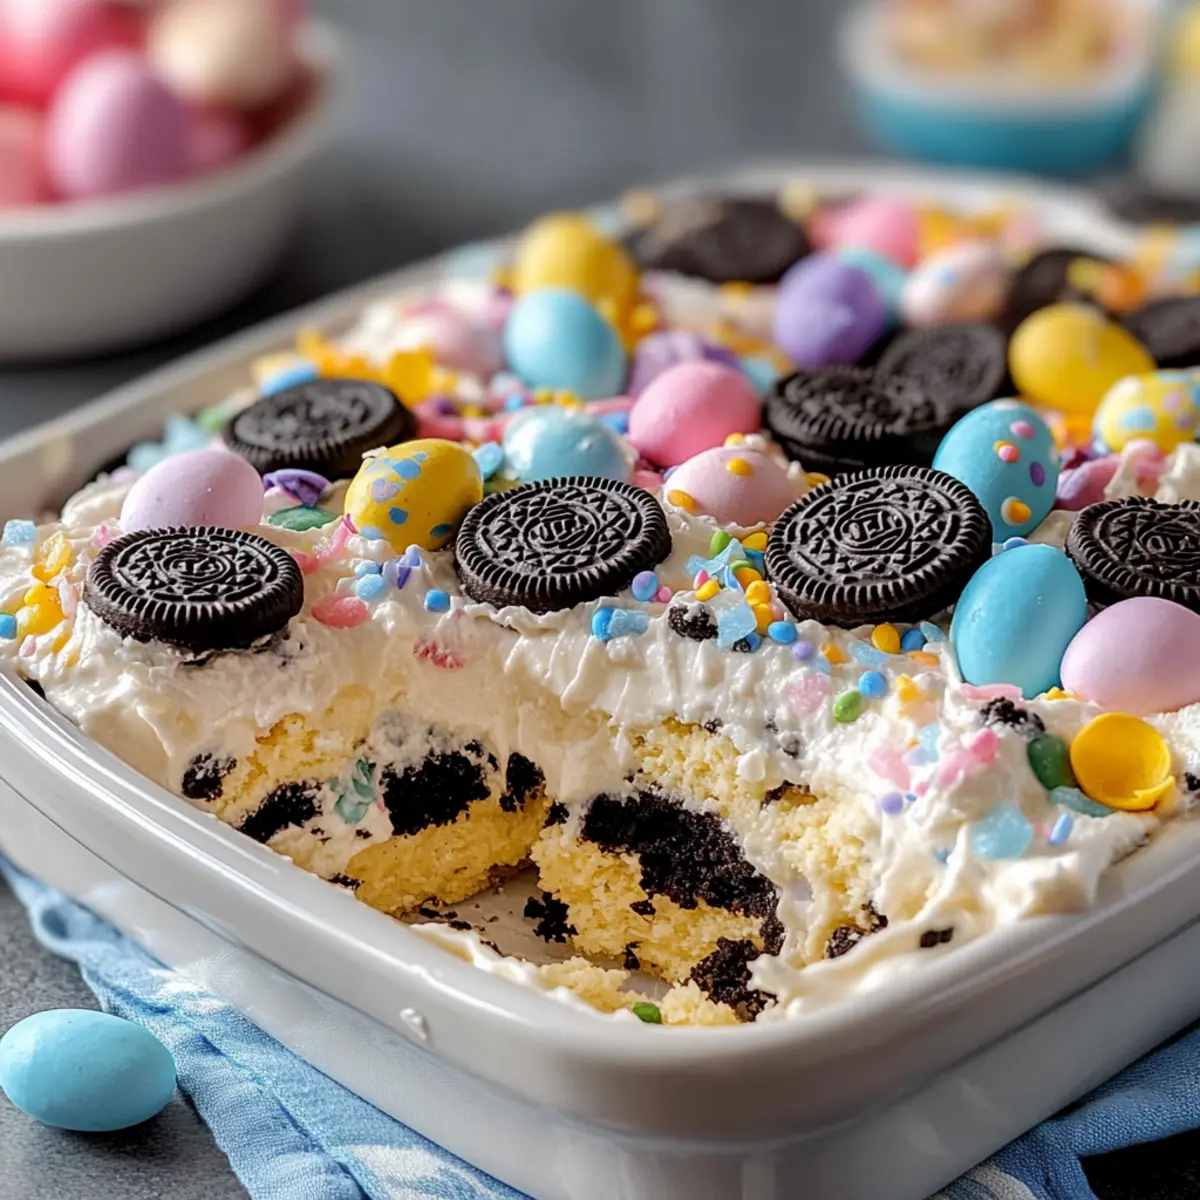
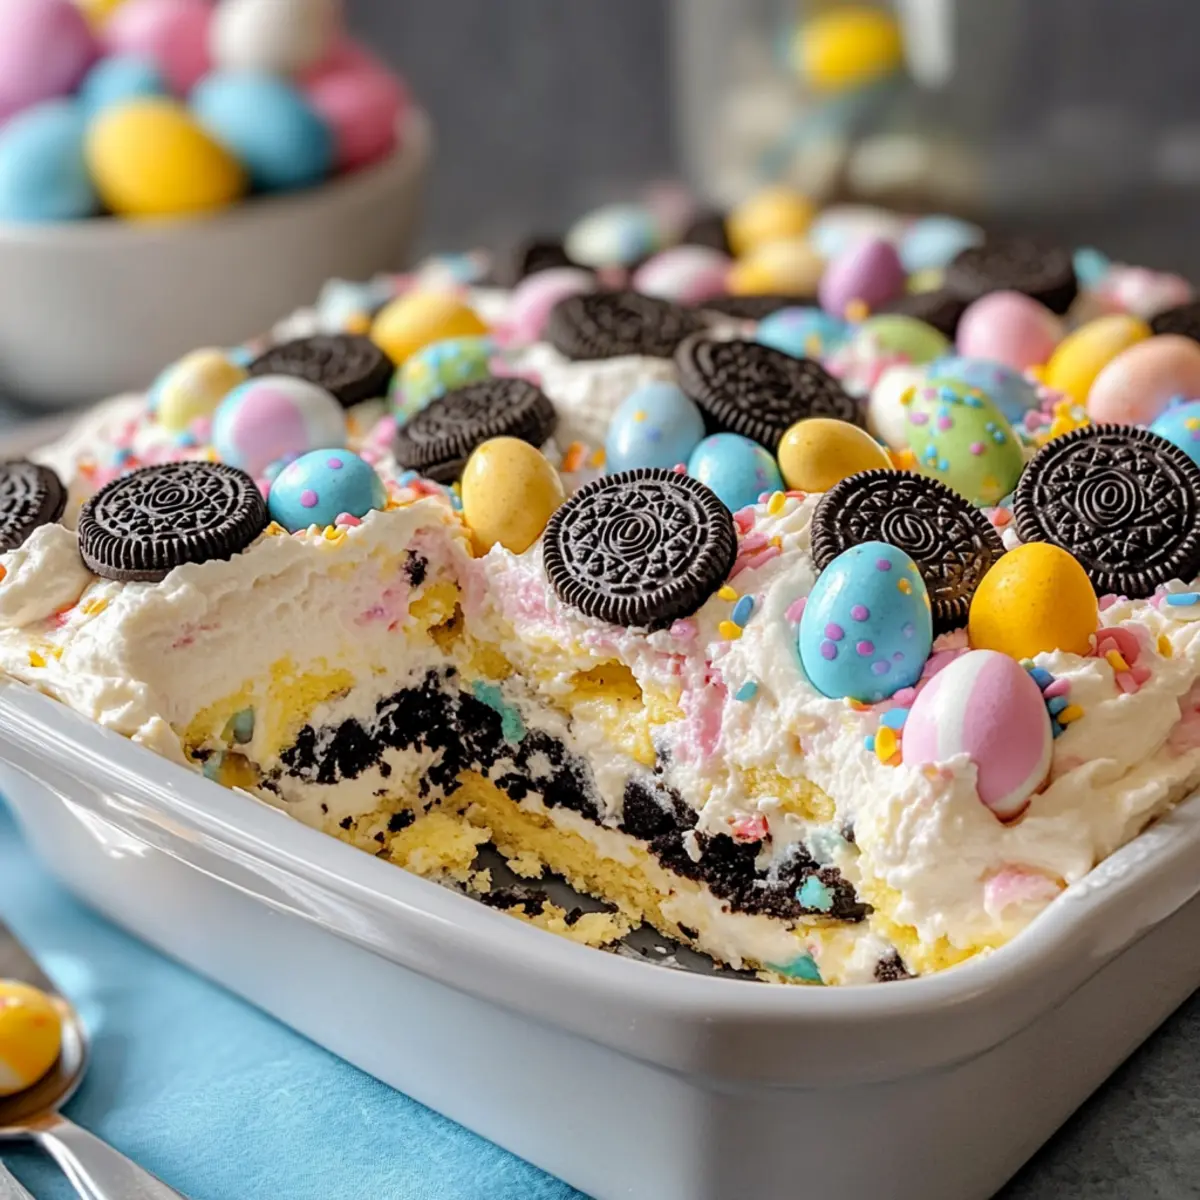
In a clear serving dish or trifle bowl, start layering by adding half of your crushed Oreos to the bottom. Spread half of the cream cheese mixture smoothly over the Oreo layer, then sprinkle half of the reserved pastel candies evenly on top. Repeat this process, layering the remaining crushed Oreos, followed by the rest of the cream mixture, and finish with a delightful sprinkle of candies.
Step 4: Chill
Cover your assembled Easter Oreo Cookie Casserole with plastic wrap or a lid, then refrigerate for at least 1 hour. This chilling allows the layers to set and combine flavors, giving the casserole a delightful texture. For optimal taste and texture, let it chill overnight, keeping the vibrant colors and crunchy layers intact.
Step 5: Serve
Once chilled, remove the Easter Oreo Cookie Casserole from the fridge. Before serving, crumble the reserved whole Oreos on top for added crunch and visual appeal. Scoop generous portions into bowls or onto plates, and enjoy this festive no-bake dessert that brings smiles to both kids and adults, perfect for your spring celebrations!
Make Ahead Options
These Easter Oreo Cookie Casserole layers are perfect for meal prep enthusiasts looking to save time before the festivities! You can prepare the casserole up to 24 hours in advance by following these steps: layer the crushed Oreo cookies and creamy filling, then cover and refrigerate. The key is to ensure it’s well-wrapped to maintain the cookie crunch; avoid letting it sit too long to prevent sogginess. When you’re ready to serve, simply crumble the reserved whole Oreos and sprinkle them on top for that final touch, ensuring a stunning presentation. This no-bake treat will delight your guests and allow you more time to enjoy the celebration!
Easter Oreo Cookie Casserole Variations
Feel free to explore these fun and delightful twists on the classic Easter Oreo Cookie Casserole!
-
Gluten-Free: Swap Oreos for gluten-free chocolate cookies to create a deliciously safe dessert for those with dietary restrictions. The taste remains rich, and it’s perfect for everyone!
-
Nutty Bliss: Add a layer of crushed walnuts or pecans between the creamy layers for an enjoyable crunch that complements the softness of the filling. The nutty flavor enhances the overall experience!
-
Fruit Forward: Incorporate layers of sliced strawberries or bananas for a fresh twist. The sweetness of the fruit balances beautifully with the cream, making every bite a burst of spring!
-
Chocolate Lovers: Use chocolate cream cheese instead of regular for an extra indulgent treat! This will give the casserole a rich, chocolaty flavor that pairs perfectly with the Oreos.
-
Dairy-Free: Substitute cream cheese and whipped topping with dairy-free alternatives, like coconut cream and vegan cream cheese, perfect for those watching their dairy intake. You’ll achieve a light and tasty result!
-
Minty Fresh: Mix in a few drops of mint extract to the filling or use Mint Oreos for a refreshing minty twist that’s perfect for celebrating spring! It adds a delightful zing to this layered dessert.
-
Candy Crush: Instead of pastel candies, sprinkle crushed Reese’s cups or mini M&Ms for a fun texture and a sweet surprise in each layer. This twist will keep everyone guessing!
-
Spicy Kick: For those who love a hint of spice, consider adding a sprinkle of cinnamon or a layer of candied jalapeños for a surprising and adventurous taste experience. It’s an unexpected twist that will delight daring palates!
Don’t forget, if you’re eager for more delicious casseroles, try my Popper Chicken Casserole or Philly Cheesesteak Casserole for more flavors to enjoy!
What to Serve with Easter Oreo Cookie Casserole
Pairing this delightful dessert with complementary dishes can transform your meal into a heartwarming celebration.
-
Fresh Fruit Salad: A medley of vibrant berries and citrus balances the rich, creamy layers of the casserole, adding a refreshing touch. The natural sweetness of the fruits brightens every bite and offers a pop of color on the plate.
-
Classic Vanilla Ice Cream: This timeless pairing brings a creamy, smooth contrast to the crunchy texture of the casserole, making for a luscious dessert experience. A scoop of vanilla ice cream will melt softly alongside the chilled casserole, creating indulgent flavors.
-
Chocolate Dipped Strawberries: Sweet berries paired with chocolate create an elegant touch, enhancing the celebration’s festive spirit. The familiar combination is timeless and adds a deliciously juicy element to every serving.
-
Mini Cheesecakes: Providing a different kind of creamy indulgence, mini cheesecakes offer variety while complementing the Oreo flavors nicely. These bite-sized treats allow guests to mix and match flavors for a delightful dessert experience.
-
Sparkling Lemonade: A fizzy, tangy drink elevates the festive vibe of your gathering. Its brightness cuts through the dessert’s richness, offering a refreshing contrast that keeps your palate engaged and lively.
-
Chocolate Milkshakes: A kid-friendly option that captures hearts at any gathering! The rich, creamy flavors of milkshakes pair perfectly with the Easter Oreo Cookie Casserole, creating a nostalgic childhood treat that everyone can enjoy.
Expert Tips for Easter Oreo Cookie Casserole
• Soften Ingredients: Ensure your cream cheese and butter are at room temperature for a smooth filling. This prevents lumps, leading to a creamy Easter Oreo Cookie Casserole.
• Chill Wisely: Refrigerating overnight is best for flavor development and texture. However, avoid chilling for more than 10 hours, as the cookie layers can become overly soft.
• Layer Smart: For a stunning visual, use a clear trifle bowl. This allows the vibrant layers of the Easter Oreo Cookie Casserole to shine, making it a centerpiece worth showing off.
• Mix and Match: Don’t hesitate to customize! Adding nuts or different candies can make your casserole unique. Just ensure the flavors compliment the original recipe for a balanced treat.
• Serve with Style: Consider a drizzle of chocolate sauce or a dollop of whipped cream on top just before serving. It adds an extra layer of indulgence that everyone will love!
How to Store and Freeze Easter Oreo Cookie Casserole
-
Fridge: Store covered in the refrigerator for up to 4 days. This keeps the layers fresh and maintains the perfect balance of creamy and crunchy textures.
-
Freezer: For longer storage, wrap the casserole tightly in plastic wrap and then foil before freezing. It can last up to 2 months, but texture may change slightly upon thawing.
-
Thawing: When ready to enjoy, transfer the casserole to the fridge to thaw overnight. Avoid rapid thawing at room temperature to help maintain quality.
-
Reheating: This dessert is best served chilled, but if you prefer it a bit softer, you can briefly set it at room temperature for about 10-15 minutes before serving. Enjoy your delightful Easter Oreo Cookie Casserole!
Easter Oreo Cookie Casserole Recipe FAQs
What type of Oreos should I use for the casserole?
I recommend using regular Oreo cookies for the best flavor and crunch in your Easter Oreo Cookie Casserole. However, if you’re looking for a gluten-free option, there are plenty of gluten-free cookie alternatives available that will work just as well!
How should I store leftover Easter Oreo Cookie Casserole?
Store the casserole covered in the refrigerator for up to 4 days. This keeps the creamy filling fresh and preserves the delightful contrast of textures. Just make sure it’s well-covered to prevent it from absorbing any odors from the fridge!
Can I freeze the Easter Oreo Cookie Casserole?
Absolutely! To freeze, wrap the casserole tightly in plastic wrap followed by foil to prevent freezer burn. It can be frozen for up to 2 months. When you’re ready to enjoy it, transfer it to the fridge to thaw overnight.
What if my filling turns out runny?
No need to worry! If your filling is too runny, it might be due to not adequately softening your cream cheese or butter. To fix this, chill the casserole in the refrigerator for an extended period, about 2-3 hours, until it firms up. If you prefer a thicker filling, you can add an extra ¼ cup of powdered sugar gently stirred in.
Is this casserole suitable for kids with allergies?
While this Easter Oreo Cookie Casserole is a kid-friendly treat, it’s essential to consider any allergies. The ingredients include dairy and gluten, so be cautious if you have children with these allergies. You can substitute cream cheese with a vegan cream cheese option and choose gluten-free cookies for a safer version.
How long should I let the casserole chill before serving?
For the best flavor and texture, I highly recommend chilling the casserole for at least 1 hour before serving. However, letting it chill overnight allows the layers to meld beautifully, making it a show-stopping dessert for your Easter celebrations!
Easter Oreo Cookie Casserole: No-Bake Delight for Spring!
Ingredients
Equipment
Method
- Begin by crushing 20 Oreo cookies into chunky pieces using a food processor or a zip-top bag and a rolling pin. Reserve about 5 whole Oreos and a handful of pastel candy-coated chocolates for topping later.
- In a large mixing bowl, combine 8 ounces of softened cream cheese and ¼ cup of unsalted butter. Beat until smooth, then gradually add 1 cup of powdered sugar and mix until combined. Fold in 8 ounces of whipped topping to create a fluffy filling.
- Layer half of the crushed Oreos in a clear serving dish, followed by half of the cream cheese mixture and half of the reserved pastel candies. Repeat the layering process with the remaining ingredients.
- Cover and refrigerate the casserole for at least 1 hour or overnight for optimal flavor.
- Before serving, crumble the reserved whole Oreos on top, scoop into bowls, and enjoy!
Leave a Reply