
As I stood in my kitchen, the sweet aroma of chocolate mingling with the tart scent of fresh cherries filled the air, instantly whisking me away to a sun-drenched German bakery. Enter the Simple Black Forest Cake, a delightful fusion of rich chocolate cake layered with homemade cherry sauce and luscious whipped cream. This recipe checks all the boxes: it’s gluten-free, vegan, and refined sugar-free, allowing you to indulge without the guilt! Not only is this cake a crowd-pleaser that will leave your friends and family asking for seconds, but it also celebrates the bright flavors of cherry season in the most scrumptious way. Curious about how to create this decadent dessert at home? Let’s dive into the sweet magic of baking!
What Makes This Cake So Special?
Decadent Sweetness: This Simple Black Forest Cake combines rich chocolate flavor with a tart cherry sauce, creating a harmonious balance that satisfies your sweet tooth without overindulgence.
Healthy Indulgence: Made with nutritious, gluten-free ingredients, this cake fits perfectly into vegan and refined sugar-free diets.
Quick and Easy: In just a few simple steps, you can whip up this enticing dessert, making it ideal for last-minute gatherings or family celebrations.
Versatile Options: Whether you choose to decorate it for a birthday or a cozy evening treat, this cake always impresses!
Consider pairing it with our High Protein Pancake Bowl for a delicious brunch idea or serving it alongside a slice of Cottage Cheese Wraps for a lighter meal option.
Guilty-Free Pleasure: Best of all, you can enjoy every bite knowing you’re treating yourself to something delicious yet nutritious.
Simple Black Forest Cake Ingredients
For the Cake
- Gluten-Free Flour – Substitute with a gluten-free flour blend if needed for a perfect texture.
- Coconut Sugar – A healthier alternative to granulated sugar with a lower glycemic index.
- Cocoa Powder – Use Dutch-processed cocoa for a rich chocolate flavor that elevates the cake.
- Baking Powder – Ensures the cake rises beautifully, creating that tender crumb.
- Baking Soda – Works alongside baking powder for the perfect lift.
- Salt – A crucial element to enhance the overall flavor of the cake.
- Almond Milk – Any plant-based milk works great for a vegan option, adding moisture.
- Brewed Coffee – Enhances the chocolate taste; replace with more milk if desired.
- Oil of Choice – Vegetable or melted coconut oil provides moisture and richness.
- Vanilla Extract – Always opt for pure vanilla for the best flavor in baked goods.
For the Topping
- Whipped Cream (Regular or Dairy-Free) – Adds creaminess; consider coconut whipped cream for vegan options.
- Homemade Cherry Sauce – A must for that sweet-tart kick; use fresh cherries for the best taste.
- Dark Chocolate Shavings – A delightful garnish that makes your cake look and taste irresistible.
With these ingredients, you’re all set to create a decadent yet guilt-free Simple Black Forest Cake that your family and friends will love!
Step‑by‑Step Instructions for Simple Black Forest Cake
Step 1: Prep Cake Layers
Preheat your oven to 350°F (175°C) and prepare two round cake pans by greasing and flouring them or lining them with parchment paper. In a large mixing bowl, combine the dry ingredients: gluten-free flour, coconut sugar, cocoa powder, baking powder, baking soda, and salt. Whisk them together until well blended, ensuring a delightful foundation for your Simple Black Forest Cake.
Step 2: Combine Wet Ingredients
In a separate bowl, whisk together the almond milk, brewed coffee, oil of choice, and pure vanilla extract until mixed well. This mixture will add moisture and flavor to your cake. Once combined, pour these wet ingredients into the bowl with your dry ingredients and stir gently until just incorporated. Be careful not to overmix; a few lumps are perfectly fine!
Step 3: Mix Together
Gently fold the batter together using a spatula, ensuring that the wet and dry ingredients are just combined. The batter should be thick and smooth, but avoid vigorous stirring. Once your batter is ready, evenly divide it between the two prepared cake pans, ensuring consistency in thickness for a beautifully layered Simple Black Forest Cake.
Step 4: Bake Layers
Place the filled cake pans in the preheated oven and bake for approximately 25 minutes, or until a toothpick inserted into the center of the cakes comes out clean. The tops should look set and slightly spring back when touched. Once baked, remove the cake layers from the oven and allow them to cool in the pans for about 10 minutes before transferring them to a wire rack to cool completely.
Step 5: Prepare Whipped Cream
While the cake layers cool, whip the cream (regular or dairy-free) in a mixing bowl until soft peaks form. If desired, sweeten with a touch of coconut sugar or vanilla extract to taste, creating a fluffy topping for your Simple Black Forest Cake. Set aside the whipped cream, allowing it to maintain a creamy consistency while the cake finishes cooling.
Step 6: Make Cherry Sauce
In a small saucepan, combine fresh or thawed cherries with a sprinkle of coconut sugar over low heat. Cook them gently until they start to release their juices and the mixture thickens slightly, about 10 minutes. Stir occasionally to prevent sticking. Once done, remove from heat and let the cherry sauce cool to room temperature, enhancing the juicy sweetness for the cake layers.
Step 7: Layer Cake
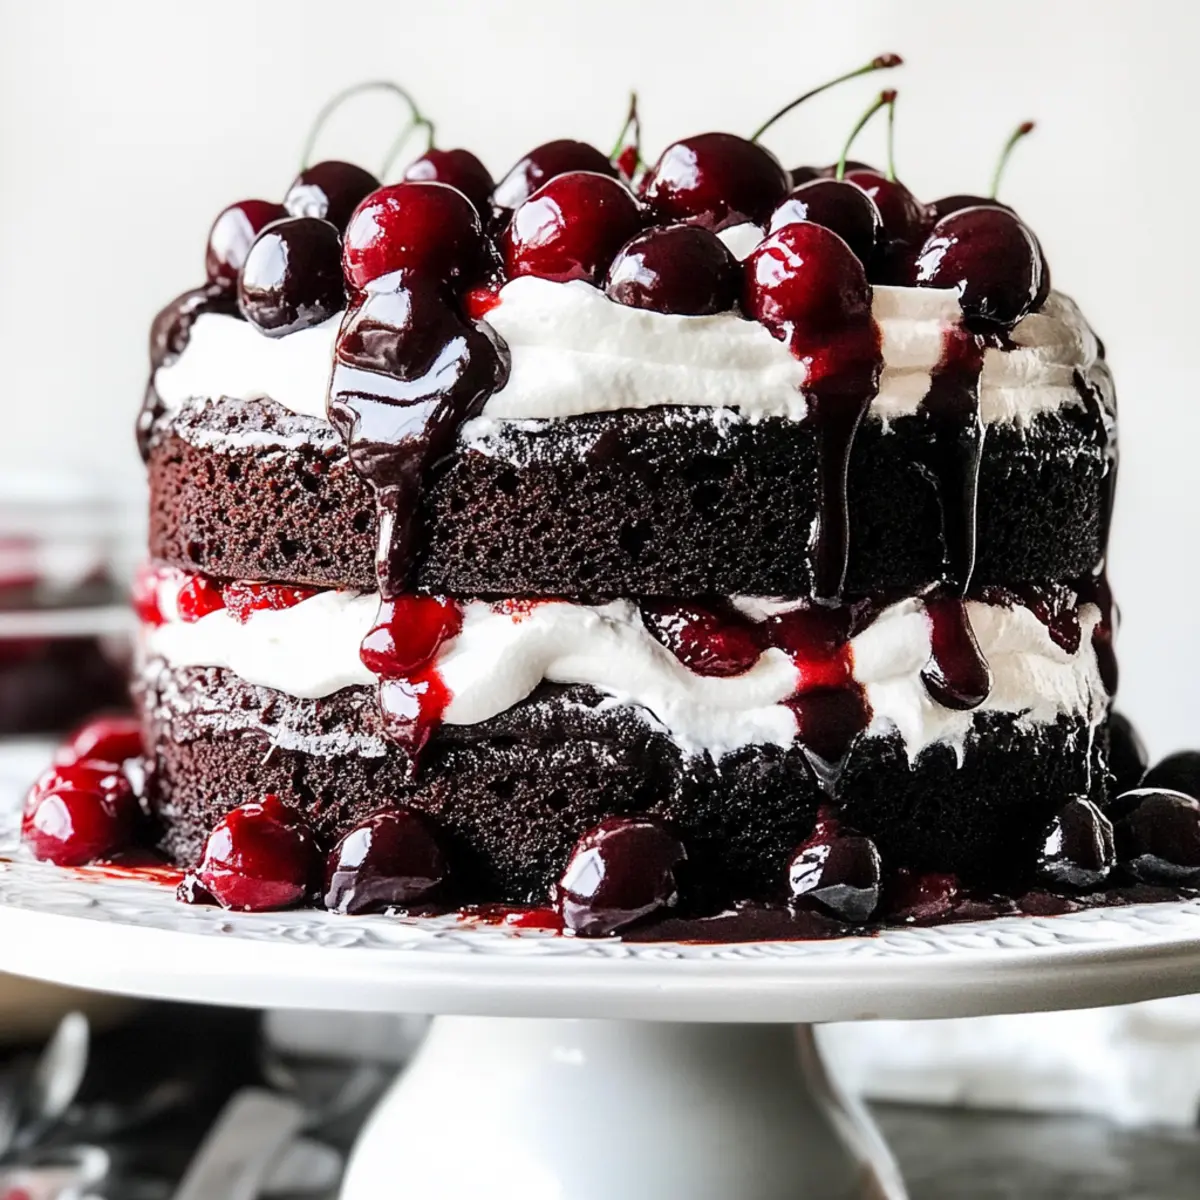
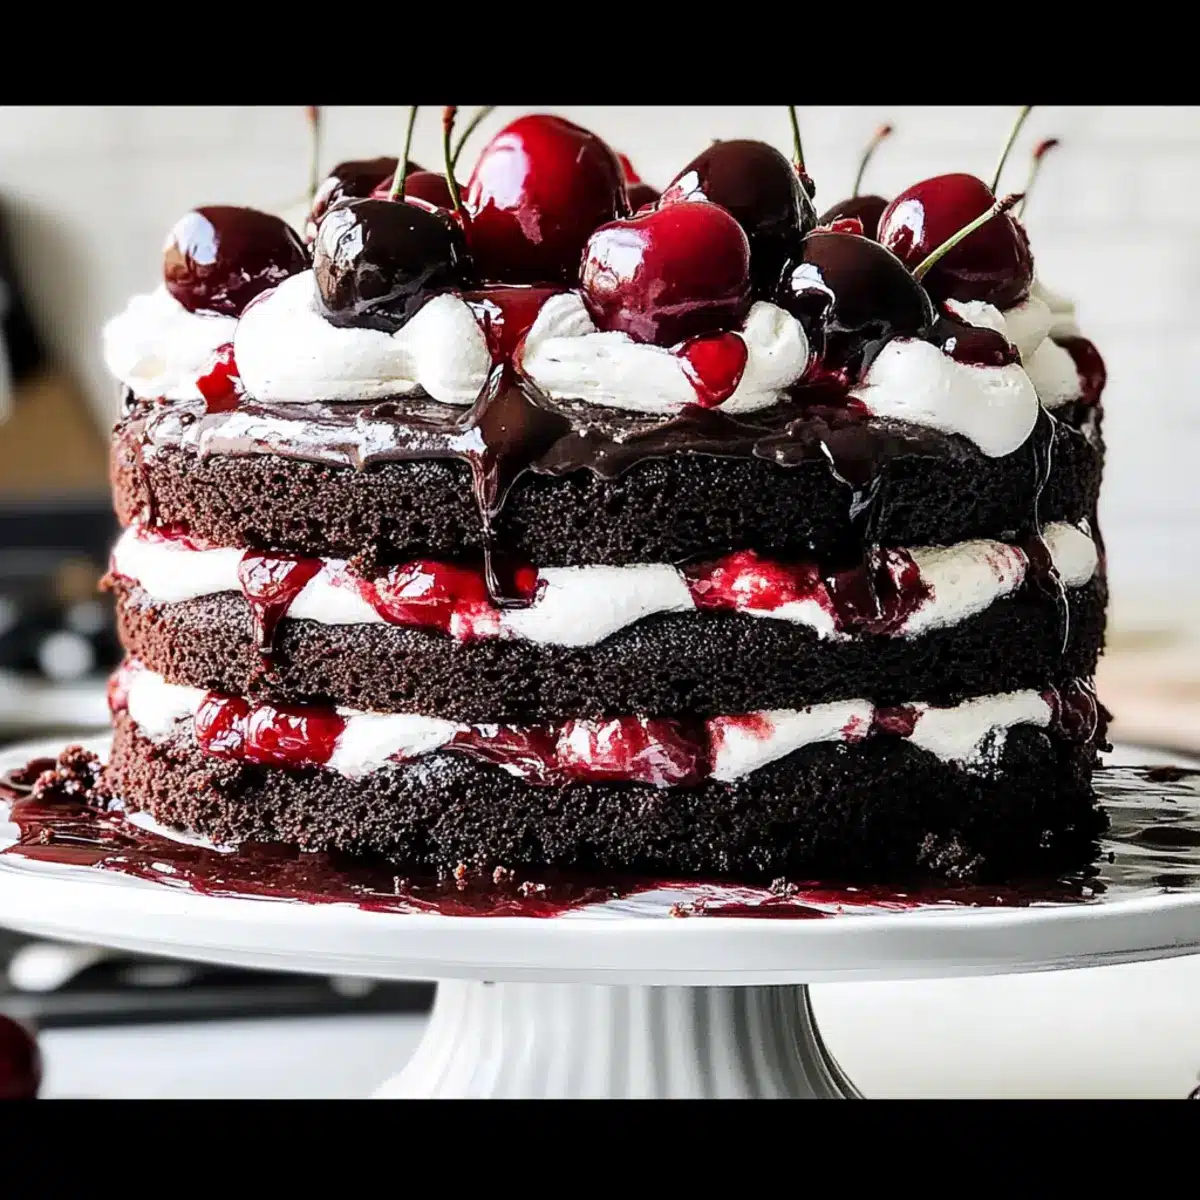
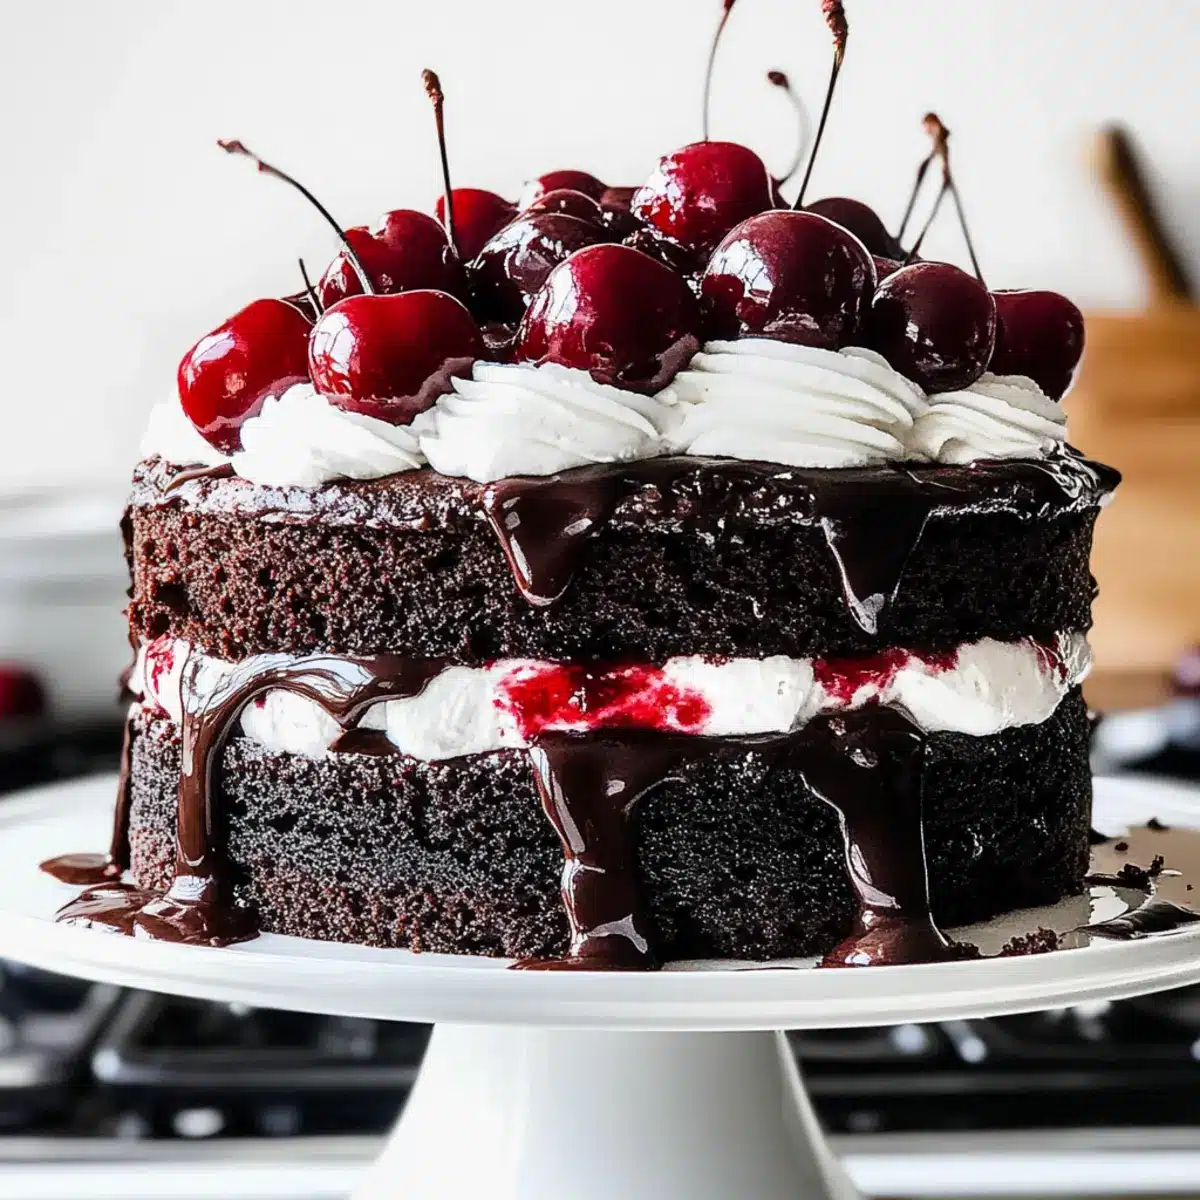
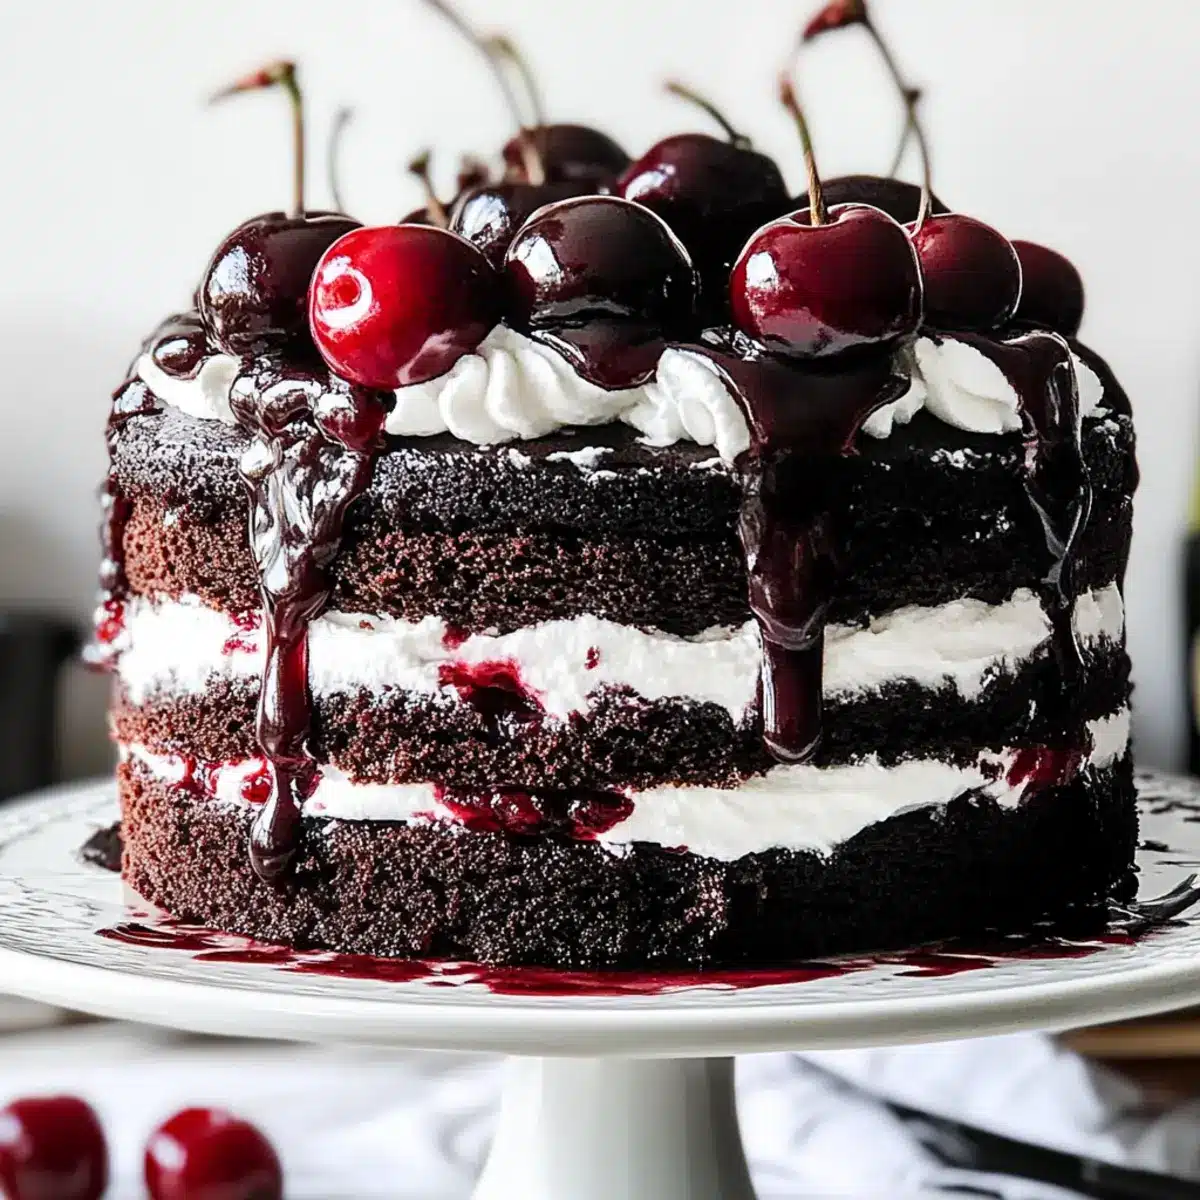
Once the cake layers are completely cool, place the first layer on a serving plate. Spread a generous layer of homemade cherry sauce over the top, followed by a layer of whipped cream. Carefully place the second layer on top, repeating the process with more cherry sauce and whipped cream. This step creates a beautiful and delicious visual appeal in your Simple Black Forest Cake.
Step 8: Garnish
For the finishing touch, sprinkle dark chocolate curls or shavings over the top of the cake. This adds a delightful texture and enhances the chocolate flavor, making your Simple Black Forest Cake irresistibly beautiful. Slice and serve to your eager guests, who are sure to be impressed by this decadent yet guilt-free dessert!
Simple Black Forest Cake Variations
Feel free to put your own delicious spin on this cake by exploring these exciting variations!
-
Non-Dairy Milk: Substitute almond milk with oat, soy, or coconut milk for a different flavor profile. Each option adds its own unique touch to the cake!
-
Berry Bliss: Try using mixed berries or strawberries instead of cherries for a fresh twist. This variation brightens the flavor while still adding a delightful sweetness!
-
Nutty Addition: Incorporate crushed walnuts or pecans into the batter for added texture and a nutty flavor. The crunch harmonizes beautifully with the moist chocolate layers.
-
Spiced Up: Add a teaspoon of cinnamon or a pinch of nutmeg for a warm spice element. It creates an inviting aroma that fills your kitchen with comfort!
-
Gluten-Free Flour Alternatives: If you don’t have gluten-free flour on hand, try experimenting with almond or coconut flour. These alternatives provide a unique flavor while keeping the cake soft and moist.
-
Vegan Frosting: Instead of whipped cream, frost the cake with a vegan cream cheese frosting for a tangy sweetness. This frosting pairs wonderfully with the chocolate and cherry!
-
Heat Elements: Add a pinch of cayenne pepper or crushed red pepper flakes to the cherry sauce for a surprising kick. It’s a bold enhancement that will wake up your taste buds!
-
Layered Delight: For a showstopper, create a three-layer cake by doubling the recipe. More layers mean more cherry sauce, whipped cream, and a beautiful centerpiece for gatherings!
You might also enjoy pairing this cake with a slice of our delightful High Protein Pancake Bowl for breakfast or serve it alongside some Cottage Cheese Wraps for a light lunch. Let your imagination run wild and personalize this dessert to make it truly yours!
Expert Tips for Simple Black Forest Cake
-
Ingredient Temperature: Ensure all ingredients are at room temperature. This allows for better mixing and a lovely rise in your Simple Black Forest Cake.
-
Avoid Overbaking: To maintain the cake’s moist texture, start checking for doneness at 20 minutes. A toothpick should come out clean—but not dry.
-
Perfect Whipped Cream: For coconut whipped cream, chill the cans overnight and only beat the solid cream. This ensures a fluffy, rich topping.
-
Gluten-Free Flour Selection: Use a gluten-free 1:1 baking blend to achieve the best texture. Substituting with regular flour can lead to a dense cake.
-
Layering Tips: Be generous with the cherry sauce and whipped cream! This enhances flavor and moisture, making every bite of your Simple Black Forest Cake incredibly satisfying.
How to Store and Freeze Simple Black Forest Cake
Fridge: Store leftover cake in an airtight container in the refrigerator for up to 4–5 days. This helps maintain its moisture and flavor.
Freezer: Wrap individual slices in plastic wrap and then place them in a freezer-safe container. The cake can be frozen for up to 3 months without losing its delightful taste.
Reheating: To enjoy your frozen slices, thaw them overnight in the refrigerator and then let them come to room temperature before serving.
Preventing Dryness: If you’re worried about the texture, reheat slices in a microwave for just a few seconds to restore moisture before enjoying your Simple Black Forest Cake!
Make Ahead Options
These Simple Black Forest Cake layers are ideal for those busy weeknights when you want to indulge without the hassle! You can bake the cake layers up to 24 hours in advance; just allow them to cool completely, then tightly wrap them in plastic wrap to keep them moist. The cherry sauce can also be made 3 days ahead and stored in an airtight container in the refrigerator, ensuring its vibrant flavor stays intact. On the day you’re ready to serve, simply whip up the cream, layer the cake with the prepared cherry sauce, and finish it off with chocolate curls. With these make-ahead tips, you’ll enjoy a stunning dessert with minimal effort!
What to Serve with Simple Black Forest Cake
There’s nothing quite like creating a wonderful meal experience, and this luscious dessert is sure to be the star!
-
Velvety Vanilla Ice Cream: Its creamy texture balances the rich chocolate, making every bite an indulgent delight. A scoop adds a refreshing cold element that harmonizes with the cake’s warmth.
-
Fresh Fruit Salad: A medley of seasonal fruits, perhaps including strawberries or blueberries, adds a burst of freshness that enhances the tart cherry notes. The vibrant colors will elevate your dessert presentation.
-
Coffee or Espresso: The robust flavors beautifully complement the chocolate and cherry, creating a cozy pairing. Enjoying a warm cup alongside your slice can transform your dessert into a full experience.
-
Chocolate-Covered Almonds: The crunch and nuttiness contrast with the softness of the cake, adding delightful textures. These snacks can also double as a nibble during gatherings, making every bite special.
-
Coconut Whipped Cream: If you’re looking to keep it dairy-free, this velvety topping is an exquisite accompaniment. Its lightness lifts the richness of the cake, enhancing its appeal.
-
Mint Tea: A soothing herbal tea with mint notes can refresh the palate between bites, making for a delightful post-meal transition. The subtle herbal taste will harmonize beautifully with the dessert flavors.
Whether you choose a warm drink or a fresh salad, each pairing will enhance your experience of the mouthwatering Simple Black Forest Cake!
Simple Black Forest Cake Recipe FAQs
How do I select the best cherries for the cherry sauce?
Absolutely! When choosing cherries, look for ones that are plump, firm, and vibrant in color. Avoid any with dark spots or wrinkles, as they may be overripe. Fresh, in-season cherries will yield the most flavorful sauce, giving your Simple Black Forest Cake a delicious brightness!
What’s the best way to store leftovers?
You can store your leftover Simple Black Forest Cake in an airtight container in the refrigerator for up to 4–5 days. This method helps lock in moisture and flavor, allowing you to enjoy the cake at its best even after a few days!
Can I freeze the cake, and if so, how?
Absolutely! To freeze your Simple Black Forest Cake, wrap individual slices tightly in plastic wrap. Place the wrapped slices in a freezer-safe container. It can be stored for up to 3 months. When you’re ready to enjoy, simply thaw the slices overnight in the fridge and let them come to room temperature before serving for optimal taste.
What should I do if the cake turns out too dry?
If your cake is dry, it might be due to overbaking or too much flour. Start checking for doneness at 20 minutes and gently handle the batter to avoid overmixing. If you find yourself with a dry cake, try soaking the layers with a simple syrup made from equal parts water and sugar to add moisture back in.
Is this cake safe for those with dietary restrictions?
Yes! The Simple Black Forest Cake is gluten-free, vegan, and refined sugar-free, making it a great option for those with dietary concerns. However, always double-check ingredients like the whipped cream and ensure they meet your specific dietary needs, particularly if allergies are involved.
Indulge in Simple Black Forest Cake: A Guilt-Free Delight
Ingredients
Equipment
Method
- Preheat your oven to 350°F (175°C) and prepare two round cake pans by greasing and flouring them or lining them with parchment paper.
- In a large mixing bowl, combine the dry ingredients: gluten-free flour, coconut sugar, cocoa powder, baking powder, baking soda, and salt. Whisk together until well blended.
- In a separate bowl, whisk together the almond milk, brewed coffee, oil of choice, and pure vanilla extract. Pour these wet ingredients into the bowl with dry ingredients and stir gently until just incorporated.
- Gently fold the batter together, ensuring that the wet and dry ingredients are just combined. Divide the batter evenly between the two prepared cake pans.
- Bake for approximately 25 minutes, or until a toothpick inserted into the center comes out clean. Allow to cool in the pans for about 10 minutes before transferring to a wire rack.
- While the cake layers cool, whip the cream until soft peaks form. Sweeten with coconut sugar or vanilla to taste, and set aside.
- In a small saucepan, combine cherries with a sprinkle of coconut sugar and cook over low heat for about 10 minutes until juices are released and mixture thickens slightly. Cool to room temperature.
- Once the cake layers are cool, place the first layer on a serving plate, spread cherry sauce on top, followed by whipped cream. Repeat with the second layer.
- Sprinkle dark chocolate shavings over the top for garnish. Slice and serve to your guests.
Leave a Reply