
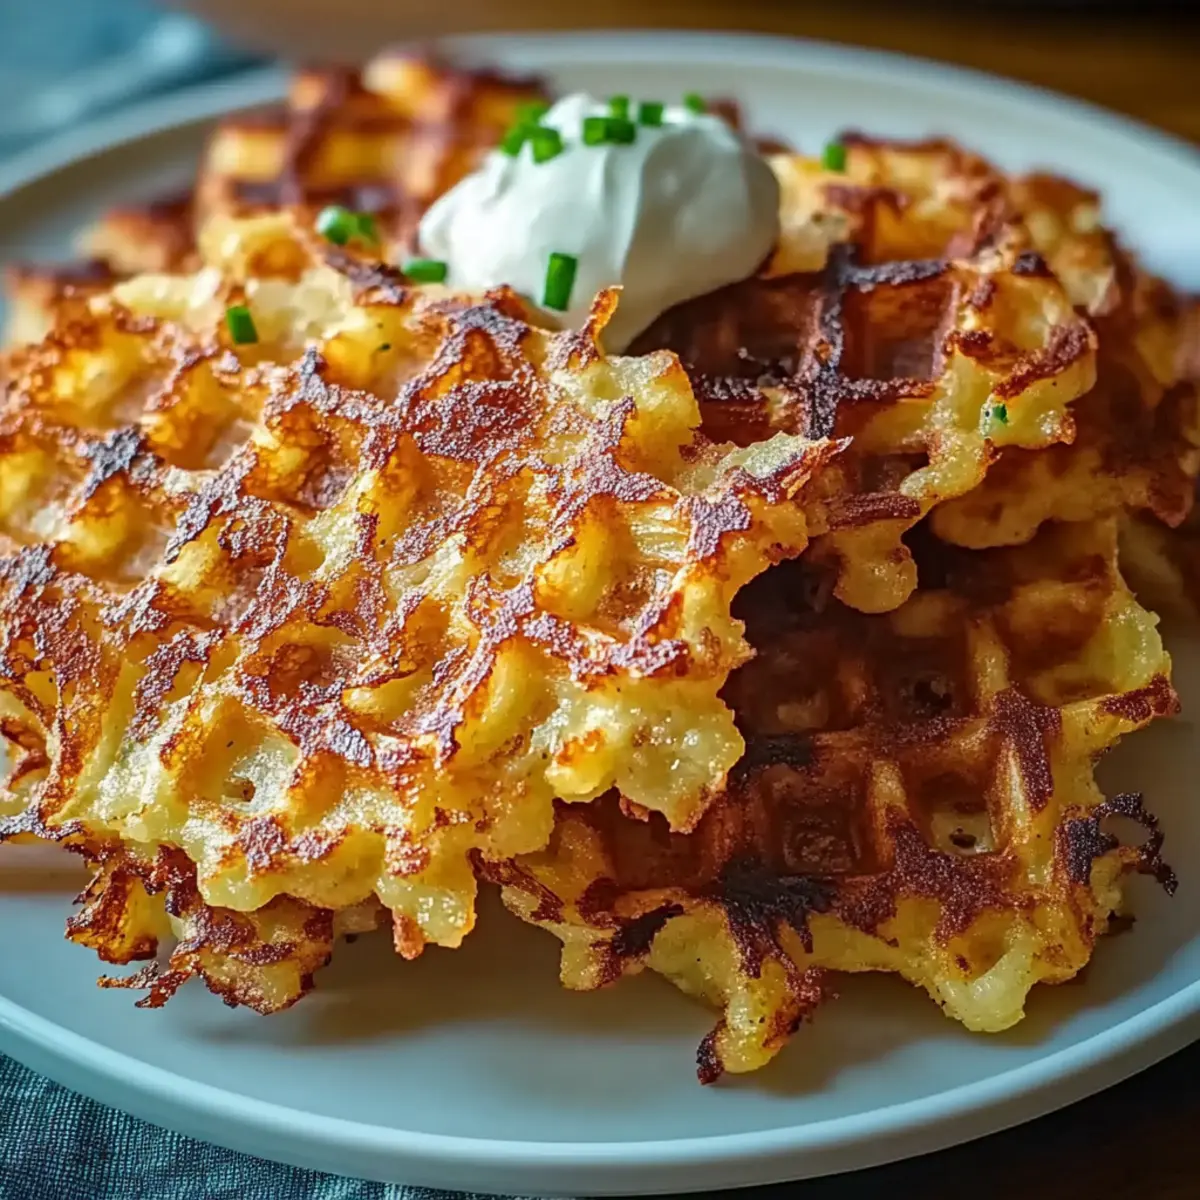
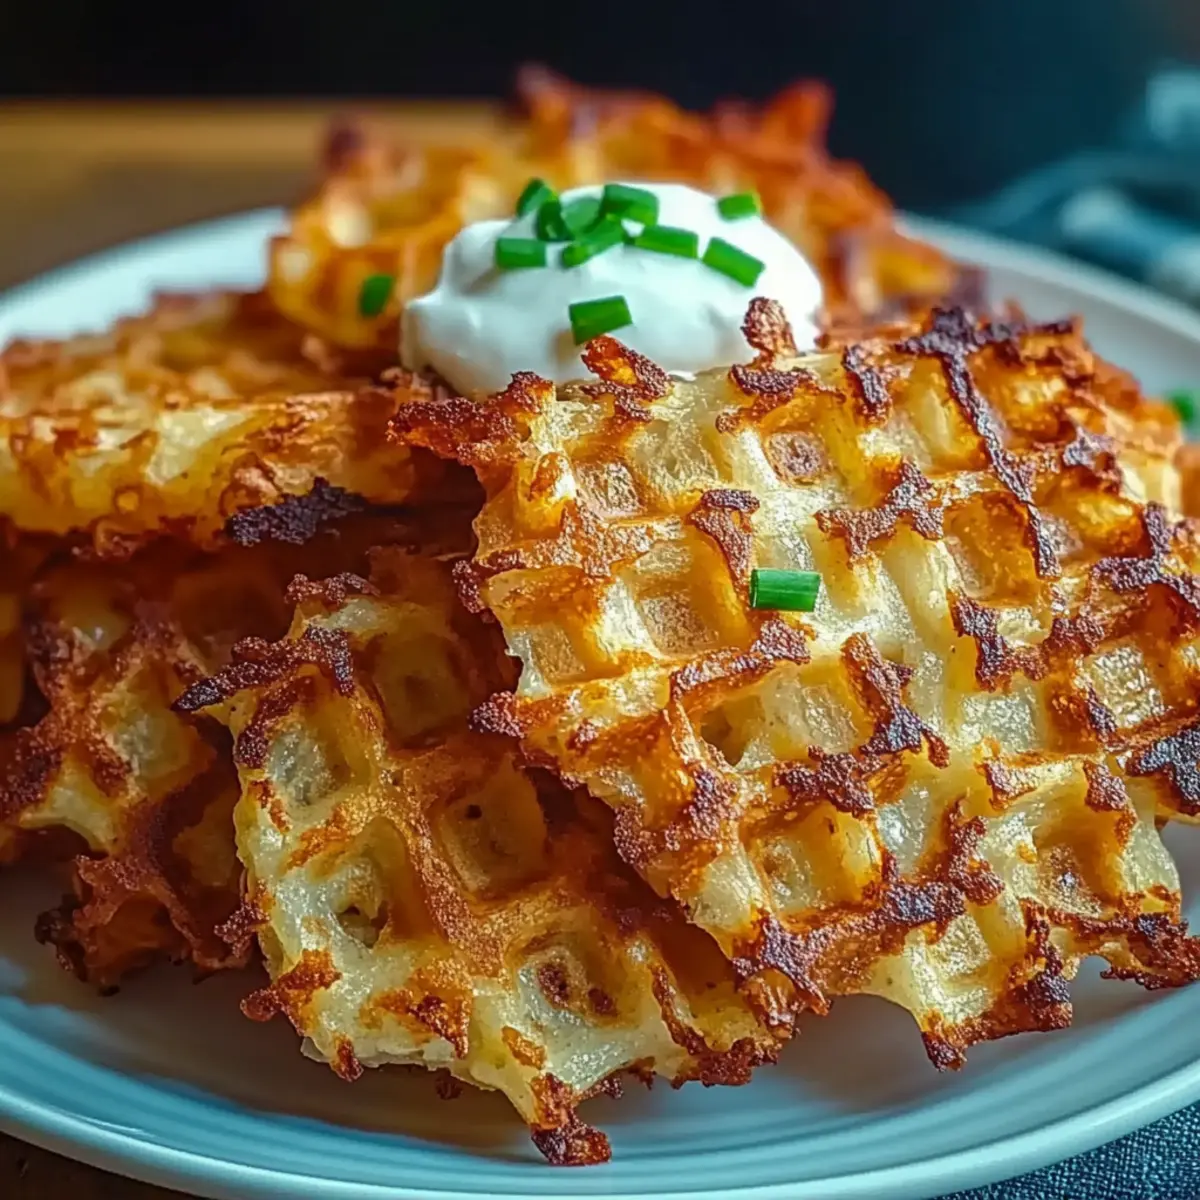
As I stood in my kitchen this morning, the sunlight streaming through the window, I realized just how transformative a simple breakfast could be. Enter the Crispy Waffle Maker Hash Browns, a delightful twist on a classic favorite. With just a handful of ingredients, this recipe not only checks the box for a quick preparation—perfect for those busy mornings—but also delivers that satisfying crunch we all crave. These golden bites come together effortlessly and are easily customizable, so you can add your favorite flavors to make them uniquely yours. Whether you’re serving them for a weekday breakfast or impressing friends at brunch, these waffle maker hash browns are bound to become a cherished staple. Ready to transform your breakfast game? Let’s dive into this delicious recipe!

Why Choose Waffle Maker Hash Browns?
Convenience: No more fussing over stovetops! This recipe offers a simple, hassle-free method that produces perfect hash browns every time using your waffle maker.
Quick Preparation: In just 30 minutes, you’ll have crispy, golden-brown hash browns that satisfy your breakfast cravings without the wait.
Endless Customization: Feel free to mix in your favorite ingredients, from cheese to veggies, making each batch uniquely yours. If you enjoy creative breakfast options, also check out our amazing Cream Cheese Hashbrown recipe for more delicious ideas!
Healthy Options: With minimal oil and gluten-free ingredients, these hash browns offer a light yet satisfying start to your day.
Crowd-Pleaser: Serve these delightful bites to family or guests, and watch them disappear! Perfect for brunch gatherings or busy weekday mornings.
Waffle Maker Hash Browns Ingredients
• Get ready to whip up these crispy delights!
For the Hash Browns
- Russet Potatoes – The main star providing texture; Yukon Gold or sweet potatoes can give a different flavor profile.
- Salt – A must for amplifying flavor in every bite.
- Black Pepper – Adds a touch of warmth without overwhelming the palate.
- Garlic Powder – Infuses delicious savory notes that elevate the dish.
- Onion Powder – Brings a hint of sweetness and complexity to the hash browns.
- Olive Oil – Essential for achieving that wonderful crispy exterior—don’t skip it!
- Cooking Spray – Key to ensuring that your waffle maker stays clean and your hash browns emerge effortlessly.
With this simple ingredient list, you’re just moments away from enjoying your very own Waffle Maker Hash Browns!
Step‑by‑Step Instructions for Waffle Maker Hash Browns
Step 1: Preheat Your Waffle Maker
Begin by preheating your waffle maker according to the manufacturer’s instructions. This essential step ensures your Crispy Waffle Maker Hash Browns cook evenly and develop that desirable golden crust. While the waffle maker heats up, gather your ingredients and equipment, keeping everything within easy reach for a smooth cooking process.
Step 2: Prepare the Potato Mixture
In a large mixing bowl, grate the russet potatoes until you have a fluffy pile. Add salt, black pepper, garlic powder, and onion powder, then mix well until all the spices coat the potato shreds evenly. This will bring out the savory flavors in your Waffle Maker Hash Browns, blending those delicious elements into each bite.
Step 3: Add Olive Oil
Drizzle the potato mixture with olive oil, which is crucial for achieving that crispy texture we love. Using a spatula or your hands, gently fold the oil into the potatoes until every shred is well-coated. This added fat enhances flavor while ensuring the mixture holds together beautifully in the waffle maker, setting you up for a delightful breakfast.
Step 4: Spray the Waffle Maker
Once your waffle maker is preheated, lightly spray both sides with cooking spray. This step is vital for preventing sticking, ensuring that your crispy hash browns release easily and remain intact. It creates a non-stick surface, leading to perfectly golden hash browns that are ready to enjoy without the mess.
Step 5: Cook the First Batch
Evenly spread half of the potato mixture onto the waffle maker, making sure it fills the spaces without overflowing. Close the lid and cook for about 8 to 10 minutes, or until the hash browns are crisp and golden brown. Keep an eye on them, as the smell will guide you toward perfect timing.
Step 6: Remove and Repeat
Once cooked, carefully open the waffle maker and use a fork or spatula to gently lift the first batch of Waffle Maker Hash Browns. They should come out easily and look beautifully crispy. Set them aside on a plate, then repeat the cooking process with the remaining half of the potato mixture for a delicious second batch.
Step 7: Serve and Enjoy
After both batches are cooked, serve your Waffle Maker Hash Browns hot. Feel free to top them with your favorite condiments, like sour cream, chives, or shredded cheese. These crispy delights make for an excellent breakfast or brunch option, perfect for sharing with family and friends.
Make Ahead Options
These Crispy Waffle Maker Hash Browns are perfect for meal prep enthusiasts! You can grate the russet potatoes and mix them with seasonings (salt, pepper, garlic powder, and onion powder) up to 24 hours in advance. Simply refrigerate the mixture in an airtight container to keep it fresh and prevent browning. When you’re ready to cook, drizzle in the olive oil and follow the same cooking instructions. This method not only saves time on busy mornings but also ensures that your hash browns are just as delicious and crispy as if made fresh. Enjoy effortless breakfast perfection with minimal effort!
Expert Tips for Waffle Maker Hash Browns
- Preheat Perfectly: Always preheat the waffle maker thoroughly to achieve crispiness; undercooking will result in soggy hash browns.
- Use Enough Oil: Olive oil is essential for that golden-brown finish—don’t skimp! It ensures the hash browns crisp up beautifully in the waffle maker.
- Check Frequently: Keep an eye on the cooking process; the smell is your best indicator that they are nearly done. Avoid opening the lid too often to maintain heat.
- Avoid Overcrowding: Spread an even layer of the potato mixture to ensure even cooking; overcrowding will hinder the crispiness of your Waffle Maker Hash Browns.
- Customize Freely: Feel free to incorporate any additional spices or toppings—creativity is key! Adding cheese or cooked bacon can elevate your dish dramatically.
What to Serve with Crispy Waffle Maker Hash Browns
Transform your breakfast table into a feast of delicious complementing flavors and textures!
-
Scrambled Eggs: Fluffy scrambled eggs add protein and creaminess, making them the perfect counterbalance to the crispy hash browns.
-
Sautéed Spinach: Lightly sautéed spinach brings a fresh, vibrant pop of color and nutrients, complementing the savory hash browns beautifully.
-
Crispy Bacon: The smoky, salty notes of crispy bacon make for a delightful pairing, adding a satisfying crunch alongside your hash browns.
-
Avocado Toast: Creamy avocado on toasted bread provides a balancing smoothness that pairs perfectly with the crunchy texture of hash browns.
-
Fresh Salsa: A zesty homemade salsa brightens the dish with its bold flavors, offering a refreshing contrast to the rich hash browns. The acidity lifts and enhances every bite, making it a must-try addition!
-
Breakfast Burrito: Wrap up some eggs, cheese, and veggies alongside your hash browns in a warm tortilla for a hearty, satisfying breakfast. This combination is not only filling but also deliciously messy in all the right ways!
-
Chai Latte or Coffee: Pair this breakfast delight with a warm chai latte or your favorite cup of coffee for that perfect morning start. The warmth and flavors of these beverages balance beautifully with the crispy bites.
How to Store and Freeze Waffle Maker Hash Browns
Fridge: Store any leftover Waffle Maker Hash Browns in an airtight container for up to 3-4 days. Allow them to cool completely before sealing to maintain crispiness.
Freezer: For longer storage, freeze the cooked hash browns in a single layer on a baking sheet, then transfer them to a freezer-safe bag or container for up to 2 months.
Reheating: When ready to enjoy again, reheat in the waffle maker or skillet until heated through and crispy, preserving that delightful texture.
Serving Tips: Feel free to add any toppings after reheating, enhancing each bite with your favorite flavors for a delightful breakfast experience.
Waffle Maker Hash Browns Variations
Feel free to let your creativity flow and personalize your hash browns for a truly unique breakfast experience!
-
Cheesy Delight: Stir in shredded cheese before cooking for a gooey, savory twist that melts perfectly into each bite. You can never go wrong with extra cheese, especially when it adds that delightful stretch!
-
Bacon Boost: Add crispy, cooked bacon bits to the potato mixture for that irresistible smoky flavor that elevates your hash browns to new heights. The combination of bacon and potatoes is a classic that never disappoints!
-
Veggie Mix: Toss in some chopped bell peppers or spinach to give your hash browns a pop of color and nutrition. It’s a quick, delicious way to sneak in some greens!
-
Spicy Kick: Incorporate diced jalapeños or red pepper flakes for a bit of heat. If you love a little spice in your breakfast, this variation will awaken your taste buds.
-
Sweet Potato Swaps: Try using sweet potatoes instead of russet for a naturally sweeter flavor and vibrant color. They bring a whole new level of deliciousness to your hash browns!
-
Herb Infusion: Mix in chopped fresh herbs like parsley or chives for a fragrant and flavorful addition. Fresh herbs can elevate your dish and make your breakfast feel gourmet.
-
Asian Flair: Add a splash of soy sauce and a sprinkle of sesame seeds for a unique twist. This gives a delightful umami flavor that’s sure to surprise!
-
Southwestern Style: Mix in corn and cumin for a southwestern spin, making your hash browns a flavor-packed treat. Pair these with avocado and salsa for a hearty breakfast that’s bursting with flavors!
Whatever you choose, these creative variations will definitely keep your breakfast routine exciting! And if you’re tempted to explore more deliciousness, check out our delightful Cream Cheese Hashbrown recipe for another tasty twist.

Waffle Maker Hash Browns Recipe FAQs
How do I choose the right potatoes for hash browns?
Absolutely! For perfect Waffle Maker Hash Browns, I recommend using russet potatoes as they offer the ideal texture and flavor. Yukon Gold or sweet potatoes can also be used for a twist, offering a different taste profile. Look for firm potatoes without dark spots or blemishes, as this indicates freshness.
How should I store leftover hash browns?
After enjoying your crispy hash browns, let any leftovers cool completely. Store them in an airtight container in the fridge for up to 3-4 days. If you prefer them to be even crispier upon reheating, you can place them back in the waffle maker for a quick refresh.
Can I freeze Waffle Maker Hash Browns?
Definitely! For longer-term storage, you can freeze the cooked hash browns. First, allow them to cool completely, then spread them in a single layer on a baking sheet and freeze for about 1-2 hours. Once frozen, transfer them to a freezer-safe bag or container, where they will last for up to 2 months. When you’re ready to eat them, simply reheat in your waffle maker or skillet until crispy again.
What if my hash browns are soggy or stick to the waffle maker?
Very! If your hash browns turn out soggy, it’s often due to excess moisture from the potatoes. To prevent this, make sure to thoroughly dry the potatoes after grating, pressing them with a clean towel if needed. Using a good amount of olive oil and cooking spray in the waffle maker will also help them come out crispier and prevent sticking.
Are these hash browns safe for people with gluten allergies?
Yes, absolutely! This recipe for Waffle Maker Hash Browns is gluten-free as it contains no flour or gluten-based ingredients. However, always check any added toppings or condiments for gluten if you’re serving someone with a gluten allergy. Enjoy worry-free!
Crispy Waffle Maker Hash Browns: Quick & Easy Morning Treat
Ingredients
Equipment
Method
- Preheat your waffle maker according to the manufacturer's instructions.
- Grate the russet potatoes into a large mixing bowl and add salt, black pepper, garlic powder, and onion powder. Mix well to coat the potatoes evenly.
- Drizzle the potato mixture with olive oil and mix until well coated.
- Spray both sides of the preheated waffle maker with cooking spray.
- Spread half of the potato mixture evenly onto the waffle maker and cook for 8 to 10 minutes until crispy and golden brown.
- Carefully lift the cooked hash browns out and repeat the process with the remaining mixture.
- Serve hot with your favorite toppings.
Leave a Reply