
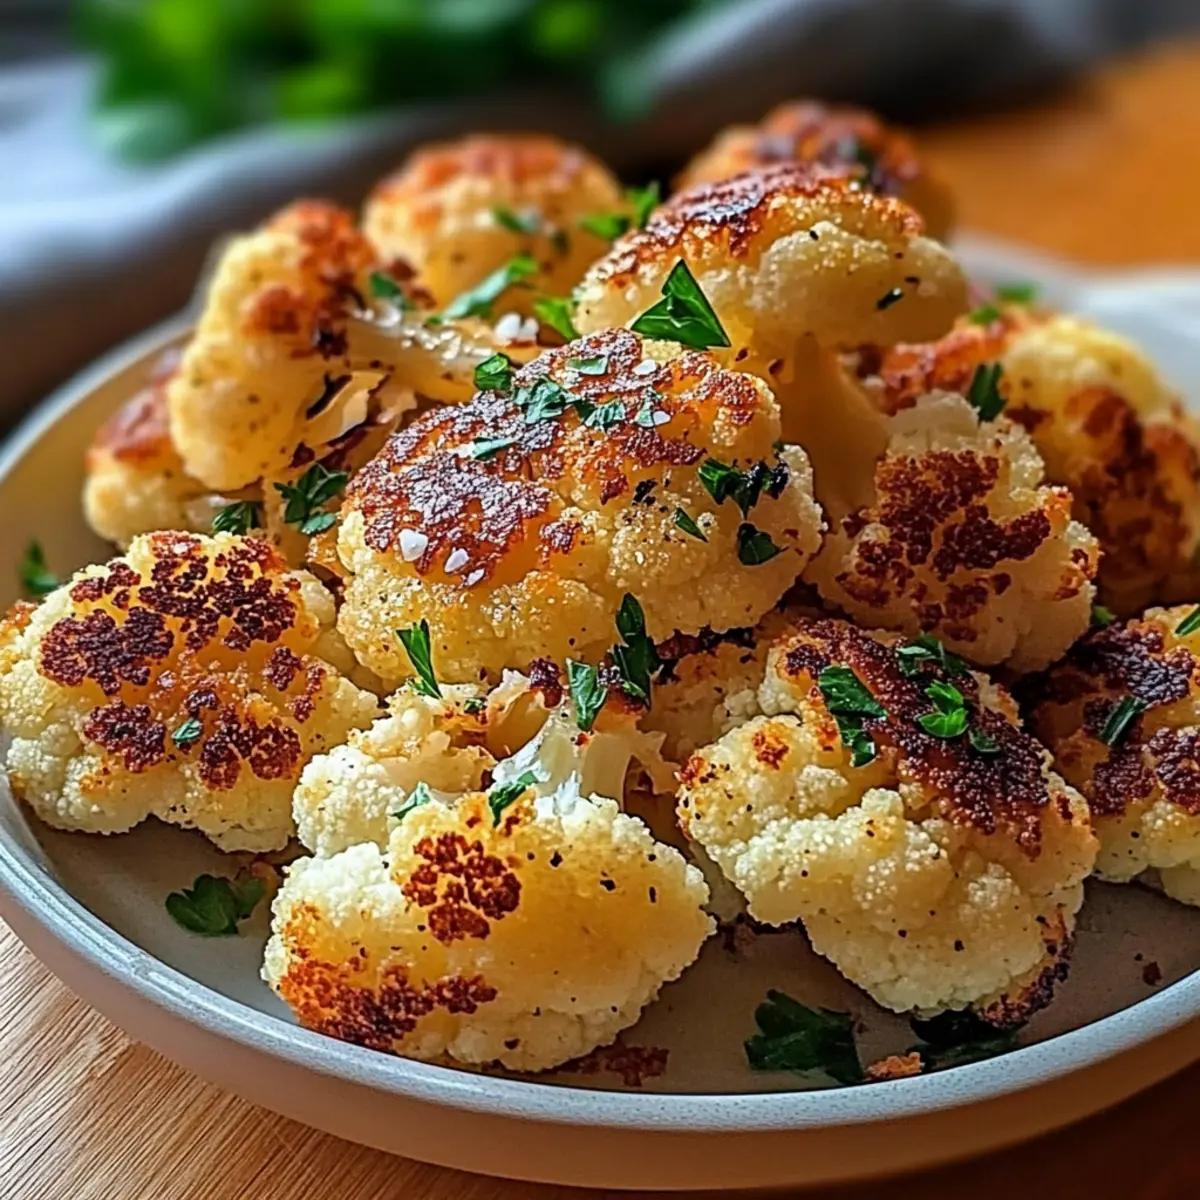
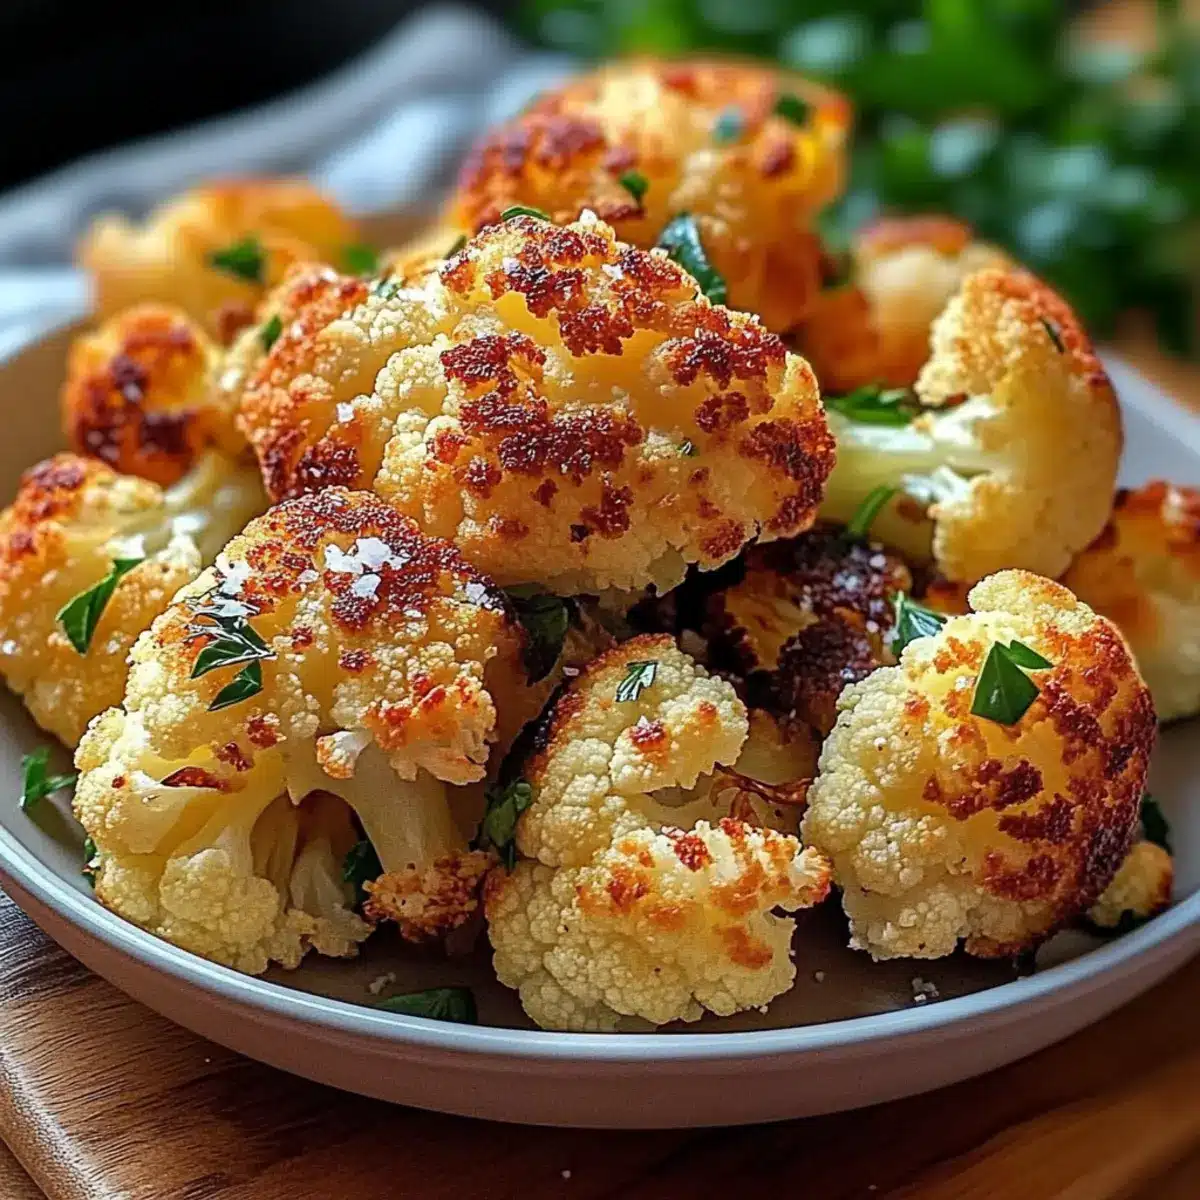
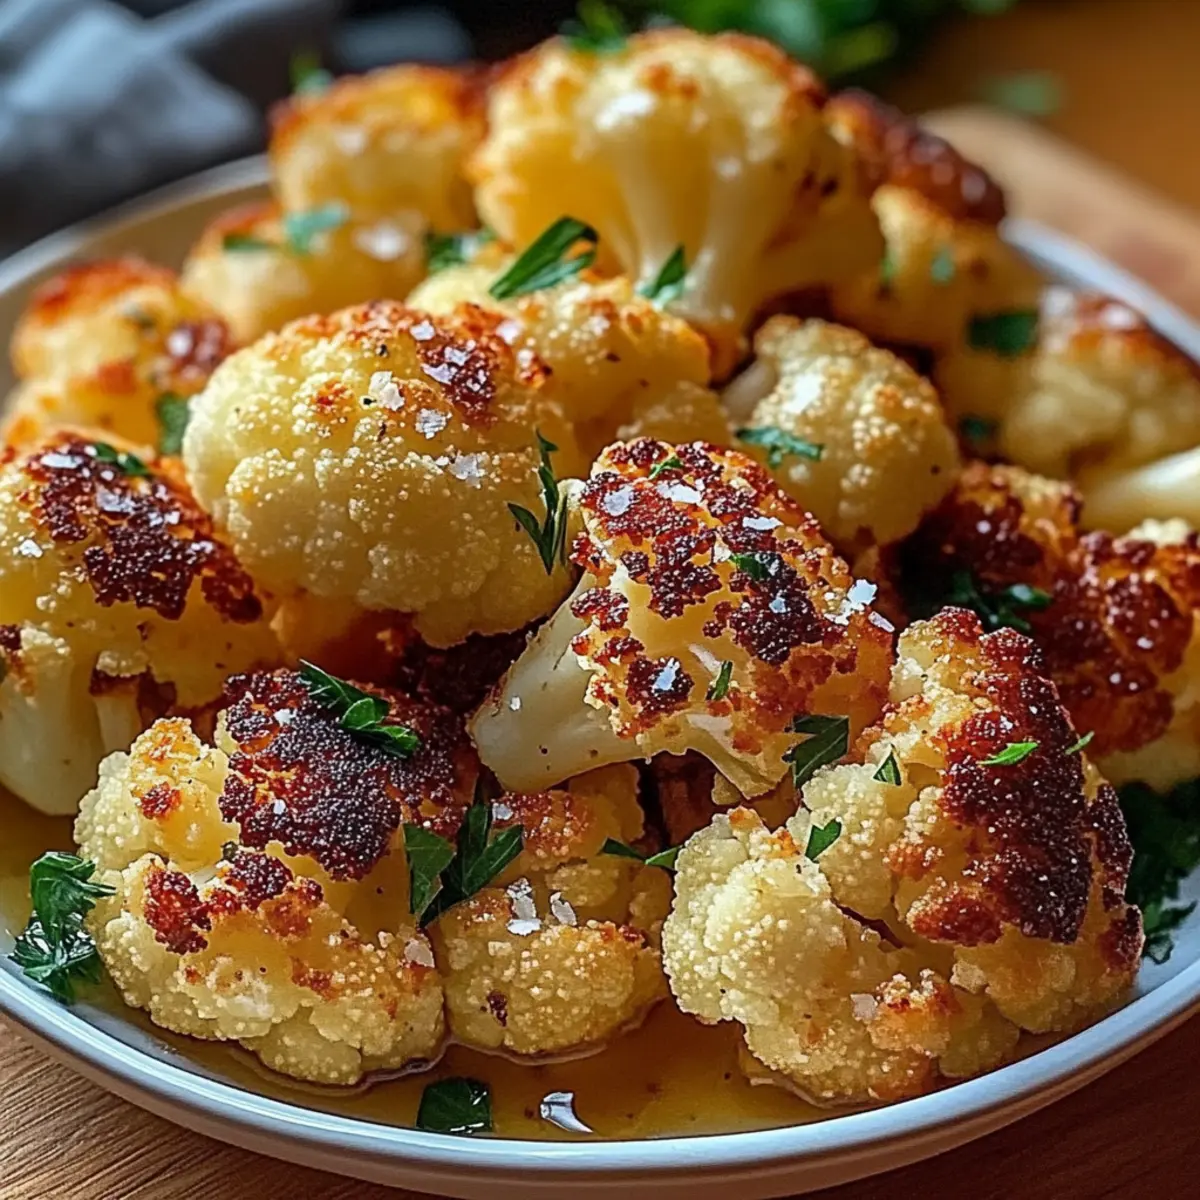
As the aroma of roasted garlic and spices wafts through my kitchen, I’m transported to a cozy little bistro I once visited. This Crispy Roasted Cauliflower recipe is my ultimate go-to when craving something satisfying that won’t weigh me down. Not only is this baked cauliflower a stunning vegetable side, but it also effortlessly sneaks in those nutritious vibes while being low-carb and keto-friendly. With a quick prep time, it’s ideal for busy weeknights or casual gatherings when you need a crowd-pleaser that even kids will relish—yes, even those picky little eaters! So, are you ready to turn a simple head of cauliflower into a delicious star of your dinner table?
Why Is This Baked Cauliflower a Must-Try?
Crispy Texture: Experience an addictive crunch that rivals your favorite snacks! This baked cauliflower transforms a simple vegetable into a delightful treat.
Flavor Burst: The strategic blend of garlic, paprika, and optional Parmesan creates layers of rich flavor, perfect for any palate.
Versatile Side Dish: It pairs beautifully with everything from grilled chicken to a fresh salad, making it a fantastic addition to any meal.
Time-Saving Delight: With just 30 minutes in the oven, you can enjoy a restaurant-quality dish at home without the fuss. Plus, try it as a fun taco filling or alongside Baked Italian Sub for a savory feast!
Keto-Friendly: Low-carb yet satisfying, this recipe keeps you aligned with your dietary goals while still indulging in delicious flavors.
Satisfy your cravings and impress your family—give this Crispy Roasted Cauliflower a try today!
Baked Cauliflower Ingredients
•
For the Cauliflower
- Cauliflower – The star of the dish, delivering a neutral taste that absorbs the seasonings beautifully. Always opt for fresh heads for the best texture.
For the Seasoning
- Olive Oil – Essential for achieving that mouthwatering crispy texture while roasting. Feel free to use avocado oil if you prefer a higher smoke point.
- Salt & Black Pepper – These simple seasonings elevate the dish significantly. Adjust according to your taste preferences for a truly personalized flavor.
- Garlic Powder – Adds an irresistible savory depth that truly brings the dish to life. If you want a stronger garlic taste, consider using fresh garlic cautiously.
- Paprika – Provides a hint of sweetness and a pop of color. For a twist, smoked paprika infuses a delightful smokiness.
Optional Toppings
- Grated Parmesan Cheese – Offers a nutty richness if desired. For a dairy-free alternative, nutritional yeast can give a similar cheesy note.
This baked cauliflower is sure to win over even the pickiest eaters while keeping your meals flavorful and nutritious!
Step‑by‑Step Instructions for Baked Cauliflower
Step 1: Preheat the Oven
Begin by preheating your oven to 425°F (220°C). This temperature ensures that your baked cauliflower becomes deliciously golden and crispy. As it heats up, you’ll prepare the cauliflower, making sure you’re set for perfect roasting.
Step 2: Prepare the Cauliflower
Take a fresh head of cauliflower and cut it into even florets. In a large mixing bowl, toss the florets with olive oil, salt, black pepper, garlic powder, and paprika. Ensure that each piece is thoroughly coated, allowing the flavors to infuse as you prep for roasting.
Step 3: Arrange for Roasting
Line a rimmed baking sheet with parchment paper for easy clean-up. Spread the seasoned cauliflower in a single layer on the sheet, making sure not to overcrowd the pieces. This spacing will help each floret roast evenly, achieving that desired crunchy texture.
Step 4: Roast the Cauliflower
Place the baking sheet in the preheated oven and roast the cauliflower for 25–30 minutes. Halfway through, carefully flip the florets to promote even browning. You’ll know it’s ready when the edges turn golden and crisp, creating a beautiful contrast to the tender interior.
Step 5: Add Cheese (Optional)
If you’re opting for added flavor, sprinkle grated Parmesan cheese over the cauliflower during the last 5 minutes of roasting. This allows the cheese to melt and brown slightly, enhancing the dish’s savory appeal just before serving.
Step 6: Serve Hot
Once your baked cauliflower is perfectly roasted, remove it from the oven and let it cool for a few minutes. Serve it hot, perhaps with a delicious dip like ranch or garlic aioli, adding an extra touch to this already irresistible vegetable dish.

Baked Cauliflower: Tasty Variations Await
Feel free to put your own spin on this baked cauliflower recipe and discover exciting new flavors that will elevate your dish!
-
Spicy Kick: Add chili flakes or cayenne pepper for an extra layer of heat. It’s a wonderful way to awaken your taste buds!
-
Fresh Herbs: Toss in fresh parsley or rosemary after roasting for a burst of flavor. These herbs will enhance freshness and vibrancy!
-
Crunchy Layer: Incorporate panko breadcrumbs before placing the cauliflower in the oven. This addition gives an irresistible crunchy texture.
-
Asian Twist: Drizzle with soy sauce and sprinkle sesame seeds post-roasting for a delightful umami taste. This twist adds a harmonious flavor profile and visual appeal.
-
Curry Flavor: Toss in some curry powder with the seasonings before roasting. This brings an exotic flair that’ll captivate your taste buds!
-
Zesty Lemon: Squeeze fresh lemon juice over the cauliflower right before serving. It brightens the dish, balancing the richness beautifully.
-
Cheesy Delight: Swap conventional Parmesan with nutritional yeast for a cheesy, dairy-free option, perfect for those with dietary restrictions.
Try these adaptations to make your baked cauliflower even more delightful! And for more scrumptious ideas, pair it with a comforting side like Baked Italian Sub or enjoy it alongside crispy Oven Baked Sweet potato fries for a flavorful spread!
Make Ahead Options
These Crispy Roasted Cauliflower florets are perfect for meal prep enthusiasts! You can prepare the cauliflower by cutting it into florets and tossing them with olive oil and seasonings up to 24 hours in advance. Simply store the seasoned cauliflower in an airtight container in the refrigerator to maintain their freshness, ensuring they stay flavorful. When you’re ready to enjoy your crispy baked cauliflower, just spread the florets on a baking sheet and roast them according to the original instructions—this will enhance their texture and flavor! By prepping ahead, you save precious time during busy weeknights while still serving a delicious, crowd-pleasing side dish.
Expert Tips for Baked Cauliflower
- Dry Thoroughly: Ensure the cauliflower is completely dry before oiling to achieve maximum crispiness during baking.
- Space It Out: Avoid overcrowding the baking sheet. This helps each floret roast instead of steam, preserving that crunchy texture.
- Flip for Evenness: Don’t forget to flip the cauliflower halfway through the cooking time for even browning all around.
- Adjust Seasonings: Taste your seasoned cauliflower before roasting; adjust salt and spices to suit your family’s preferences—everyone will enjoy this baked cauliflower.
- Experiment with Toppings: Try adding different herbs or spices like Italian seasoning or chili flakes for a unique twist on flavor!
Storage Tips for Baked Cauliflower
Fridge: Store leftovers in an airtight container in the refrigerator for up to 3 days to keep your baked cauliflower fresh and flavorful.
Freezer: For longer storage, freeze the cooled cauliflower in a freezer-safe container for up to 2 months. When ready to enjoy, thaw it overnight in the fridge.
Reheating: Reheat in the oven at 350°F (175°C) for 10-15 minutes to regain that crispy texture or use an air fryer at 375°F (190°C) for about 5-8 minutes.
Serving Ideas: Serve reheated baked cauliflower as a side dish, in salads, or as a topping for grain bowls. Enjoy the versatility!
What to Serve with Crispy Roasted Cauliflower
Transform your mealtime with delightful pairings that enhance the flavors and textures of your baked cauliflower.
-
Creamy Mashed Potatoes: These buttery potatoes provide a rich contrast to the crisp cauliflower while delivering comfort in every bite.
-
Grilled Chicken: Juicy, seasoned chicken complements the savory notes of roasted cauliflower, creating a protein-packed meal loved by all.
-
Quinoa Salad: A refreshing quinoa salad, dotted with vegetables and a light vinaigrette, adds bright flavors and healthy grains to your plate.
-
Chocolate Mousse: End your meal on a sweet note! The velvety richness of chocolate mousse is a delightful dessert that balances the savory elements beautifully.
-
Garlic Bread: Crunchy garlic bread provides a wonderful texture contrast and is perfect for scooping up any leftover cauliflower morsels.
-
Chilled White Wine: A crisp, chilled white wine—like Sauvignon Blanc—pairs elegantly, enhancing your roasted vegetables while offering a refreshing sip.
-
Citrus Avocado Salad: The creamy avocado and zesty citrus bring brightness to your meal, making for a vibrant side that plays well with the flavors of the baked cauliflower.
Each of these pairings will elevate your dining experience, making your crispy roasted cauliflower the star of an unforgettable meal!
Crispy Roasted Cauliflower Recipe FAQs
How do I select the best cauliflower for this recipe?
Absolutely! When choosing cauliflower, look for heads that are firm, with tightly packed florets and bright white color. Avoid any with dark spots or soft areas, as these can indicate spoilage. Fresh heads will provide the best texture and flavor for your Crispy Roasted Cauliflower.
What’s the best way to store leftover baked cauliflower?
You can store your leftover baked cauliflower in an airtight container in the refrigerator for up to 3 days. To maintain its crispy texture, reheat in the oven at 350°F (175°C) for about 10-15 minutes or use an air fryer at 375°F (190°C) for 5-8 minutes for a delightful crunch on your second serving!
Can I freeze cooked cauliflower?
Yes, you can! After allowing it to cool completely, place the crispy roasted cauliflower in a freezer-safe container. It will keep well for up to 2 months. When you’re ready to enjoy it again, thaw overnight in the fridge, then reheat as mentioned for best results.
What should I do if my cauliflower isn’t crispy after baking?
Very! If your cauliflower didn’t turn out crispy, there are a few troubleshooting steps you can follow. Ensure the florets were well-coated with oil and spaced out properly on the baking sheet—overcrowding can lead to steaming. Next time, try preheating the oven longer, and if using fresh garlic, be cautious about adding it too soon as it can burn and create moisture.
Is this recipe suitable for my dietary needs?
Absolutely! This Crispy Roasted Cauliflower is not only keto-friendly and low-carb, but it’s also vegetarian. However, if you or your loved ones have specific allergies, be mindful of the optional Parmesan cheese or explore alternatives like nutritional yeast for a dairy-free option. Always check for any additional allergens in seasonings used.
Can I customize the seasonings or spices used?
The more the merrier! This recipe is incredibly versatile. You can definitely experiment by adding spices like chili flakes for heat or fresh herbs like thyme or rosemary after roasting for an extra flavor boost. The garlic and paprika combo can also be swapped out based on your taste preferences—get creative and make it your own!
Baked Cauliflower: Crispy and Irresistibly Flavorful Delight
Ingredients
Equipment
Method
- Preheat the oven to 425°F (220°C).
- Cut the cauliflower into even florets and toss with olive oil, salt, black pepper, garlic powder, and paprika.
- Line a baking sheet with parchment paper and spread the seasoned cauliflower in a single layer.
- Roast the cauliflower for 25–30 minutes, flipping halfway through.
- Sprinkle grated Parmesan cheese over the cauliflower during the last 5 minutes of roasting if desired.
- Serve hot, optionally with a dip like ranch or garlic aioli.
Leave a Reply