
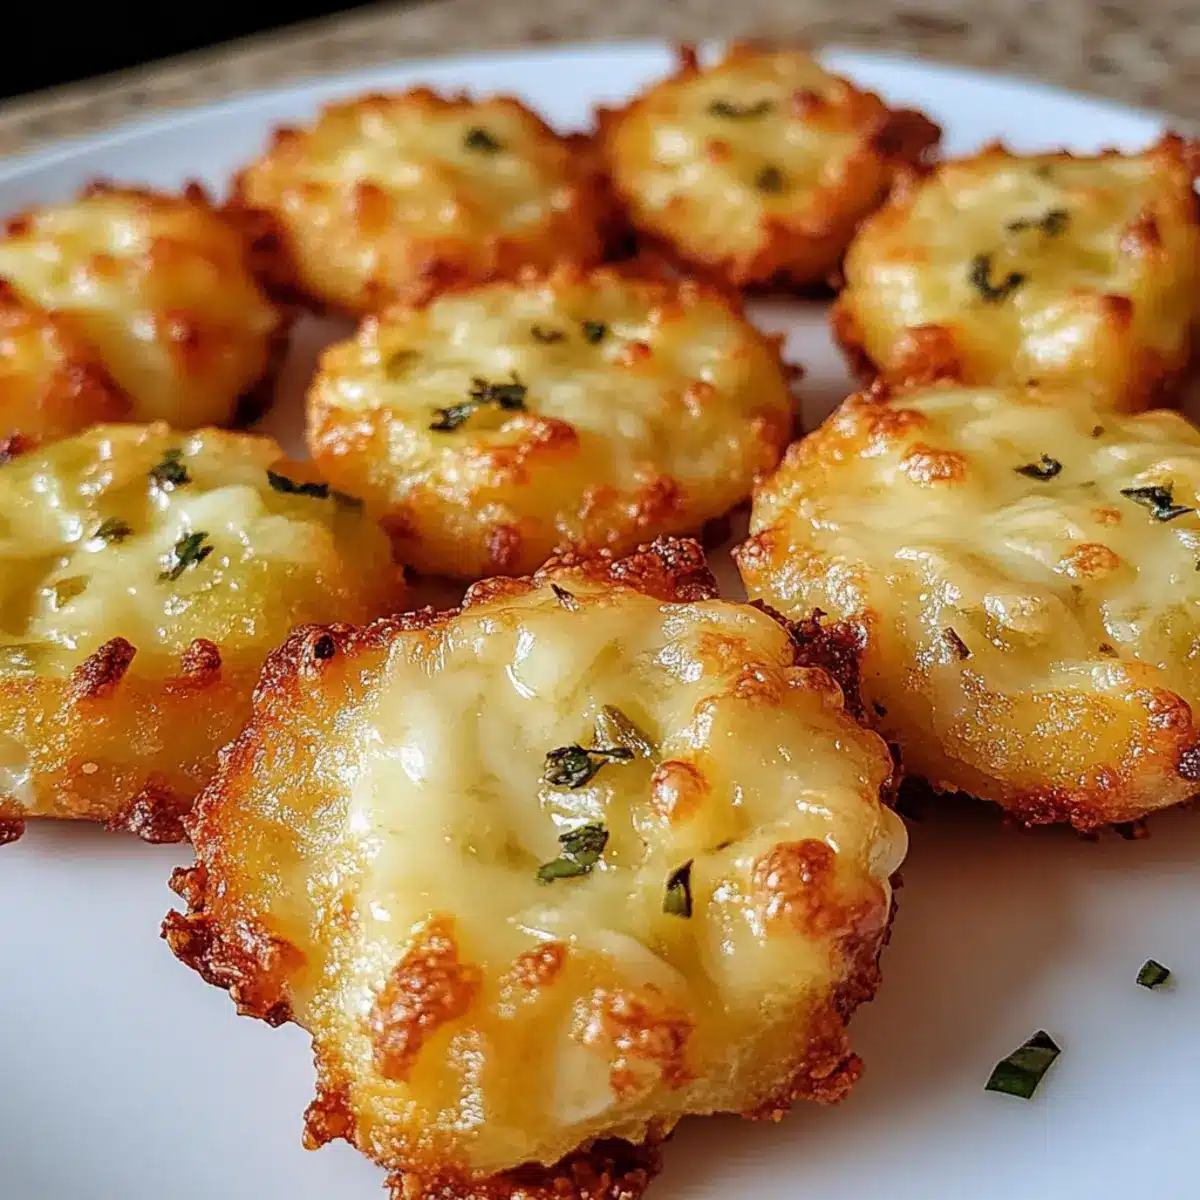
Walking through the vibrant aisles of my local market, a jar of pickles caught my eye, and inspiration struck! That zesty crunch paired with melty cheese? The perfect combination! With these Crispy Pickle Cheese Bites, you’ll have a fun and effortless snack ready in just 20 minutes. This recipe is fantastic for both unexpected guests and cozy nights at home, delivering a satisfying crunch that pleases cheese lovers and pickle fans alike. Plus, there are plenty of options to customize your bites with different types of cheese or pickles, making it an incredibly versatile treat. Whether you choose to make it gluten-free or stick to the classic recipe, you’re in for a delightful surprise. So, are you ready to dive into these cheesy, crunchy bites of joy?
Why are Crispy Pickle Cheese Bites a must-try?
Irresistible Combination: The fusion of gooey cheese and crispy pickles creates a flavor explosion that’s both satisfying and unique.
Quick & Easy: With just 20 minutes needed from prep to plate, these bites are a lifesaver for busy days or unexpected guests.
Customizable Delight: Experiment with different cheeses and pickles for flavors that suit your palate—try Cream Cheese Hashbrown or Cottage Cheese Wraps as inspirations for further creativity in your pairing.
Gluten-Free Friendly: Tailored to meet gluten-free needs, making them an inclusive snack for everyone to enjoy.
Perfect Finger Food: Ideal for gatherings, these bites are a crowd-pleasing treat that will have everyone coming back for more!
Crispy Pickle Cheese Bites Ingredients
-
For the Cheese Mixture
• Shredded Cheddar Cheese – A rich, tangy cheese that forms the foundation of the bites; swap it for Monterey Jack or Pepper Jack for an extra kick.
• Shredded Mozzarella Cheese – Adds a beautiful gooey texture that complements the cheddar; Provolone or Gouda can also add unique flavors when substituted. -
For the Pickle Base
• Finely Chopped Dill Pickles – Delivers the essential tanginess and crunch; try bread-and-butter pickles or pickled jalapeños for a spicy twist. -
For the Flavor Boost
• Garlic Powder – Enhances the overall flavor with a subtle garlic essence; optional spices like smoked paprika or cayenne pepper can bring warmth to the mix. -
For Extra Crunch
• Breadcrumbs (optional) – Creates an irresistibly crispy texture; don’t forget gluten-free breadcrumbs if you’re catering to dietary needs! -
For Baking
• Nonstick Spray or Parchment Paper – Essential for preventing sticking and ensuring easy removal of your glorious crispy pickle cheese bites after baking.
Step‑by‑Step Instructions for Crispy Pickle Cheese Bites
Step 1: Preheat the Oven
Start by preheating your oven to 375°F (190°C). While the oven warms up, grab a baking sheet and either spray it with nonstick cooking spray or line it with parchment paper. This will ensure our crispy pickle cheese bites don’t stick and are easy to remove after baking.
Step 2: Mix the Ingredients
In a spacious mixing bowl, combine the shredded cheddar cheese, mozzarella cheese, finely chopped dill pickles, and garlic powder. If you’re using breadcrumbs, add them to the mixture as well. Stir the ingredients together thoroughly until all components are well incorporated and you have a cohesive mixture that holds together beautifully.
Step 3: Shape the Bites
Now it’s time to form our cheesy snacks! Using your hands, scoop small portions of the cheese mixture and shape them into bite-sized balls. Place each formed bite onto the prepared baking sheet, ensuring they are evenly spaced to allow for even cooking.
Step 4: Bake to Perfection
Place the baking sheet in your preheated oven and bake the bites for about 10 minutes. Keep an eye on them, and when they turn golden brown and crispy, it’s a sign they’re ready. The combination of melted cheese and crunchy edges will be irresistible!
Step 5: Cool Before Serving
Once the crispy pickle cheese bites are done baking, carefully remove the baking sheet from the oven. Let the bites cool for a few minutes to avoid burning your fingers on the hot melted cheese. This cooling time will help them set the perfect texture for serving.
Variations of Crispy Pickle Cheese Bites
Customize your crispy pickle cheese bites to tickle your taste buds and add a personal twist to this beloved recipe!
-
Spicy Kick: Substitute cheddar with Pepper Jack for a flavorful heat; it brings an exciting zing that pairs perfectly with the pickles.
-
Creamy Delight: Use Cream Cheese for a richer texture, making the bites creamy and indulgent—perfect for those who love extra creaminess.
-
Bread-and-Butter Twist: Swap out regular dill pickles for bread-and-butter pickles for a touch of sweetness and tanginess that adds a delightful contrast.
-
Herb-Infused: Add fresh herbs like dill or chives into the cheese mixture for a burst of fresh flavor. These herbs will brighten up each bite beautifully!
-
Bacon Bits: Mix in cooked, chopped bacon for a savory and smoky twist that transforms them into a true indulgence. Every bite becomes a meaty snack!
-
Gluten-Free Option: Substitute regular breadcrumbs with gluten-free breadcrumbs to make this recipe suitable for everyone; it’s an effortless swap that maintains the crunch.
-
Veggie Boost: Combine the cheese mixture with finely chopped bell peppers or jalapeños for added crunch and flavor—delivering a colorful pop in every bite!
-
Herbed Cheese: Experiment with Gouda for a creamier flavor that pairs well with pickles; this sweet and nutty cheese offers a unique twist.
With these variations, your crispy pickle cheese bites can be as diverse and exciting as the gatherings you serve them at! Try pairing them with a zesty dipping sauce or enjoy them alongside treats like Cottage Cheese Chips for a delightful platter everyone will love.
Expert Tips for Crispy Pickle Cheese Bites
-
Chill the Mixture: If your cheese mixture feels too sticky, pop it in the fridge for about 10 minutes before shaping. This helps avoid messy hands!
-
Golden Perfection: Keep a close watch during baking—10 minutes should yield golden brown bites; don’t let them burn. They need just the right crunch for perfect crispy pickle cheese bites.
-
Experiment with Cheese: Don’t hesitate to swap in your favorite cheeses. Mixing cheddar with spicy Pepper Jack adds an exciting kick to the flavor profile!
-
Serve with Dips: Elevate your bites by serving them with delicious dips, like creamy ranch or zesty sriracha mayo, for a flavorful experience.
-
Storage Secrets: For crunch that lasts, store leftover bites in an airtight container, but enjoy them fresh for the best texture!
How to Store and Freeze Crispy Pickle Cheese Bites
Fridge: Store leftover crispy pickle cheese bites in an airtight container for up to 2 days. They are best enjoyed fresh for maximum crunchiness, but this ensures they stay tasty!
Freezer: For make-ahead preparation, shape the bites and freeze them on a tray before transferring to a freezer bag. They can be baked straight from frozen by adding 2-3 minutes to the cooking time.
Reheating: To restore the delightful crispiness, reheat the bites in the oven at 350°F for 5-7 minutes instead of using a microwave. This keeps them golden and delicious!
Wrapping: If you’re storing bites for later, wrap them tightly before freezing. This prevents freezer burn and keeps those delicious flavors intact!
Make Ahead Options
These delicious Crispy Pickle Cheese Bites are perfect for meal prep! You can prepare the cheese mixture up to 24 hours in advance by combining the shredded cheeses, chopped pickles, and seasonings in a bowl. Once mixed, simply cover and refrigerate. For an even more convenient option, shape the bites and freeze them on a baking sheet before transferring to a freezer bag. This way, you can pull out as many as you need later, baking them directly from frozen by adding an extra 2-3 minutes to the cook time. Just remember to let them cool for a few minutes after baking to maintain that perfect crispiness and you’ll have delightful bites ready with minimal effort!
What to Serve with Crispy Pickle Cheese Bites
These delectable bites are perfect for crafting a complete meal that will delight your taste buds and satisfy your cravings.
- Creamy Ranch Dip: A cool, herby ranch dip accentuates the refreshing tang of pickles while balancing the cheesy richness, creating a delightful contrast.
- Spicy Sriracha Mayo: Add a touch of heat with sriracha mayo, which complements the crispy bites and ignites your palate with every dip.
- Fresh Veggie Platter: Crisp cucumbers, carrots, and bell peppers provide a refreshing crunch that pairs well with the rich flavors, ensuring a balanced plate.
- Mini Sliders: Serve these cheesy bites alongside juicy sliders. The combination of textures makes for a fun, casual dining experience that everyone will love.
- Sparkling Lemonade: A zesty, bubbly drink enhances the snack experience, cutting through the richness and providing a refreshing sip between bites.
- Chocolate Chip Cookies: End on a sweet note with warm cookies; the gooey chocolate will create a delightful balance after that zingy pickle flavor.
- Pickle Slices: For the quintessential pickle lover, additional sliced pickles on the side will amplify the delightful pickle flavor and offer a zesty crunch!
- Cheesy Nachos: Pair with cheesy nachos for a fun and indulgent snack platter that’s perfect for game day gatherings or casual hangouts.
- Light Salad: A simple green salad with a tangy vinaigrette will provide a refreshing element against the crispy bites’ richness while adding color to your meal.
- Fizzy Mocktail: A fruit-infused sparkling water adds a festive touch, making your snack time feel even more special while lightening the overall richness.
Crispy Pickle Cheese Bites Recipe FAQs
How do I choose the right pickles for the recipe?
Absolutely! The best choice of pickles depends on your flavor preference. For a classic taste, finely chopped dill pickles are perfect. If you’re looking for something sweeter, try bread-and-butter pickles, or for a bit of heat, pickled jalapeños will do wonders. Make sure the pickles are firm and without dark spots to ensure crispness in your bites!
How do I store leftover Crispy Pickle Cheese Bites?
Store any leftovers in an airtight container in the refrigerator for up to 2 days. For crispy bites, it’s best to consume them fresh, but if you need to save some, this method will keep them tasty. Just remember—flavor and crunch are at their peak when enjoyed right after baking!
Can I freeze the Crispy Pickle Cheese Bites? How?
Definitely! To freeze, shape the bites and place them on a baking tray in a single layer. Freeze for about 1-2 hours until firm, then transfer them to a freezer-safe bag. These can be stored in the freezer for up to 3 months. When ready to enjoy, bake them directly from frozen, adding an extra 2-3 minutes to the cook time for that lovely gooey texture.
What if my cheese mixture is too sticky to handle?
No worries! If you find your cheese mixture is sticky, simply chill it in the refrigerator for about 10 minutes. This will firm it up and make it easier to shape into bites without creating a mess.
Are there any allergy considerations with these ingredients?
Yes! If you’re making these bites for someone with dietary restrictions, make sure to check for cheese allergies, gluten sensitivity, or lactose intolerance. Swap regular breadcrumbs for gluten-free ones if needed, or experiment with vegan cheese alternatives to cater to different diets. The more the merrier when it comes to ensuring everyone can enjoy them!
What’s the best way to reheat Crispy Pickle Cheese Bites?
For best results, reheat the bites in the oven at 350°F for about 5-7 minutes. This method will enhance crispiness and restore that delightful texture that we all love. Avoid using the microwave, as that can make them soggy and less enjoyable.
Crispy Pickle Cheese Bites: Irresistibly Cheesy & Crunchy Delight
Ingredients
Equipment
Method
- Preheat your oven to 375°F (190°C). Prepare a baking sheet with nonstick spray or line it with parchment paper.
- In a mixing bowl, combine cheddar cheese, mozzarella cheese, dill pickles, and garlic powder. Stir until well mixed.
- Shape the mixture into bite-sized balls and place them on the prepared baking sheet, spaced evenly.
- Bake for about 10 minutes until golden brown and crispy.
- Let the bites cool for a few minutes before serving.
Leave a Reply