
As I rummaged through my pantry, I stumbled upon a bag of dried hominy, forgotten but full of potential. Instead of tossing it aside, an idea sparked—what if I could turn these simple kernels into a crunchy snack I could feel good about? That’s when I decided to whip up a batch of Healthier Homemade Corn Nuts! These baked corn nuts offer all the satisfying crunch and addictive seasoning of the traditional variety, but with a boost of health and flavor. They’re gluten-free, vegan, and incredibly easy to make, ensuring you have a delightful snack ready for any occasion. Perfect for movie nights or as a party platter centerpiece, these homemade corn nuts are a delicious alternative to store-bought snacks. Curious about how to transform dried hominy into this irresistible treat? Let’s dive in!

Why Try Homemade Corn Nuts?
Healthier Alternative: Break free from greasy snacks with this guilt-free version that doesn’t compromise on crunch or flavor.
Crowd-Pleasing: Ideal for gatherings, they elevate any party platter or movie night—everyone will be reaching for these!
Easy Prep: With just a few simple steps, you can whip up a batch in no time, making it a go-to recipe for busy days.
Flavorful Fun: Customizable with spices like chili powder or nutritional yeast, these corn nuts are consistently delightful and exciting.
Vegan & Gluten-Free: Perfect for diverse dietary preferences, they cater to everyone without sacrificing taste, just like my Street Corn Chicken or Street Corn Salad.
Turn your pantry leftovers into a crunchy sensation that will have you craving more!
Homemade Corn Nuts Ingredients
For the Corn Nuts
• Dried Hominy – This is your main ingredient; soaking transforms it into the crunchy delight known as homemade corn nuts!
• Peanut Oil – Coats the hominy, helping spices stick and enhancing that satisfying crunch; any high smoke point oil works here!
• Salt (fine ground) – Essential for flavor; remember, fine ground ensures an even coating for maximum taste.
• Garlic Powder – Brings in a savory kick; you can substitute it with onion powder for a different flavor twist.
• Paprika – Adds a mild smokiness and vibrant color to your snack; if you want heat, try cayenne instead!
• Onion Powder – Offers an extra layer of flavor; optional for those who enjoy a bit more onion taste.
Get ready to enjoy these homemade corn nuts as a fun and flavorful snack that’s sure to impress!
Step‑by‑Step Instructions for Homemade Corn Nuts
Step 1: Soak the Hominy
Begin by adding the dried hominy to a large bowl filled with water. Ensure the water level is 1-2 inches above the hominy, allowing it to absorb moisture. Let this sit for 6-10 hours, or preferably overnight, until the kernels have plumped up. This soaking step is crucial as it transforms the hard kernels into a crunchy base for your homemade corn nuts.
Step 2: Drain and Dry
Once the hominy has soaked, drain it in a colander and gently pat dry with paper towels. This step is vital for achieving that coveted crunch; the drier the hominy, the crispier your corn nuts will be. Take your time to ensure they’re well dried, as any remaining moisture could affect the final texture of your snack.
Step 3: Preheat the Oven
Preheat your oven to 375°F if using convection mode, or 400°F for regular baking. This temperature allows the hominy to bake thoroughly, giving your homemade corn nuts a beautiful golden color while developing their crunchiness. A properly preheated oven sets the stage for perfectly baked corn nuts that will be irresistible.
Step 4: Prepare the Seasoning Mix
In a small jar, combine fine ground salt with garlic powder, paprika, and onion powder. Shake the jar well to mix the spices evenly. This homemade seasoning mix will enhance the flavor profile of your corn nuts, ensuring each bite is full of savory goodness. Choose your spice amounts based on your personal taste preferences!
Step 5: Coat the Hominy
Drizzle peanut oil over the dried hominy in a large mixing bowl, tossing gently to ensure even coverage. Gradually sprinkle your prepared seasoning mix over the hominy, stirring thoroughly to coat every kernel. The oil helps the spices adhere, promising a flavor-packed, crunchy experience in your freshly baked homemade corn nuts.
Step 6: Bake to Perfection
Spread the seasoned hominy evenly on a baking sheet in a single layer to allow for optimal air circulation. Bake for 20 minutes, then remove the tray from the oven and stir the hominy to ensure even browning. Return to the oven and bake for an additional 20-25 minutes, checking for a golden, crunchy finish every 5 minutes to avoid burning.
Step 7: Cool and Enjoy
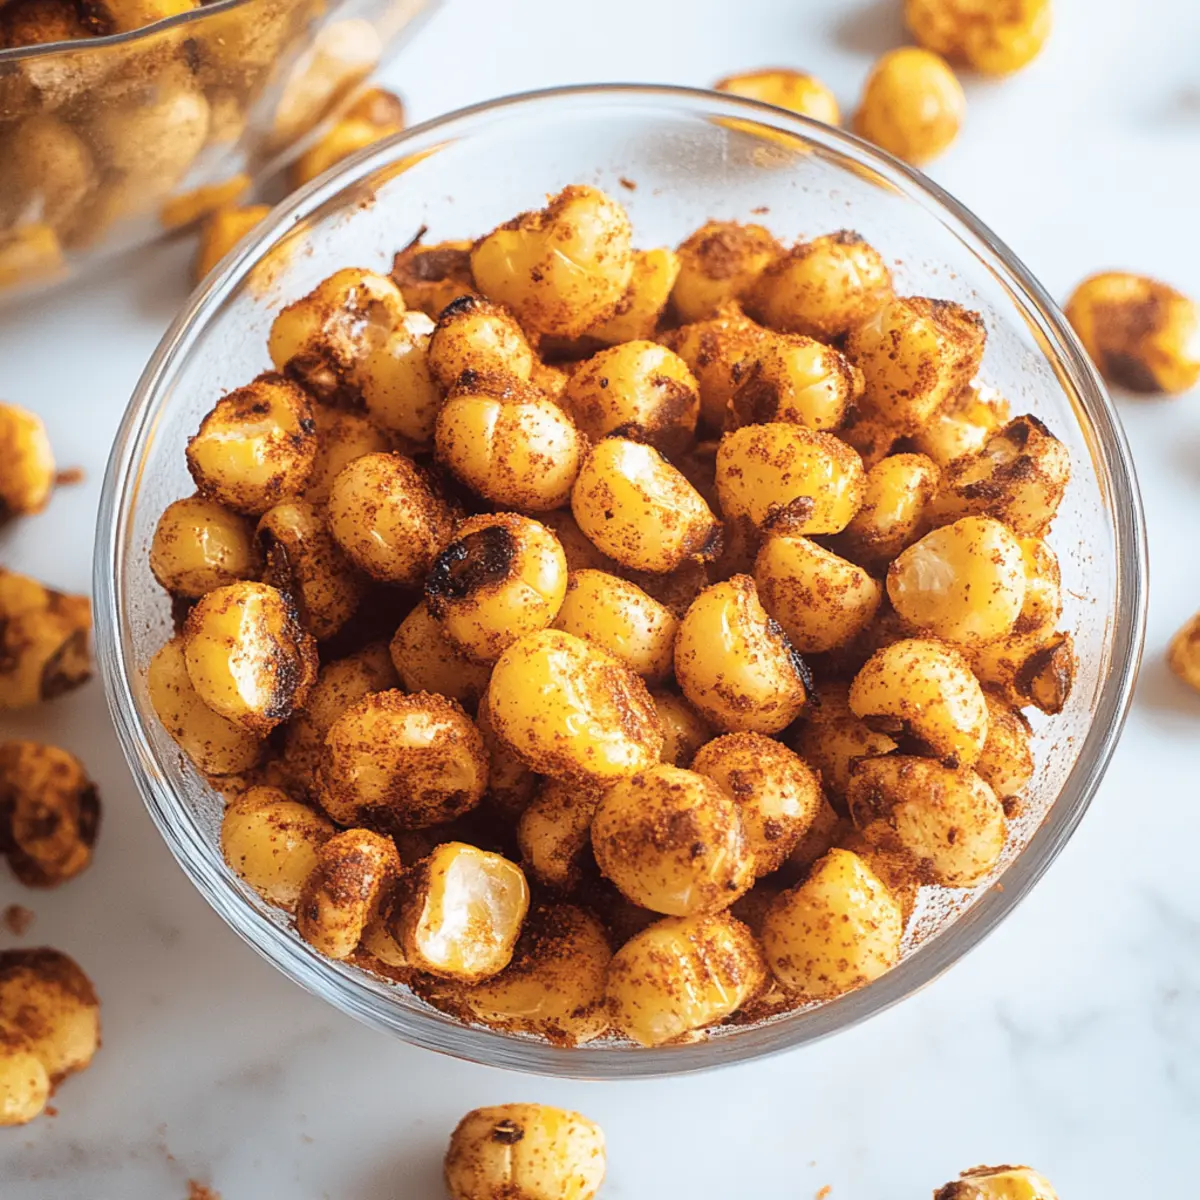
Once your homemade corn nuts are beautifully golden and crisp, remove them from the oven and allow them to cool on the baking sheet for at least 15 minutes. This cooling period is essential, as it enhances the crunchiness. After cooling, transfer them to an airtight container, and enjoy your delicious, healthier snack!
Make Ahead Options
These Healthier Homemade Corn Nuts are perfect for meal prep, allowing you to enjoy a satisfying snack without the hassle on busy days! You can soak the dried hominy up to 24 hours in advance; simply drain and dry them well before seasoning. The coated hominy can be refrigerated for up to 3 days before baking, ensuring you maintain that irresistible crunch; just be sure to pat them dry again if any moisture gathers. When you’re ready to enjoy, bake them as usual, stirring the mixture halfway through to ensure even crispiness. This way, you can have your crunchy snack ready with minimal effort, just like a quick trip to the store!
Expert Tips for Homemade Corn Nuts
• Perfect Drying: Ensure your hominy is completely dried after soaking; any moisture left will lead to chewy rather than crunchy homemade corn nuts.
• Mind the Oven: Keep an eye on the baking process in the final minutes to prevent burning. A small adjustment in time can make a big difference in texture!
• Airtight Storage: To maintain freshness, store your popcorn in an airtight container. They can stay crispy for up to 2-3 weeks.
• Season to Taste: Don’t hesitate to experiment with spices! Adjust the seasoning levels to find your ideal flavor balance, enhancing the experience of your homemade corn nuts.
• Even Spreading: Spread the hominy in a single layer on the baking sheet for best results. This ensures even baking and maximizes crunchiness throughout.
How to Store and Freeze Homemade Corn Nuts
Fridge: Store your homemade corn nuts in an airtight container in the fridge for up to 1 week to keep them fresh and crispy.
Freezer: For longer storage, freeze homemade corn nuts in a freezer bag for up to 3 months. Thaw them in the fridge and re-crisp in the oven before serving.
Airtight Container: Always use an airtight container to prevent moisture from softening your corn nuts and affecting their delightful crunch.
Reheating: To restore that satisfying crunch, place leftover corn nuts in a preheated oven at 350°F for about 5-10 minutes. Enjoy a snack that’s as good as fresh!
Homemade Corn Nuts: Creative Variations
Feel free to explore these delightful twists and substitutions to personalize your corn nut experience, making them uniquely yours!
-
Spicy Kick: Add cayenne pepper for an extra layer of heat; you’ll enjoy an exciting burst of flavor in every crunchy bite.
-
Cheesy Flavor: Substitute nutritional yeast for a cheesy twist—this is a fantastic option for a dairy-free, flavor-packed alternative.
-
Herb-Infused: Experiment with dried herbs like rosemary or thyme to add a fragrant, earthy undertone that complements the corn perfectly.
-
Smoky Delight: Use smoked paprika instead of regular for a deeper, richer flavor that will take these corn nuts to the next level.
-
Savory Ranch: Toss in a packet of ranch dressing mix during seasoning for a classic flavor profile that everyone loves. It’s like bringing the ranch to your snack!
-
Nuts & Seeds Boost: Mix in a handful of roasted sunflower seeds or chopped nuts for added texture and nutritional benefits, transforming your corn nuts into a trail mix delight.
-
Sweeter Variation: Drizzle with a touch of maple syrup or sprinkle with cinnamon for a sweet twist; this unexpected combo will surprise and delight!
Don’t forget to serve your delicious homemade corn nuts alongside fresh guacamole, or enjoy them with a refreshing drink at your next gathering. Those looking for more scrumptious recipes might enjoy my Homemade Cheeseburger Pie or some tasty Street Corn Salad. Happy snacking!
What to Serve with Healthier Homemade Corn Nuts
Savoring crispy homemade corn nuts opens up a world of delightful pairings perfect for any gathering or casual snack time.
- Creamy Guacamole: Enhances the crunch with its rich, creamy texture; a perfect contrast that lifts the flavors of the corn nuts.
- Spicy Salsa: Add some zest with a fresh salsa; the acidity complements the savory spices while providing a refreshing burst.
- Zesty Hummus: Creamy and flavorful, hummus offers a nutritious dip that balances the crunchiness of the corn nuts beautifully.
- Tangy Yogurt Dip: A cooling yogurt dip with herbs adds a refreshing touch, making it an inviting accompaniment to the seasoned corn nuts.
- Cheese Platter: Elevate your snack experience by including a variety of cheeses. Each bite with a corn nut creates a delightful flavor explosion.
- Fresh Veggie Sticks: Carrot, cucumber, or bell pepper sticks provide a refreshing crunchy element that pairs well with the seasoned corn.
- Crisp Wine: Try a light, crisp white wine or a bubbly drink that cleanses the palate, enhancing the snack’s savory profile.
- Citrus Spritzer: A refreshing beverage like a citrus spritzer will complement the salty nuances, making every bite more enjoyable.
- Chocolate Squares: For a sweet finish, serve alongside dark chocolate squares which create a delightful contrast with the savory corn nuts.

Homemade Corn Nuts Recipe FAQs
How do I select the best dried hominy for this recipe?
Absolutely! Look for dried hominy that is uniform in size and free from dark spots or blemishes. The kernels should feel hard and not have any moisture when you touch them. This ensures that you’ll achieve that perfect crunch once baked. Avoid canned hominy, as it can lead to a chewy texture instead of the desired crunch.
How should I store my homemade corn nuts?
To keep your corn nuts fresh, store them in an airtight container at room temperature in a cool, dry place. They will stay crispy and delicious for about 2-3 weeks. I often use glass jars for better preservation, as they can help to keep moisture at bay.
Can I freeze homemade corn nuts?
Yes, you can freeze your homemade corn nuts! Just place them in a freezer-safe bag or airtight container; they can be stored for up to 3 months. When you’re ready to enjoy them, simply thaw them in the fridge overnight and re-crisp in the oven at 350°F for about 5-10 minutes before serving.
What can I do if my corn nuts aren’t crunchy enough after baking?
Very! If your corn nuts aren’t as crunchy as you’d like after baking, it’s usually due to excess moisture. Make sure to dry the soaked hominy thoroughly before coating with oil and seasonings. If they’re already baked, you can return them to the oven for an additional 5-10 minutes at a lower temperature (around 300°F), checking frequently to prevent burning.
Are there any dietary considerations for homemade corn nuts?
Absolutely! This recipe is vegan and gluten-free, making it suitable for many diets. However, be cautious if you have nut allergies; peanut oil can be substituted for avocado or vegetable oil to accommodate those sensitivities. Always check the specific ingredients you use to avoid any allergens.
How do I make my homemade corn nuts taste even more flavorful?
For a punch of flavor, feel free to experiment with different spices! After coating the hominy with oil, consider adding nutritional yeast for a cheesy flavor, or try tossing in ranch seasoning, chili powder, or even a dash of cayenne for some heat. Mix and match to create your ideal seasoning blend for the most delicious homemade corn nuts!

Homemade Corn Nuts: A Crunchy Guilt-Free Snack Adventure
Ingredients
Equipment
Method
- Soak the dried hominy in a large bowl of water, ensuring it's 1-2 inches above the hominy, for 6-10 hours or overnight.
- Drain and pat dry the hominy using paper towels to achieve proper crunch.
- Preheat the oven to 375°F for convection or 400°F for standard baking.
- Combine salt, garlic powder, paprika, and onion powder in a small jar and shake well.
- Drizzle peanut oil over the dried hominy and toss to coat evenly with the seasoning mix.
- Spread the seasoned hominy on a baking sheet in a single layer and bake for 20 minutes, stir, then bake for an additional 20-25 minutes, checking every 5 minutes.
- Cool on the baking sheet for at least 15 minutes before transferring to an airtight container.
Leave a Reply